You grab your carbine, load a mag, and step to the line. No warm-up. No sighters. No excuses. Five rounds tell you exactly where you stand today, not where you were last month when you were warmed up and feeling good. That's the point of a cold-start drill. It strips away the comfort of repetition and shows you what your actual baseline looks like.
May contain affiliate links.

Most shooters never test themselves cold. They show up to the range, burn through a mag or two getting "warmed up," and then start evaluating their performance. That's backwards. Your real skill level is the one that shows up on demand, before your body and brain have settled into a groove. If you carry a rifle for home defense, competition, or duty, the moment you need it won't come after twenty minutes of live fire. It'll come cold. This drill is built around that reality.
What you'll walk away with is a simple, repeatable five-round protocol that diagnoses your readiness across three dimensions: mechanical accuracy, shooting position consistency, and time pressure management. Five rounds. Under two minutes of shooting. A full diagnostic you can run at the start of every range session for the rest of your life.
Why cold matters more than warm
There's a well-documented phenomenon in precision rifle circles where shooters track their cold bore shot separately from the rest of their session. Long-range shooters have been logging cold bore impacts for decades because they know that first round tells a different story than round fifty. The barrel is at ambient temperature. The shooter hasn't settled into a rhythm. There's no recent feedback loop telling the brain where the last shot went. Everything about that first shot is honest.
The same principle applies at carbine distances, just compressed. At 25 to 100 yards with a 1-4x or red dot, you're not chasing cold bore shift in the barrel. You're chasing cold bore shift in the shooter. Your natural point of aim hasn't been refined by recent reps. Your cheek weld might be slightly off. Your trigger press might carry tension you don't notice after ten rounds. The cold start exposes all of it.

Think about the last time you ran a timed drill at the range. Were you already warmed up? Had you already fired a magazine or two? Most people nod yes. That means every data point you've collected about your own performance is slightly inflated. You're measuring your warmed-up self and calling it your skill level. A cold-start drill corrects that. It gives you a number that reflects what you can actually do on demand.
The practical applications are obvious. Home defense scenarios don't come with a warm-up period. A competition stage doesn't care that you haven't shot in two weeks. If you hunt, that first shot on game is the only one that matters in most situations. Cold performance is real performance. Everything else is practice.
The drill: five rounds, three targets, one standard
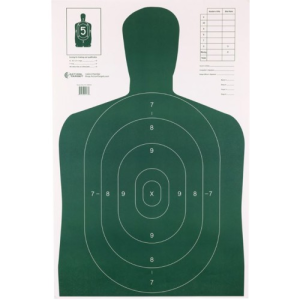
Here's the setup. You need three targets at three distances. The specific distances can flex based on your range, but the version outlined here uses 10, 25, and 50 yards. Each target is a standard 8-inch paper plate or an 8-inch circle drawn on a silhouette. Nothing fancy. If you're running steel, an 8-inch plate works perfectly.

The course of fire breaks down like this:
Round 1: Standing, unsupported, 10 yards. One round on the first target.
Rounds 2-3: Standing to kneeling transition, 25 yards. Two rounds on the second target from a kneeling position.

Rounds 4-5: Kneeling to prone transition, 50 yards. Two rounds on the third target from prone.
Total round count: five. Par time for the entire sequence: 30 seconds. That includes all position changes and transitions between targets. The timer starts on the beep, and you fire your last round before the 30-second mark. We realize that many experienced shooters can do this faster, but we recommend the 30 seconds to make sure that all transitions and shots are performed safely.
The passing standard: all five rounds inside the 8-inch circle. That's it. Five for five, inside the zone, under time. Anything less is a diagnostic, not a failure. You're not trying to pass or fail. You're trying to see where the breakdown happens.
Range notes
Run this as the very first thing you do at the range. Not after checking your zero. Not after a few warm-up rounds. Pull the rifle from the case, load five rounds, and go. If you're worried about zero, good. That anxiety is part of the test. If you confirmed zero last session and haven't dropped the rifle, it's fine. Learning to trust your equipment under pressure is part of the drill.

Use a shot timer if you have one. If you don't, use a phone app. The par time matters. Without time pressure, this drill is just slow fire at easy distances, and slow fire at easy distances doesn't diagnose anything useful.
Log your results. Every time. Write down which rounds hit, which missed, and where the misses went. Over ten sessions, patterns emerge that single sessions can't reveal.
Breaking down each stage
Stage one: the standing shot at 10 yards
This is your gimme. Or at least it should be. Ten yards, standing, unsupported, 8-inch target. If you miss this shot, the drill just told you something important before you even got to the hard part.
May contain affiliate links.
The standing shot at close range tests your mount, your cheek weld, and your ability to find the dot or reticle quickly. Most misses here come from rushing. The timer just beeped, adrenaline is up slightly because you know you're being measured, and you yank the trigger before the sight picture is confirmed. Sound familiar? That's the diagnostic working.

The fix for a miss at this stage is almost always in the mount. A consistent, repeatable rifle mount that puts your eye behind the optic in the same spot every time is the foundation everything else builds on. If you're hunting for the dot, you're already behind. Dry fire fixes this. Ten reps a day of mounting the rifle to your shoulder and confirming sight picture will do more for your cold first shot than a hundred live rounds of warm-up shooting.
What you should feel at this stage is almost boring. The rifle comes up, the dot is there, the trigger breaks, the hit registers. If it feels frantic or uncertain, that's your first training priority identified.
Stage two: the kneeling pair at 25 yards
Now the drill gets interesting. You just fired from standing, and you need to transition to a kneeling position, acquire a target at 25 yards, and put two rounds into an 8-inch circle. The position change is where most people hemorrhage time.
AR-15 with Wood Stock
May contain affiliate links.
There are several kneeling positions that work. The standard competition kneel with the support elbow on the forward knee is stable and fast to get into. A double-kneel (both knees down) is more stable but slower to assume. Pick one and own it. The worst thing you can do is be indecisive about which knee hits the ground first.
Two rounds at 25 yards on an 8-inch target from kneeling is not a difficult accuracy challenge in isolation. The difficulty comes from doing it under time pressure, after a position change, while the clock is running. This stage tests your ability to get stable quickly. Most shooters take too long getting into position because they're trying to build a perfect position. You don't need perfect. You need stable enough for an 8-inch target at 25 yards. That's a much lower bar than most people think.
If your two rounds at this stage are splitting apart, with one in the circle and one out, or both out in different directions, the issue is almost certainly that you're not waiting for stability before pressing the trigger. You're arriving in the kneeling position and immediately firing because the clock is running. The counter-intuitive fix is to slow down the transition by half a second and invest that time in building a stable platform. You'll actually shoot faster overall because you won't need to correct or re-engage.
Stage three: the prone pair at 50 yards
The final two rounds. You're going from kneeling to prone, acquiring a target at 50 yards, and putting two rounds into an 8-inch circle. Prone is your most stable position, and 50 yards with a magnified optic or a red dot is well within carbine capability. The challenge is the transition and the time remaining on the clock.

Getting into prone quickly and cleanly is a skill that degrades fast without practice. If you haven't gone prone with your rifle in a few weeks, you'll feel it. Your body won't flow into the position smoothly. Your elbows will hunt for placement. The bipod or support hand will need adjusting. All of that eats clock.
Once you're in prone, the two shots should be your best of the drill. If they're not, if your prone group at 50 yards on an 8-inch target is worse than your kneeling group at 25, something is mechanically wrong. Check your prone fundamentals: natural point of aim, elbow placement, cheek weld consistency, and breathing. Prone misses at 50 yards with a carbine almost always trace back to natural point of aim. If you're muscling the rifle onto the target instead of adjusting your body position so the rifle naturally points there, your shots will scatter.
The 50-yard stage also reveals zero confidence issues. If you're not sure your rifle is zeroed, you'll hesitate. Hesitation burns time. And if you adjusted your zero last session but didn't confirm it with a cold shot, you might actually be off. The drill catches that too.
Reading your results
Five rounds produce a surprising amount of data when you know what to look for. Here's how to interpret common outcomes.
Five for five, under time
You're good. Your cold performance matches your warm performance, your positions are solid, and your transitions are efficient. Now push the standard. Drop the par time to 25 seconds. Shrink the target to a 6-inch circle. Add a reload between stages. The drill scales.
Miss at 10 yards, hits everywhere else
Your rifle mount needs work. You rushed the first shot because of timer anxiety. This is the most common single-round miss in the drill, and it's almost entirely a mental problem. You know 10 yards is easy, so you don't give it the respect it deserves. Dry fire your mount. Every day. Build the consistency so your optic is where your eye expects it to be before you even think about the trigger.
Hits at 10, misses at 25
Your kneeling position is either unstable or you're not waiting for stability before shooting. Spend time in dry fire just getting into your kneeling position and holding the dot steady on a target. Time how long it takes you to get stable. If it's more than three seconds from the start of your transition, you need to practice the transition itself, not just the shooting.
Hits at 10 and 25, misses at 50
Could be position, could be zero, could be time pressure. If both 50-yard shots miss in the same direction, suspect zero or a consistent natural point of aim error. If they scatter, you're rushing because the clock is running out. Either way, the fix is more prone dry fire and confirming your zero independently before your next cold-start attempt.
May contain affiliate links.

Miss everything or multiple misses across stages
No shame in this result. It just means your cold baseline is significantly below your warm baseline, which is the whole point of finding out. Focus on the fundamentals of each position in dry fire, run the drill again next session, and track improvement over time.
Common mistakes
Five things that consistently trip people up on this drill, and most of them happen before a single shot is fired.
The first is treating it like a warm-up instead of a test. The whole value of the drill is that it's cold. If you fire "just a couple rounds" before running it, you've defeated the purpose. You've turned a diagnostic into practice. Run it cold or don't run it.
The second is not using a timer. Without time pressure, this drill is trivially easy for anyone who can shoot at a basic level. Eight-inch targets at 10, 25, and 50 yards with no clock? That's not a drill. That's plinking. The 30-second par time is what creates the diagnostic pressure that reveals where your skills actually are.
Third is changing the drill based on last session's results. If you missed the kneeling shots last time, the temptation is to add extra kneeling reps to this session's cold start. Don't. Run the drill exactly the same way every time. The consistency of the protocol is what makes the data useful over time. Fix the kneeling problem in your training after the cold start, not during it.
Fourth is ego-driven target selection. Some shooters will swap the 8-inch circle for a smaller target because 8 inches "feels too easy." If you're going five for five under time consistently, absolutely shrink the target. But if you're not yet hitting that standard reliably, an 8-inch circle is the right diagnostic size. It's large enough that misses indicate real problems, not random variation.
Fifth is failing to log results. Running this drill without writing down what happened is like going to the doctor and refusing to hear the diagnosis. The value is in the data. A notebook, a spreadsheet, a note on your phone. Doesn't matter. Track the date, the hits, the misses, where the misses went, and your subjective sense of how it felt. Over ten or twenty sessions, you'll see trends that are invisible in any single session.

Scaling the drill
Once you're consistently hitting five for five under 30 seconds, the drill needs to get harder or it stops being diagnostic. Here are progressions that maintain the cold-start principle while raising the bar.
Drop the par time. Going from 30 seconds to 25 seconds doesn't sound like much, but it compresses your transitions significantly. Five seconds is an eternity when you're trying to get from kneeling to stable prone.
Shrink the targets. Move from 8-inch circles to 6-inch circles. At 50 yards in prone, this still isn't a precision challenge, but at 25 yards from kneeling under time, 6 inches starts to demand real stability.
Push the distances. Move the three targets to 15, 50, and 100 yards. The 100-yard prone shot on an 8-inch target is where carbine fundamentals really show. Wind, zero precision, and natural point of aim all become factors.
Add a reload. Start with three rounds in the magazine. After the kneeling pair, you're empty. Reload, get into prone, and fire the last two. This adds a gross motor skill under time pressure and tests your reload efficiency when it's not rehearsed.
Add a start condition. Instead of starting with the rifle mounted, start from a low ready or a table pickup. This adds time to the first shot and tests your ability to efficiently get the rifle into action from a realistic starting point.
Each of these progressions should be introduced one at a time. Stack two or three simultaneously and you won't be able to identify which variable is causing the misses. Change one thing, run it for several sessions, then add the next.
Dry fire integration
You can run a version of this drill entirely in dry fire, and you should. Set up three aim points at roughly the correct distances in your home or garage. Simulated distances work fine since you're not measuring accuracy with live rounds. You're practicing the mount, the transitions, and the position changes.

Use a timer. Set a 30-second par and run the sequence: standing shot on aim point one, transition to kneeling for two trigger presses on aim point two, transition to prone for two trigger presses on aim point three. Watch the dot or reticle through each trigger press. If it's moving when the trigger breaks, you've identified a live fire miss before it happens.
What you'll feel when it clicks
There's a specific moment in this drill where everything smooths out. The rifle mount becomes automatic. The transition to kneeling happens without conscious thought about which knee goes where. The prone position builds itself while your eyes are already finding the target. You stop thinking about the clock because the movements are efficient enough that 30 seconds feels generous. That's your trained baseline catching up to your cold baseline. That's the gap closing.
Most shooters experience this somewhere between session ten and session twenty of consistent cold-start practice. The key word is consistent. Running this drill once a month won't close the gap. Running it as the first five rounds of every range session will.
Fifty rounds with a plan
Here's how to structure an entire range session around this drill. Start with the five-round cold start. Log your results. Then spend the next 45 rounds addressing whatever the cold start revealed.

5.56 NATO Ammunition Deals
Prices may change. May contain affiliate links.
If you missed the standing shot, spend 15 rounds on rifle mount drills at 10 yards. Mount, fire, evaluate. Repeat. Then spend 15 rounds on kneeling work and 15 on prone work at the appropriate distances.
If your kneeling stage was the weak link, flip the ratio. Spend 30 rounds on kneeling drills at 25 yards, working on getting into position quickly and building stability. Use the remaining 15 rounds split between standing and prone to maintain those skills.
If you went five for five, spend your remaining 45 rounds pushing the scaled progressions. Tighter par times, smaller targets, longer distances. Find where your new failure point is and train that.
Fifty rounds with a plan beats 200 without one. Every round has a purpose. Every result gets logged. The cold start tells you what to work on, and the rest of the session is the work.

The long game
Track your cold-start results over time. What you're looking for isn't perfection on any single day. You're looking for the trend. A shooter who goes three for five on session one, four for five on session three, and five for five by session six is making measurable progress that has nothing to do with how they feel about their shooting. The numbers don't lie, and they don't care about your ego.
Once you've established a reliable five-for-five baseline at the standard distances and par time, that becomes your floor. You now know, with data, what your cold carbine performance looks like. Every progression you add from there builds on a foundation you can actually trust because you tested it honestly, under time, with no warm-up and no excuses.
Run this cold. Log it. Trust the trend. Five rounds is all it takes to know exactly where you stand.