
You've got a pile of .30-06 brass and a rifle chambered in .338-06 A-Square. The good news: forming cases is one of the simplest wildcat-adjacent operations on the bench. The .338-06 is literally the .30-06 case opened up to accept .338-inch diameter bullets. No trimming the body, no pushing shoulders around, no fire-forming required to get functional brass. One pass through the right die, and you have a case that's ready to prime, charge, and seat.
After reading this, you'll understand the mechanics of expanding a .30-06 neck from .308 to .338, know which dies and lube setups prevent split necks, and have a clear process for inspecting finished cases before they ever see powder. You'll also have a dry-run protocol for practicing the feel of the operation and a simple live-fire procedure for final case forming in the chamber.
What you'll be able to do
By the end of this walkthrough, you'll neck up .30-06 brass to .338-06 dimensions consistently, without splitting necks or sticking cases in the die. You'll know how to evaluate each formed case for concentricity, neck thickness, and proper dimensions before loading. And you'll have a repeatable process that scales from a dozen cases to a few hundred without degrading quality or introducing safety problems.
The .338-06 A-Square is a SAAMI-standardized cartridge, not technically a wildcat, even though it spent decades in wildcat territory before Art Alphin formalized it with a consistent 17.5-degree shoulder angle. That standardization means your dies are cut to SAAMI specs, your chamber should be cut to SAAMI specs, and published load data exists from sources like Speer, Sierra, Barnes, and Norma. This matters because it removes the guesswork that true wildcat forming sometimes demands.
Safety and prerequisites
This is a cold-forming operation. No powder, no primers, no live ammunition on the bench during the forming process. That's the one safety rule that needs stating, and it's absolute.
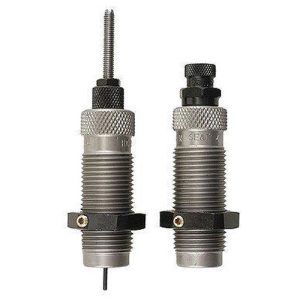
RCBS Group D Full-Length Die Set .338-06 Deals
Prices may change. May contain affiliate links.
You need a single-stage press. A turret press works too, but progressive presses introduce unnecessary complexity for case forming. You need a .338-06 full-length sizing die set. RCBS makes a Group D full-length die set for the .338-06 that includes both the sizing die and the seater die. The sizing die should come with a tapered expander button, which is the critical component for this operation. If your die set came with a non-tapered expander, you need to source the tapered version. Non-tapered expanders split necks routinely during neck-up operations. This was a known issue with some older .35 Whelen and .358 Winchester die sets, and the same principle applies here.

You also need quality case lube, both for the exterior of the case body and for the inside of the neck. A caliper capable of measuring to .001 inches. The correct shell holder for .30-06 family cases. And a supply of .30-06 brass, ideally new or once-fired.
Baseline skills: you should already be comfortable operating a single-stage press, sizing standard rifle cases, and measuring case dimensions with a caliper. If you've never resized a case before, practice on some .30-06 brass through a .30-06 full-length die first to get the feel of the operation before you attempt the neck-up.
How the neck-up works
The concept is straightforward. The .338-06 case and the .30-06 case share the same body dimensions: same rim diameter (.473 inches), same base diameter (.472 inches), same shoulder diameter (.441 inches), same case length (2.494 inches). The only difference is the neck. The .30-06 neck holds a .308-inch bullet; the .338-06 neck holds a .338-inch bullet, with a neck diameter of .369 inches.
When you run a .30-06 case into a .338-06 full-length sizing die, the die body contacts the case body and shoulder normally, since the external dimensions are identical. The magic happens on the way back out. As you withdraw the case from the die, the tapered expander button gets pulled through the neck, gradually opening it from .308 to .338. The taper is what makes this work smoothly. A straight expander would try to jump the neck diameter all at once, work-hardening the brass instantly and splitting it. The tapered button eases the brass open progressively.

This is a single-pass operation. Multiple sources confirm that the .338-06 dies with a tapered expander enable you to neck up .30-06 brass to .338 in one stroke. The result is a case that's dimensionally correct for the .338-06 chamber. Fire the first load, and the brass will conform exactly to your specific chamber. After that first firing, subsequent resizing is just normal full-length or neck-only sizing.
Think of "good" as: no split necks, consistent neck wall thickness around the circumference, no visible scoring or galling on the neck exterior, and case length within spec after forming. The case length shouldn't change significantly during a neck-up since you're not pushing the shoulder or shortening the body, but verify it anyway.
Step-by-step breakdown
Step 1: Inspect and sort your .30-06 brass
Start with your brass selection. New, unfired .30-06 brass is ideal. The necks haven't been work-hardened by repeated firing and sizing cycles, so they'll expand cleanly. Once-fired brass from a single rifle works well too. Winchester, Nosler, Norma, and Lapua .30-06 brass have all been used successfully for .338-06 forming.
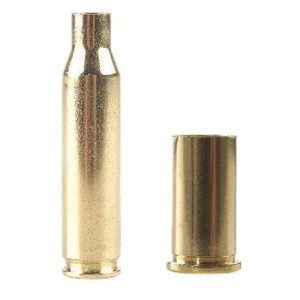
Winchester .30-06 Brass Winchester Deals
Prices may change. May contain affiliate links.
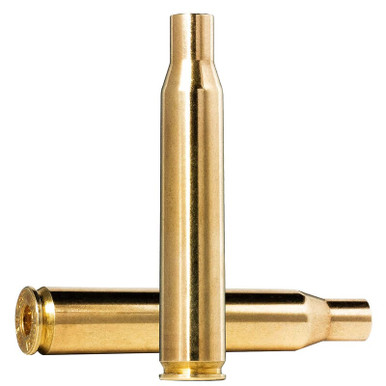
Lapua .30-06 Brass Lapua Deals
Prices may change. May contain affiliate links.
The brass you want to avoid: cases that have been fired and resized multiple times in a .30-06 chamber. Every firing and sizing cycle work-hardens the neck brass. After three or four cycles, the neck may be brittle enough to split during the expansion. If you're working with range pickup brass of unknown history, inspect the necks closely for any hairline cracks or discoloration before you start. Better yet, anneal the necks first.
Sort your brass by headstamp. Different manufacturers use different brass alloys and neck thicknesses, and mixing them will give you inconsistent neck tension on the formed cases. Keep each lot together through the entire forming and loading process.
Step 2: Lube correctly
This is where brass prep pays off. You need lube in two places: on the outside of the case body and on the inside of the neck.

For the exterior, use your standard sizing lube applied to the body and shoulder. Don't over-apply on the shoulder, as hydraulic dents from trapped lube are just as possible here as with any full-length sizing operation. A light, even coat on the body is sufficient.
For the inside of the neck, use a dry graphite lube or a light application of case neck lube on a neck brush. This is the step most people skip, and it's the step that causes the most problems. The expander button is being pulled through the neck under significant friction. Without internal neck lube, you'll feel dramatically more resistance on the press handle, and you increase the risk of galling the inside of the neck, sticking the expander, or splitting the case.
One experienced reloader on the Nosler forum uses fine molybdenum dust on the inside of case necks specifically to reduce friction and neck stretch during expansion. Graphite works similarly. The point is: something needs to be between the expander button and the brass.
Bench notes: the feel of a good stroke
When the operation is going right, you'll feel moderate resistance as you push the case into the die (the body and shoulder being sized, same as normal .30-06 sizing), then a smooth, progressive increase in resistance as you pull the handle back and the expander comes through the neck. It shouldn't feel like you're forcing anything. If the handle suddenly gets very hard to pull back, stop. Either your internal lube is insufficient, your expander isn't tapered, or the brass is too work-hardened for cold forming.
Step 3: Run the case through the die
Set up the .338-06 full-length sizing die in your press per the manufacturer's instructions. For RCBS Group A dies, this means screwing the die down until it contacts the shell holder with the ram fully raised, then raising the handle and snapping it over center to achieve cam-over, and locking the ring. This gives you full-length sizing with proper case resizing.

Insert a lubed .30-06 case into the shell holder. Raise the ram smoothly and fully. Lower the ram smoothly. The case should come out of the die with the neck now expanded to .338 dimensions. Inspect it immediately.
The whole operation takes no more effort than standard .30-06 resizing. Multiple sources describe it as exactly that simple, and that's been the consistent experience across forums and loading manuals. The shared body dimensions between .30-06 and .338-06 mean the die is really only doing one thing differently: pulling a larger expander through the neck.
Step 4: Inspect every formed case
After forming, check each case for:

Neck splits. Roll the case on a flat surface under a light. Hairline cracks will show up as thin dark lines on the neck. Any split, no matter how small, means that case goes in the scrap bin.
Case length. Measure with your caliper. The .338-06 has a maximum case length of 2.494 inches. Neck-up operations can occasionally push the case length slightly, so verify. If any case is over spec, trim it.
Neck diameter. Should be approximately .369 inches with no bullet seated. Measure at several points around the neck to check for uniformity.

Neck wall thickness. If you have a ball micrometer or a tubing micrometer, check neck wall thickness at four points around the circumference. Variation of more than .002 inches means the neck was uneven to begin with, and that case will produce inconsistent neck tension. For hunting loads this is less critical than for precision work, but it's still worth knowing.
Step 5: Deburr and chamfer
After forming and inspection, deburr the inside and outside of the case mouth. The expansion process can leave a slightly rough edge on the mouth, and you want a clean chamfer for consistent bullet seating. This is standard case prep, nothing unique to the neck-up process.
Step 6: Prime, charge, and seat for fire-forming
Your formed brass is now dimensionally a .338-06 case. Load it with a standard .338-06 load using published data. The first firing will fire-form the brass to your specific chamber, giving you cases that are a perfect match for your rifle. After that first firing, you're in normal reloading territory.
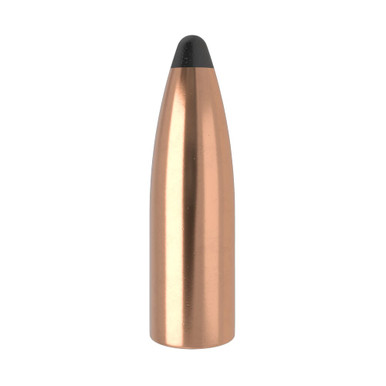
Nosler Partition 210 Grain .338 Deals
Prices may change. May contain affiliate links.
Published load data for the .338-06 covers bullet weights from 180 to 275 grains. Typical loads include 210-grain Nosler Partitions over RL-15 or IMR 4350, and 200-grain bullets over H4350. The Speer Reloading Manual #14 lists ballistic data showing a 200-grain SP at 2,773 fps, a 225-grain SP at 2,678 fps, and a 250-grain SP at 2,531 fps from a 23-inch test barrel. Start at the published minimum charge weight for your chosen bullet and powder combination and work up. Log everything.
Common mistakes and fixes
Using brass that's been fired too many times
This is the most common cause of split necks during forming. Brass that's been through multiple fire-and-resize cycles in a .30-06 chamber has work-hardened necks. The fix is simple: either start with new brass or anneal the necks before forming. If you're getting more than one or two splits out of a batch of 50 cases, the brass is too hard. Annealing the necks will restore ductility and let the brass expand without cracking.
Skipping internal neck lube
The expander button is doing real work during this operation. It's opening the neck by .030 inches in diameter. Without lube on the inside of the neck, you're generating enough friction to gall the brass, stick the expander in the case, or damage the expander spindle assembly. One forum poster ruined a zip spindle and spindle lock trying to unstick an expander from a case that wasn't properly lubed internally. Graphite, molybdenum, or dedicated neck lube on a brush all work. Just use something.
Using a non-tapered expander button
Some older die sets shipped with straight (non-tapered) expander buttons. These were designed for sizing cases that were already at the correct neck diameter, not for expanding from a smaller caliber. A straight button tries to open the neck all at once, which concentrates stress at one point and splits brass reliably. If your die set doesn't have a tapered expander, contact the manufacturer for the correct part. RCBS and Redding both offer tapered expander buttons for their .338-06 dies.
Not inspecting formed cases
Every case needs individual inspection after forming. A hairline neck crack that you miss becomes a case failure in the chamber. Roll each case under a light, measure the length, and check the neck diameter. This takes about 10 seconds per case. Don't skip it.
Mixing brass lots
Different manufacturers use different brass hardness, neck thickness, and internal capacity. Mixing Nosler, Winchester, and military surplus brass in the same batch gives you inconsistent neck tension, inconsistent capacity, and inconsistent velocity. Sort by headstamp and keep lots together.
Equipment comparison
For .338-06 forming, your die choice matters primarily for the quality of the expander button and the internal finish of the die body.
RCBS Group A full-length die sets are the most commonly referenced for .338-06 forming. They come with a tapered expander button, size to SAAMI minimum dimensions, and include both the sizing die and seater die. The internal finish is smooth enough to avoid scratching brass during the forming operation. Multiple forum users specifically name RCBS .338-06 FL dies as their choice for forming from .30-06 brass.
Redding full-length dies are another solid option. Redding sent one user a replacement stem assembly with both a tapered and a standard button after a stuck case incident, which suggests they stock the tapered version. Redding dies tend to have very tight tolerances and excellent internal finish.
Lee dies are also available for the .338-06, though they may be marked "Ackley" on the die body to avoid trademark issues with the A-Square name. The actual dimensions are standard .338-06, not Ackley Improved. Verify the expander button type before using Lee dies for a neck-up operation.
Forster and Hornady also make sizing dies that can work for this application, though the sources reference more experience with RCBS and Redding specifically for .338-06 forming.
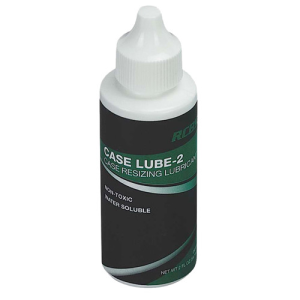
For lube, RCBS Case Lube-2 or Imperial Sizing Die Wax both work for the exterior. For internal neck lube, Hornady One Shot with a neck brush, dry graphite powder, or fine molybdenum dust are all effective options.
Dry-run practice with no live components
Before you form your first case with intent to load, do a dry run. Take five .30-06 cases that you don't mind sacrificing. Lube them inside and out. Run them through the .338-06 sizing die one at a time, paying attention to the feel of the press handle at each stage of the stroke. Note where resistance increases, where it peaks, and where it releases.
After forming all five, inspect them. Measure neck diameter, case length, and check for splits. This gives you a baseline for what the operation should feel like and what the finished product should look like, with zero risk since there's no powder or primers involved.
If any of the five split, diagnose why before proceeding. Was the brass old and work-hardened? Was the internal lube insufficient? Is the expander button tapered? Fix the root cause, then run five more until you get five clean cases in a row.
You can also practice the inspection protocol during this dry run. Set up your caliper, your lighting, and your sorting system (good cases in one box, scrap in another) so that when you move to production forming, the workflow is automatic.
Live-fire forming drill
Once you've formed a batch of brass and loaded them with published starting loads, the first trip to the range doubles as your fire-forming session and your initial load development.
Drill 1: fire-form and verify (20 rounds)
Load 20 rounds at the published starting charge for your chosen bullet weight. A 210-grain Nosler Partition over a starting charge of RL-15 or IMR 4350 is a classic .338-06 combination. Fire all 20 from a bench rest, recording group size and any unusual pressure signs (sticky bolt lift, ejector marks, cratered primers). These 20 rounds fire-form the brass to your chamber. Save all the brass, label it as once-fired .338-06, and keep it as a separate lot.

Drill 2: ladder test (15 rounds)
After fire-forming, resize the brass (full-length or neck-only, depending on your rifle and die setup), and load a three-round ladder in half-grain increments from the starting charge up to the published maximum. For example, with a 210-grain bullet and H4350, Sierra lists data from 56.0 to 62.0 grains. Load three rounds each at 56.0, 56.5, 57.0, 57.5, and 58.0 grains. Shoot over a chronograph if possible. You're looking for the velocity node where ES tightens up and group size shrinks. Log charge weight, velocity, ES, SD, and group size for every three-round string.
Drill 3: confirmation group (10 rounds)
Once you've identified a promising charge weight from the ladder, load 10 rounds at that charge and shoot a 10-round group at 100 yards. This confirms whether the node is real or if you got lucky with three rounds. The ES/SD tells you everything here. If the 10-round ES is under 30 fps and the group is under 1.5 MOA, you have a working load.
Measuring progress
Track these numbers across your forming and loading process:
For forming: record the split rate per batch (number of splits divided by total cases formed). With proper lube and new or annealed brass, this should be zero or very close to it. If it's above 5%, something in your process needs fixing.
For neck consistency: measure neck wall thickness variation across formed cases. Record the maximum spread within each case (thickest point minus thinnest point). Target under .002 inches for hunting loads, under .001 inches if you're chasing precision.
For load development: log charge weight, bullet type, seating depth (both COAL and CBTO if you have a comparator), primer type, velocity, ES, SD, and group size. The .338-06 is not a long-range cartridge by modern standards, and experienced shooters recommend keeping shots under 250 yards for hunting applications. But that doesn't mean you shouldn't pursue consistent loads. Consistency beats velocity, and a .338-06 load with 15 fps SD will outperform a sloppy load with 40 fps SD at any distance.
For case life: track how many firings each lot of brass survives before you see primer pockets loosening, case head separation, or neck splits. Formed brass that was new when you started should give you multiple firings before it needs annealing again. Log the firing count per lot so you know when to anneal or retire brass.
The .338-06 with 225 or 250-grain bullets at moderate velocity is a genuine medium-bore performer. The sectional density of a 225-grain .338-inch bullet is .281, which exceeds that of a 270-grain .375 bullet. That's real penetration on heavy game. Depending on bullet weight and rifle weight, the cartridge generates roughly 25% to 35% less recoil than a .338 Winchester Magnum, which means you can shoot it more and flinch less. And the brass is as close to free as reloading gets, since .30-06 cases are everywhere. Form a batch, work up a load, and put the rifle to work.