
You've got a new cartridge, a stack of manuals open to the same page, and a hundred pieces of prepped brass. The temptation is to load three rounds at every half-grain increment from start to max, shoot them all at 100 yards, and pick the tightest group. That approach burns components, barrel life, and time; and it doesn't actually tell you what you need to know.
The ladder test exists to answer a specific question: where are the charge weight nodes for this barrel and cartridge combination? Not which load shoots the smallest group on one day, but which charge weights sit in a zone of velocity stability; where small variations in powder charge don't translate into large variations in point of impact or velocity. Finding that zone first, then refining around it, is the most component-efficient path to a load that performs consistently across conditions.
This walkthrough covers how to set up, execute, and interpret a ladder test using nothing but published load data as your boundaries. No extrapolation beyond manual maximums. No guessing at start charges. The manual is the guardrail. The ladder test is the tool that tells you where, within those guardrails, your rifle wants to live.
What a ladder test actually measures
Creighton Audette developed the original ladder test method decades ago, and the core concept hasn't changed. You load one round at each charge weight increment across a range; typically from a published starting load up to or near the published maximum. You fire each round at a target at extended range (usually 200 to 300 yards), and you look for clusters: groups of shots at consecutive charge weights that land in nearly the same spot on the target despite increasing powder charges.

Those clusters indicate a node. Within a node, the barrel's harmonic vibration pattern at the moment the bullet exits the muzzle is relatively stable. Small changes in charge weight shift the bullet's exit timing, but within a node, those timing shifts don't move the muzzle enough to change the point of impact meaningfully. The result is a charge weight window where velocity is increasing but impact point stays put.
The Satterlee method is a variation that uses a chronograph instead of (or in addition to) target impact analysis. Instead of looking for clusters on paper at distance, you look for flat spots in the velocity curve; consecutive charge weights where velocity increases are unusually small. Same principle, different measurement tool. Both work. Using both together gives you the most information per round fired.
A common misconception is that the ladder test finds your final load. It doesn't. It narrows the search space. Once you've identified a node, you load groups at charge weights within that node and evaluate for precision, ES (extreme spread; the difference between your fastest and slowest rounds), and SD (standard deviation of velocity). The ladder test is step one. Group testing within the node is step two.
Setting your charge weight boundaries
Every ladder test starts and ends with published data. Open at least two manuals; three is better. You'll find that starting charges and maximum charges for the same bullet weight and powder combination don't always agree between publishers. Hodgdon's online data might list a start charge of 41.0 grains for a given combination while Nosler's manual shows 40.5. Maximum charges can differ by a full grain or more.

Here's how to handle the discrepancy: use the lowest published starting charge as your floor and the lowest published maximum as your ceiling. If Hodgdon says 41.0–45.5 and Nosler says 40.5–44.8, your working range is 40.5 to 44.8. This keeps you inside the boundaries that every publisher agrees are safe, and it gives you the widest possible window to search for nodes.
The reason for using the lowest max rather than the highest is straightforward. Maximum pressure loads are tested in specific test barrels with specific chambers. Your rifle's chamber dimensions, throat length, barrel length, and even the lot of brass you're using all affect pressure. Starting at a published max from one source that's above the max from another source is unnecessary risk with zero upside. The node you're looking for almost certainly exists below the lowest published maximum anyway.
Bench notes: recording your boundaries
Before you load a single round, write down the following for each manual you're referencing:
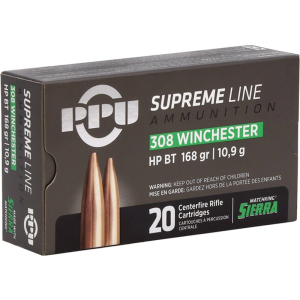
Sierra MatchKing 168-grain bullet Deals
Prices may change. May contain affiliate links.
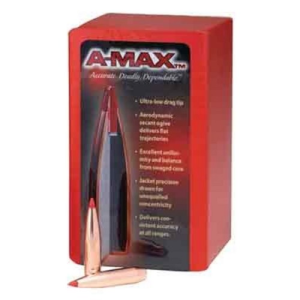
Hornady A-MAX 168-grain bullet Deals
Prices may change. May contain affiliate links.
Publisher and edition
Bullet weight, type, and specific product (a 168-grain Sierra MatchKing is not the same as a 168-grain Hornady A-MAX in terms of bearing surface and pressure behavior)
Powder type and lot number
Listed starting charge
Listed maximum charge
Listed COAL (cartridge overall length) or CBTO (cartridge base to ogive) if given
Test barrel length
That last item matters more than most people realize. If the manual's test barrel is 26 inches and yours is 22, your velocities will run lower at the same charge weight, and pressure signs may present differently. You're not adjusting charge weights for barrel length; the published data is still your boundary; but you need to know why your chronograph numbers might not match the manual's listed velocities.
Choosing your increment
The increment between charge weights determines how many rounds your ladder test requires and how precisely you can identify a node. Too coarse and you'll step right over a narrow node. Too fine and you're burning components for data resolution you can't actually interpret from impact points on paper.
For most rifle cartridges in the medium-capacity range (.308 Winchester, 6.5 Creedmoor, .243 Winchester, .270 Winchester), 0.3-grain increments work well. This gives you enough resolution to see nodes without requiring an absurd number of rounds. For larger cases; magnums like the 7mm Rem Mag, .300 Win Mag, or 6.5 PRC; 0.5-grain increments are reasonable because the charge weight window is wider and the nodes tend to be broader. For small, efficient cases like the 6mm BR or .22-250, 0.2-grain increments can be justified.

Here's the math. If your working range is 40.5 to 44.8 grains and you're using 0.3-grain steps, that's roughly 15 charge weights, so 15 rounds for the ladder test. If you're using 0.5-grain steps, it's about 9 rounds. Fifteen rounds is a reasonable number; enough data points to see patterns, few enough to shoot in a single session without heat-soaking the barrel.
Some reloaders use a 10-shot ladder (the Satterlee-style approach) with increments calculated to span from start to near-max in exactly 10 steps. That works fine as long as the increment doesn't end up so coarse that you miss information. Do the math for your specific cartridge rather than defaulting to a round number of shots.
Brass prep and consistency before you start
The ladder test only works if the only variable changing between shots is the powder charge. Everything else needs to be as consistent as you can make it. This is where brass prep pays off.
All brass should be from the same manufacturer and the same lot if possible. It should all be at the same firing count; either new or once-fired from the same rifle. Trim to a uniform length. Chamfer and deburr case mouths. If you're using a neck-sizing die or bushing die, verify that neck tension is consistent by checking the force required to seat bullets (a seating force gauge helps, but at minimum, seat a few and confirm they all feel the same on the press handle).

Flash holes should be uniform. If you're using brass with crimped primer pockets (military surplus or some factory ammo), ream or swage them consistently. Inconsistent primer seating depth creates inconsistent ignition, which creates velocity variation that has nothing to do with your charge weight; and that's noise in your data.
Primers should all be from the same box, same lot. Seat them to a consistent depth, just below flush with the case head. You should feel the anvil legs contact the bottom of the primer pocket. If you don't feel that, the pocket may be too deep or the primer may not be fully seated.
Bullet seating depth should be identical for every round. Pick a COAL or CBTO based on the manual's recommendation or your chamber's throat length, and hold it for the entire ladder. Don't change seating depth during a ladder test. That's a separate variable to test after you've found your charge weight node.
What you'll see if prep is sloppy
If your brass prep isn't consistent, the ladder test results will look noisy; impacts scattered without clear clusters, velocity data that bounces around without obvious flat spots. The temptation is to blame the method. The problem is almost always the brass. Neck tension inconsistency causes ES problems before powder charge does. If your ladder test looks like shotgun patterning, go back to the bench before you go back to the range.
Loading the ladder
Load one round at each charge weight. Not two, not three; one. This is counterintuitive for people used to loading groups, but the whole point of the ladder test is to see how individual charge weights relate to each other across the range. Loading multiples at each weight turns it into a group test, which is a different (and later) step.
Label each round. A fine-point Sharpie on the case head works. Write the charge weight or assign each round a number that corresponds to your data sheet. You need to know exactly which round produced which impact and which velocity reading.
Use a quality powder measure or, better, a trickler and scale for each charge. A volumetric measure from a progressive press isn't precise enough for this work; you need charges accurate to 0.1 grain at minimum. An RCBS ChargeMaster, a Hornady Auto Charge, or a balance beam with a trickler all work. The A&D FX-120i with an autotrickler setup is the gold standard for speed and precision if you're willing to invest, but a $30 balance beam and a $10 trickler will get you the same accuracy; just slower.

Weigh every charge. Don't throw and trust. The entire test depends on knowing that the charge weight you wrote down is the charge weight that's in the case.
Shooting the ladder
Distance
The original Audette method calls for shooting at 300 yards. The reason is resolution: at 100 yards, the vertical spread between charge weights is compressed, and it's hard to distinguish a node from normal group dispersion. At 300 yards, the vertical differences between charge weights are magnified enough to see patterns.

If you don't have access to 300 yards, 200 works. Below 200, you're likely to see clusters that aren't real nodes; they're just shots that are close together because the distance isn't enough to separate them. If you're relying primarily on chronograph data (Satterlee style), distance matters less because you're reading velocity, not impact position. But even then, shooting at 200+ yards gives you both data streams.
Conditions
Shoot on the calmest day you can find. Wind moves impacts horizontally, and you're looking for vertical patterns. A 10 mph crosswind at 300 yards can push shots far enough sideways to obscure the vertical clustering you're trying to read. Early morning, late evening, or overcast days with minimal wind are ideal.
Let the barrel cool between shots. This isn't a speed drill. A hot barrel shifts point of impact and can change pressure behavior. Three to five minutes between shots is reasonable. Bring a book. Some shooters use a barrel-temperature strip or IR thermometer and wait until the barrel is back below a threshold (often 90–100°F) before firing the next round.
Chronograph setup
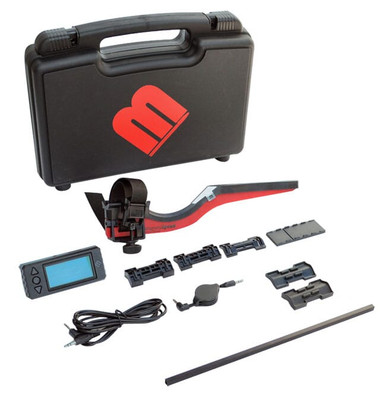
If you have a chronograph, use it. A LabRadar or MagnetoSpeed will give you the velocity for each shot without requiring a downrange screen setup. Record the velocity for every round alongside its charge weight. If you're using a MagnetoSpeed bayonet-style unit, be aware that it can shift point of impact slightly due to the weight on the barrel. For the Satterlee method where you're reading velocity data primarily, this doesn't matter. For the Audette method where you need accurate impact positions, consider whether the attachment is affecting your results.

Shooting sequence
Fire rounds in order from lowest charge weight to highest. This is a safety practice; you're working up, so if you encounter pressure signs, they'll appear at the top of the ladder where you expect them, not randomly in the middle. Watch for pressure indicators at every shot: flattened primers, ejector marks on the case head, stiff bolt lift, cratered primers. If you see pressure signs before reaching your planned maximum charge weight, stop. The data you have is the data you have. Mark where pressure appeared and don't load above that point.
Shoot at a clean target with a visible aiming point. Some people use a single aim point for all shots; others prefer to aim at the same point but place small numbered markers near expected impact zones. The key is that you can identify which hole belongs to which shot. If you're shooting at 300 yards and your group is spreading vertically across 4–6 inches, that's normal and expected; you're not trying to shoot a tight group, you're mapping the vertical dispersion pattern.
Reading the results
Impact-based analysis (Audette method)
Pull the target and plot each impact point with its corresponding charge weight. You're looking for vertical clusters; three or more consecutive charge weights whose impacts are within a small vertical window despite increasing charges.
Here's what a node looks like on paper: shots at 42.0, 42.3, and 42.6 grains all land within half an inch of each other vertically at 300 yards, while the shots at 41.7 and 42.9 are clearly above and below that cluster. The cluster is the node. The charge weights at its edges are where the barrel's harmonics are transitioning between nodes.
You might see two nodes across your charge weight range. That's normal. The lower node is often preferred because it runs at lower pressure, is easier on brass, and gives you more room below maximum. The upper node, closer to max charge, will produce higher velocity but with less margin.
Not every ladder test produces clean, obvious nodes. If the wind was variable, if the barrel was heating up, or if brass prep wasn't tight, the results can be ambiguous. That's okay; it means you either reshoot the ladder under better conditions or use the velocity data to supplement what the target is showing you.
Velocity-based analysis (Satterlee method)
Plot charge weight on the X-axis and velocity on the Y-axis. In a linear world, velocity would increase at a constant rate as charge weight increases. In reality, the curve has flat spots; places where adding 0.3 grains of powder only adds 5 fps instead of the 20 fps you'd expect based on the overall trend.

Those flat spots correspond to nodes. The charge weights within a flat spot are where the barrel is less sensitive to charge variation, which means your ES and SD will be lower when you load groups in that zone.
The Satterlee method is sometimes called the "10-shot ladder" because it was popularized as a 10-round protocol. The specific number isn't sacred. What matters is having enough data points to see the velocity curve's shape. With 10–15 shots across the working range, the flat spots usually become apparent.
Combining both
When impact clusters and velocity flat spots line up at the same charge weights, you've found a strong node. That's your target zone for group testing. When they don't align perfectly; say the impact cluster is at 42.0–42.6 but the velocity flat spot is at 42.3–42.9; the overlap (42.3–42.6 in this example) is where you focus.
Common mistakes with ladder tests
Running the test at 100 yards
This is the most frequent error. At 100 yards, the vertical spread between charge weights is often less than the rifle's inherent mechanical precision. You can't distinguish a node from normal dispersion. You'll see what looks like one big group and conclude the test didn't work. It worked; you just couldn't read it at that distance. Move to 200 minimum, 300 if you can.
Loading multiple rounds per charge weight
This turns a ladder test into a group test. You end up evaluating each charge weight as a mini-group, which defeats the purpose. The ladder test is about the relationship between charge weights across the range, not the precision of any single charge weight. Load one round per increment. Save the group testing for after you've identified the node.
Ignoring the chronograph data
Some reloaders shoot a ladder test without a chronograph and try to read everything from the target. That can work at 300 yards in calm conditions, but you're throwing away half your data. Velocity information is less affected by wind and shooter error than impact position. If you own a chronograph, use it. If you don't, consider whether a LabRadar or MagnetoSpeed is worth the investment before burning components on a test that gives you half the picture.
Shooting in wind
A 10 mph wind at 300 yards can move a .308 bullet roughly 10–12 inches horizontally. If the wind is gusting and shifting, your horizontal dispersion will overwhelm the vertical pattern you're trying to read. Wait for a calm day. If calm days don't exist where you shoot, weight your analysis toward the chronograph data and treat the target as supplementary.
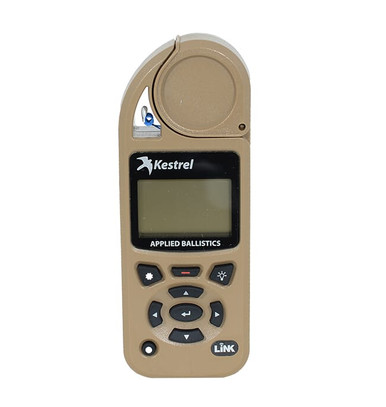
Kestrel Elite Ballistics wind meter Deals
Prices may change. May contain affiliate links.

Exceeding published maximums
The ladder test protocol calls for working from start to max. Not start to max-plus-one. Not "the manual says 45.0 but the bolt still feels fine at 45.5." Published maximums exist for a reason, and exceeding them during a ladder test; when you're firing single shots with no group-level data to confirm behavior; is where bad things happen. If you reach the published max and haven't found a node, the answer isn't to keep going. The answer is to try a different powder or bullet.
Equipment comparison for ladder test loading
Scales
The RCBS ChargeMaster Lite is a popular combination dispenser/scale that throws charges to within about 0.1 grain. It's adequate for ladder test work but can be slow and occasionally overthrows. The Hornady Auto Charge Pro is similar in capability, with a slightly different dispensing mechanism that some find more consistent. For maximum precision, an A&D FX-120i analytical balance paired with an autotrickler (like the Area 419 unit) resolves to 0.02 grains and removes nearly all human error from the weighing process. A Redding Model 2 balance beam scale with a Redding powder trickler is the budget option; slower, fully manual, but accurate to 0.1 grain in practiced hands.
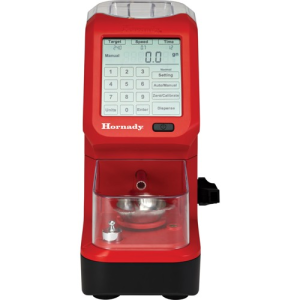
For a ladder test where you're loading 10–15 rounds, speed doesn't matter much. Accuracy does. Any of these will work if you verify each charge.
Chronographs
The MagnetoSpeed V3 attaches to the barrel and reads velocity via electromagnetic sensors. It's immune to lighting conditions and doesn't require a downrange setup, but it adds weight to the barrel and can shift point of impact. For a Satterlee-style velocity ladder, this is fine. For an Audette-style impact ladder, the barrel attachment is a consideration; you may want to remove it and rely on the target, or accept that your impact data has a slight systematic shift.
The LabRadar sits beside the shooter and tracks the bullet via Doppler radar. No barrel attachment, no downrange equipment, works in any light. It also gives you downrange velocity at multiple distances if you set it up correctly. More expensive than the MagnetoSpeed but eliminates the barrel-weight concern.
Optical chronographs (the traditional two-screen setups from Caldwell, Competition Electronics, and others) work but are sensitive to lighting, require a clear path downrange, and can be destroyed by a low shot. For precision load development, the LabRadar or MagnetoSpeed are worth the upgrade.
Dies
For ladder test prep, your sizing die matters. A full-length sizing die (like the RCBS Gold Medal or Redding Type S) with a bushing insert lets you control neck tension precisely. A standard full-length die without a bushing still works but gives you less control over one of the key consistency variables.

Seating dies with a micrometer adjustment (Redding Competition, Forster Ultra Micrometer, Hornady Micrometer) let you set and hold CBTO to within about 0.001 inches. For a ladder test where seating depth is held constant, this repeatability matters. A standard seating die without micrometer adjustment can work, but you'll want to verify CBTO with a comparator on every round rather than trusting the die setting.
After the ladder: refining the node
You've shot the ladder. You've identified a node; let's say it's centered around 42.5 grains with the flat spot running from 42.2 to 42.8. Now what?
Load five-round groups at 42.2, 42.5, and 42.8 grains. Same brass prep standards as the ladder. Shoot these groups at 100 yards (yes, now 100 is fine; you're evaluating precision within a narrow charge weight range, not mapping vertical dispersion across a wide range). Measure group size, and more importantly, record velocity for every shot.
Calculate ES and SD for each five-round group. The charge weight within the node that produces the lowest SD is your winner; not necessarily the one with the smallest group on that day. A five-round group is a small sample, and group size is noisy. SD over a chronograph is a more reliable indicator of load consistency.

What you're looking for: SD under 10 fps is good. Under 8 is very good. Under 5 is excellent and probably means you've found the center of a strong node. ES under 20 fps for five shots is a reasonable target. If you're seeing ES of 40+ and SD of 15+ within the node, something else is off; go back to brass prep, primer seating, or check for powder bridging in the case neck.
Once you've confirmed the charge weight, you can start testing seating depth. Move the bullet in 0.005-inch increments of CBTO, loading three to five rounds at each depth, and evaluate group size and velocity consistency. This is the fine-tuning step. The ladder test found the neighborhood. The group test confirmed the address. The seating depth test picks the house.
When the ladder doesn't show a clear node
It happens. You shoot 15 rounds, plot the data, and the velocity curve looks roughly linear with no obvious flat spots. The target shows scattered impacts without clustering. Several things could be going on.
The powder might not be well-suited to the cartridge and bullet combination. Not every powder produces distinct nodes in every barrel. If your working range is narrow (say, only 3 grains between start and max), there may not be enough charge weight variation to reveal a node. Try a different powder; one with a burn rate better matched to the case capacity and bullet weight.
Your barrel might have a harmonic profile that doesn't produce strong nodes with that specific load combination. This is less common than the powder-match issue, but it's real. Some barrels are more sensitive to charge weight than others due to contour, length, and how they're bedded or free-floated.
Environmental conditions might have obscured the data. Wind, mirage, barrel temperature variation, and even the shooter's fatigue over a 15-shot string can add noise. Before switching powders, consider reshooting the ladder on a calmer day.
Or the brass prep wasn't consistent enough. This is the most common culprit and the easiest to fix. Go back to the bench. Check neck tension uniformity. Verify primer seating depth. Weigh the loaded rounds to confirm charge weights are what you think they are.
A note on the OCW method
The Optimal Charge Weight (OCW) method is a related but distinct approach. Instead of loading one round per charge weight, you load three-round groups at each increment and shoot them all at the same aim point at 100 or 200 yards. You're looking for the charge weight where the group center (not size) doesn't shift relative to the groups above and below it.
OCW uses more components than a ladder test (three times as many) but gives you group-size data alongside the node-finding data. Some reloaders prefer it because it feels more familiar; you're shooting groups, not single shots. The tradeoff is component consumption and barrel heat management. Shooting three rounds per charge weight across 10 increments is 30 rounds, and keeping the barrel cool between groups turns a one-hour session into a three-hour session.
Neither method is objectively better. The ladder test is more component-efficient. OCW gives you more data per session. Many experienced reloaders use a ladder test first to narrow the range, then shoot OCW-style groups within the identified node. That hybrid approach uses maybe 15 rounds for the ladder and 15–20 for the group confirmation; 30–35 rounds total to arrive at a validated charge weight.
The test protocol that works
Here's the full sequence, start to finish:
Open your manuals and establish the charge weight floor and ceiling. Pick your increment based on case capacity. Load one round at each charge weight, holding all other variables constant. Label every round. Shoot at 200–300 yards on a calm day, in order from lowest to highest charge weight, with the barrel cooling between shots. Record velocity for every shot. Retrieve the target and plot impacts against charge weights. Look for vertical clusters on the target and flat spots in the velocity data. Identify the node.
Go home. Load five-round groups at three charge weights within the node. Shoot them at 100 yards over a chronograph. Pick the charge weight with the lowest SD. Then test seating depth in 0.005-inch increments around your current CBTO. Pick the depth that gives the best combination of group size and velocity consistency.
Log everything. Charge weight, velocity, ES, SD, group size, temperature, humidity, barrel round count. The log is how you verify that the load still performs at round 500 the same way it did at round 50. It's how you diagnose problems when something changes. And it's how you avoid re-doing work you've already done.

What to do next
If you haven't shot a ladder test before, start with a cartridge and powder combination you already have data on. Load the ladder across the published range and see if the node you find corresponds to the charge weight you're already using. If it does, you've validated both the method and your existing load. If it doesn't, you might find a better charge weight hiding in a spot you never tested.
For a genuinely new cartridge where you have no prior data, the ladder test is the fastest way to narrow the field. Fifteen rounds and one range session gets you more useful information than fifty rounds of random group testing. The ES/SD tells you everything; but only if you set up the test to isolate the variable you're actually trying to measure. Start low. Work up. Log everything.