
You just installed a new trigger group, or you adjusted the spring on a single-action revolver, and now you need to know the actual pull weight; not the "feels like about three pounds" guess, but a real number. Maybe you're checking that a carry gun's trigger hasn't drifted light enough to be a liability, or you're verifying consistency across a set of competition guns. Either way, you need a trigger pull gauge, and you don't need to spend $300 on one.
The good news is that the sub-$150 market has legitimate options; both mechanical and digital; that'll give you accurate, repeatable readings for benchwork, safety verification, and trigger tuning. The bad news is that some of them are junk, and the differences between models matter more than most people realize. A gauge that reads 0.5 pounds off might not sound like much, but if you're trying to verify a 2-pound competition trigger is safe, that error margin is the whole ballgame.
This piece covers the gauges worth buying under $150, what separates them, how to actually get consistent readings (the gauge is only half the equation), and the specific checks you should be running whether you're a hobbyist gunsmith or just someone who wants to verify their own work.
Why you actually need one
There's a tendency to treat trigger pull gauges as nice-to-have accessories; something competitive shooters own but most people don't need. That undersells what they do.
The most practical use is safety verification. If you've done any trigger work; swapped springs, polished engagement surfaces, installed an aftermarket trigger group; you need to verify the pull weight is within a safe and functional range. A trigger that's been lightened too aggressively can follow (fire when the bolt closes), double, or fail to hold the sear under recoil. A gauge won't catch all of those problems, but confirming the pull weight is in the expected range is the first diagnostic step.
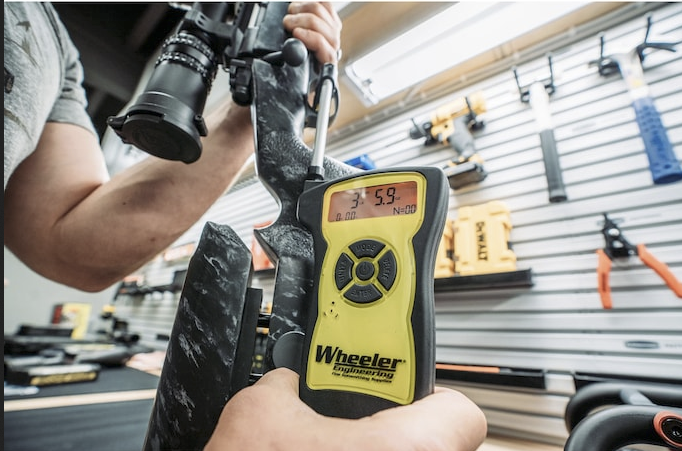
For anyone building or tuning multiple guns, a gauge lets you document pull weights and track changes over time. Springs wear. Engagement surfaces lap in. A trigger that measured 4.5 pounds out of the box might settle to 4.0 after a thousand rounds, and that's normal; but you won't know the trajectory without baseline measurements.
Competition shooters in IDPA, USPSA, SASS, and other disciplines often face minimum pull weight requirements. IDPA, for example, requires a minimum of roughly 3 pounds for Stock Service Pistol division. Showing up to a match with a trigger that's 2.8 pounds because you never checked it means equipment failure at the chrono stage.
And then there's the simple diagnostic value. If a trigger feels gritty, heavy, or inconsistent, a gauge quantifies the problem. "The pull weight varies by a full pound between pulls" tells you something specific about the sear engagement or spring condition. "It feels weird" doesn't.
Mechanical vs. digital: the real differences
The first decision is whether to go mechanical or digital, and the answer depends on what you're actually doing with it.
Mechanical gauges
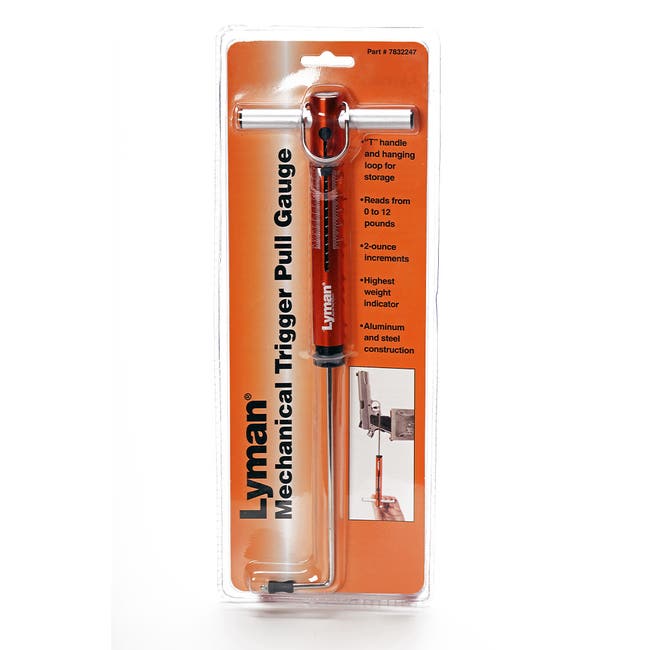
A mechanical trigger pull gauge is essentially a calibrated spring scale. You hook it to the trigger, pull until the trigger breaks, and read the peak force off a sliding indicator. The Lyman mechanical gauge is the most common example in this price range, and it's been around for decades.
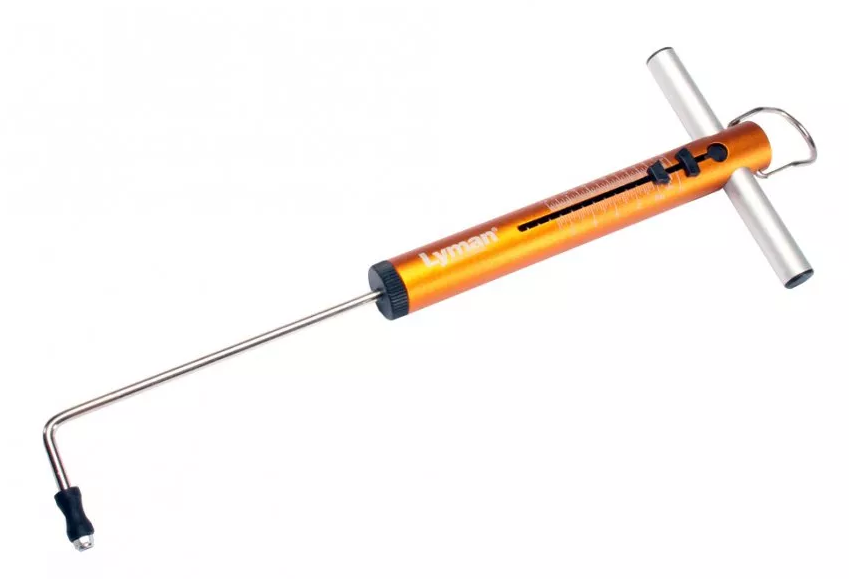
The advantages are simplicity and durability. No batteries, no electronics to fail, no calibration drift from temperature changes. You can throw one in a range bag and it'll work the same in January as it does in July. They're also intuitive; there's no menu to navigate, no mode to accidentally switch.
The downsides are resolution and repeatability. Most mechanical gauges in this price range read in 0.5-ounce or 1-ounce increments at best, and reading the scale accurately requires good eyes and consistent lighting. The bigger issue is technique sensitivity. Because you're pulling the gauge by hand, variations in pull speed and angle directly affect your readings. Two people using the same mechanical gauge on the same gun will often get readings that differ by several ounces.
The Lyman mechanical gauge reads from 0 to 12 pounds and has been a staple for decades. It's accurate enough for safety checks and rough tuning; you'll know if a trigger is 3 pounds versus 5 pounds; but it's not the tool for verifying that your competition trigger is exactly 2 pounds, 4 ounces.
Digital gauges
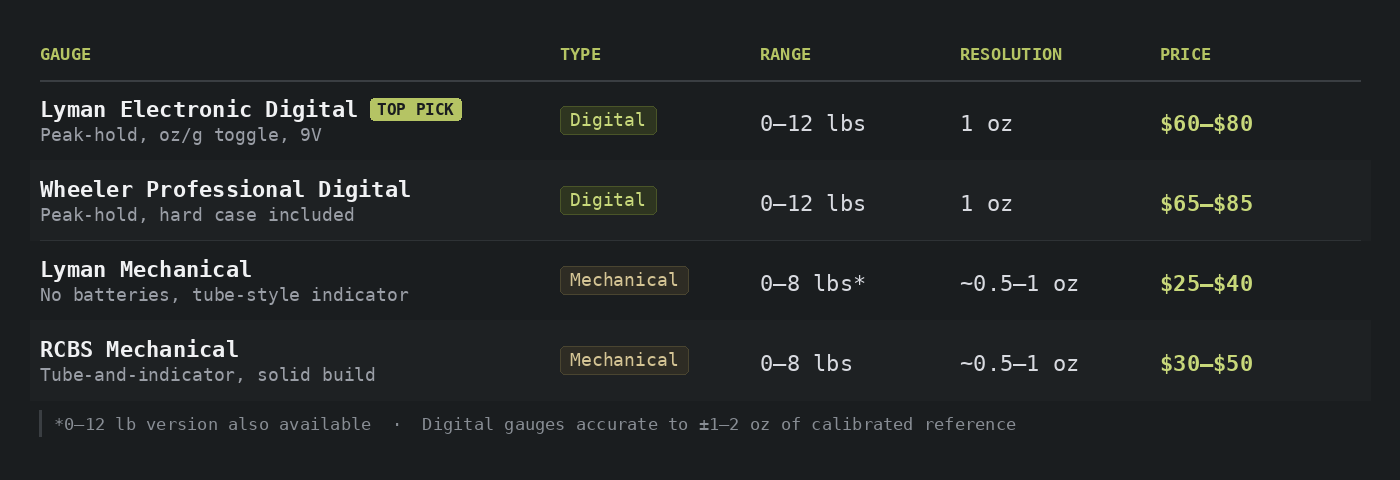
Digital gauges use a load cell (strain gauge) to measure force electronically and display the result on an LCD screen. The two dominant options under $150 are the Lyman Electronic Digital Trigger Pull Gauge and the Wheeler Professional Digital Trigger Pull Gauge.
Resolution is the immediate advantage. Both the Lyman and Wheeler digital gauges read in 1-ounce increments, which is a meaningful step up from mechanical gauges when you're doing precision work. Most digital gauges also capture and hold the peak reading automatically, so you don't have to watch the display while pulling; you just pull, break the trigger, and read the number.
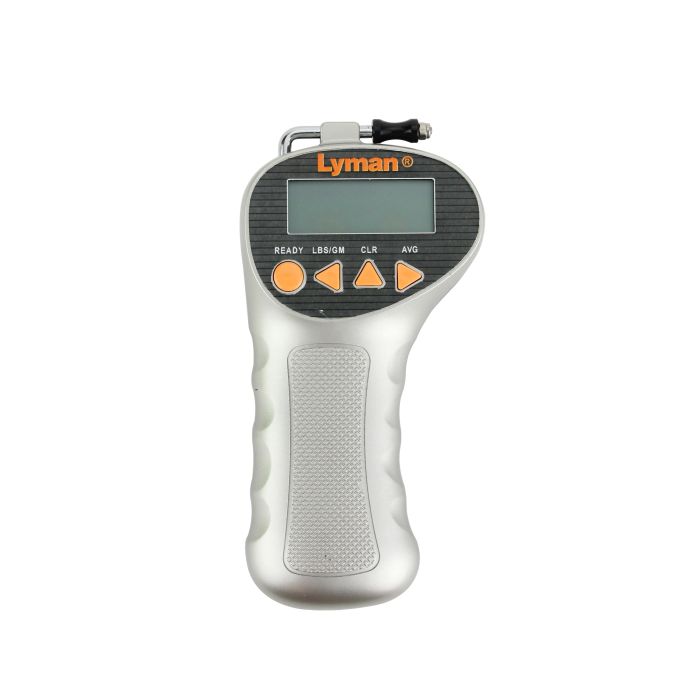
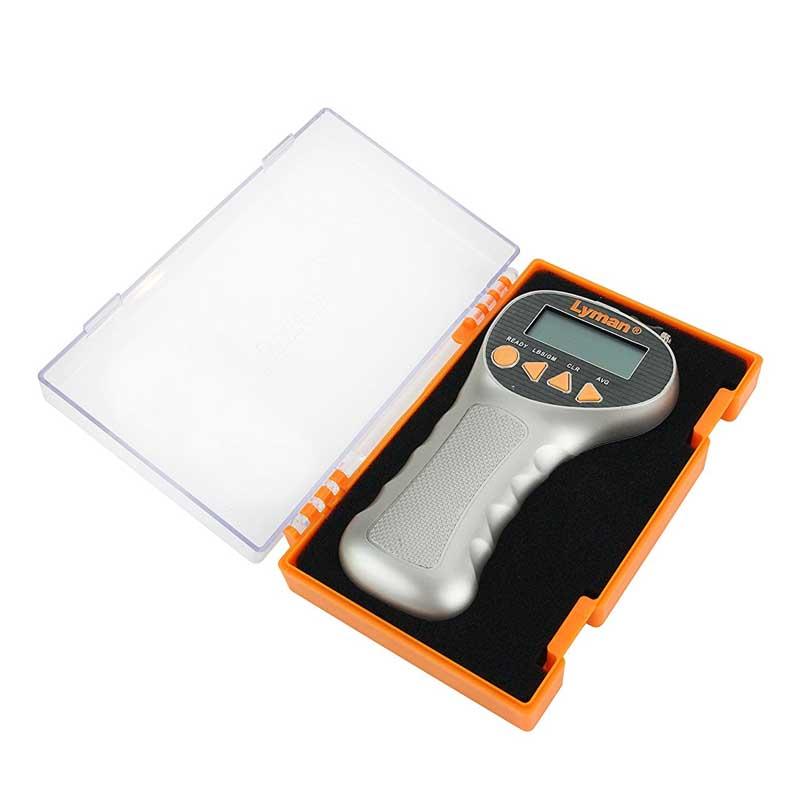
The Lyman digital gauge measures from 0 to 12 pounds and displays in ounces or grams. It has a peak-hold function and runs on a standard 9-volt battery. The build quality is solid plastic with a metal hook attachment. Multiple reviews and forum threads confirm it's accurate to within about 1-2 ounces of calibrated reference weights, which is more than adequate for nearly all gunsmithing applications.
The Wheeler digital gauge covers the same 0-12 pound range with 1-ounce resolution. It's slightly more compact than the Lyman, and the digital display is generally considered easy to read. Wheeler also includes a hard case, which is a small but appreciated detail for a tool that lives in a range bag.
The downsides of digital gauges are battery dependency (always carry a spare 9-volt), potential sensitivity to extreme temperatures, and the fact that electronics can simply fail. Load cells can also drift over time, though both the Lyman and Wheeler units are reasonably stable within their accuracy specs.
So which type?
For safety checks and general benchwork; verifying that a trigger is in the right neighborhood after a spring swap or trigger job; a mechanical gauge is fine. If you're doing precision tuning, documenting pull weights for competition, or comparing small differences between trigger groups, go digital. Most people who get serious about trigger work end up owning both, but if you're buying one, the digital Lyman or Wheeler will cover more use cases.
The gauges worth buying
Lyman electronic digital trigger pull gauge
This is the default recommendation in the sub-$150 space, and for good reason. The Lyman digital gauge has been tested extensively by reviewers and forum users, and the consensus is that it's accurate, reliable, and reasonably well-built for the price.
The range is 0 to 12 pounds in 1-ounce increments. It reads in both ounces and grams, which is useful if you're working from specs published in metric. The peak-hold function captures the highest reading during a pull, which is the number you actually care about; you want to know the force at the moment the sear breaks, not the force during the takeup or overtravel.
The gauge comes with a hook-style attachment that fits inside most trigger guards. For triggers with very narrow or curved shoes, you may need to adjust your hook placement to get a clean, centered pull. The Lyman's hook is thin enough to work with most designs, but extremely narrow target triggers on some competition pistols can be finicky.
Build quality is functional rather than premium. The body is molded plastic, the display is clear, and the controls are simple; power, zero, and a unit toggle. It runs on a 9-volt battery. Multiple long-term users report years of reliable service, though like any electronic tool, it benefits from being stored with the battery removed if you're not using it regularly.
Street price typically falls in the $60-$80 range, making it one of the better values in the category.
Wheeler professional digital trigger pull gauge
The Wheeler is the Lyman's direct competitor, and the two are close enough in performance that the choice often comes down to personal preference and availability.
Same 0-12 pound range, same 1-ounce resolution, same peak-hold function. The Wheeler's display is slightly different in layout, and some users find it marginally easier to read, though this is subjective. Wheeler includes a hard storage case, which the Lyman doesn't; a minor detail, but nice for keeping the tool protected.
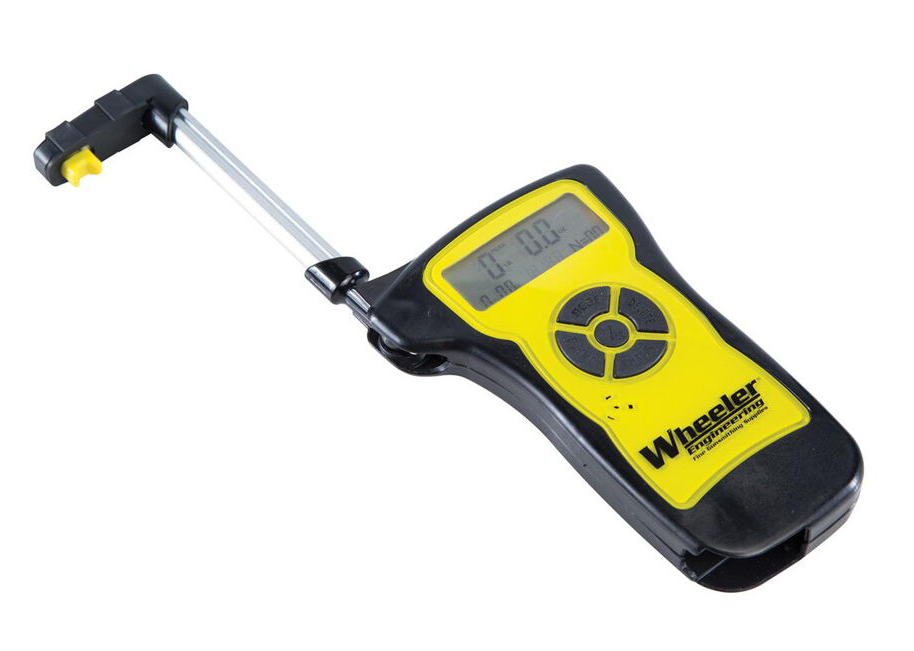
The Wheeler's hook attachment is similar to the Lyman's. Both work well on standard triggers. The Wheeler may have a very slight edge in build feel according to some forum comparisons, but the accuracy difference between the two is negligible in real-world use. Side-by-side testing on forums like The High Road and Sniper's Hide consistently shows the two gauges reading within 1-2 ounces of each other on the same trigger, which is within the expected tolerance for both units.
Street price is usually in the $65-$85 range. If you can find one for less than the Lyman, buy it. If the Lyman is cheaper, buy that. You won't be disappointed either way.
Lyman mechanical trigger pull gauge
The old-school option. The Lyman mechanical gauge has been in production for a very long time, and it's still a perfectly valid tool for what it does.
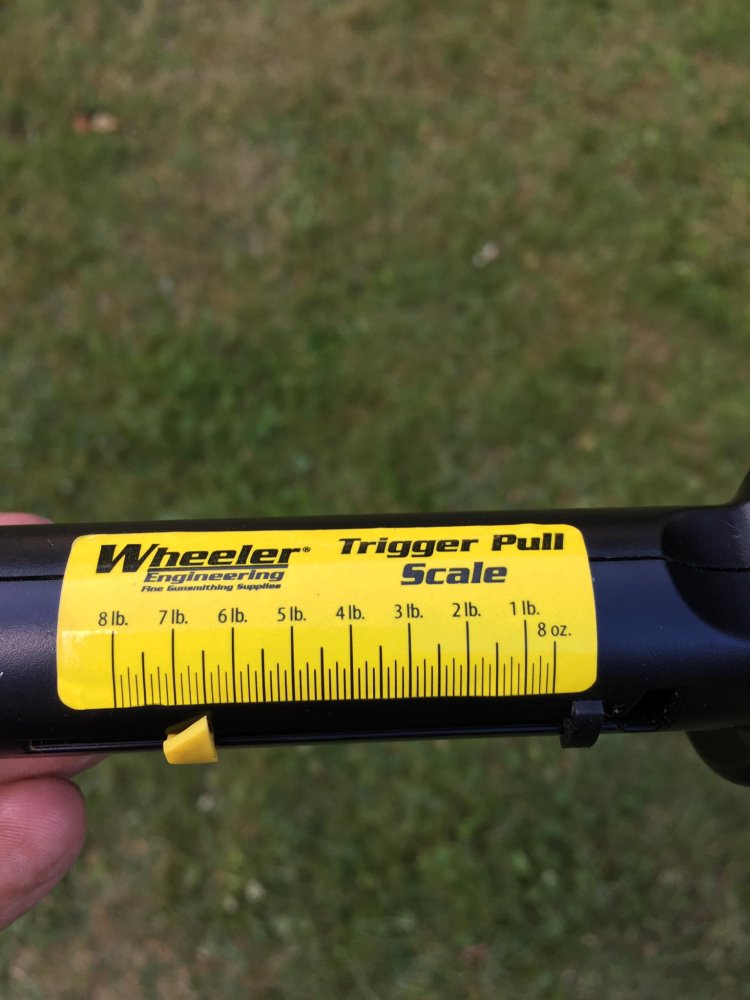
The range is 0 to 8 pounds on the standard model (there's also a 0-12 pound version). It uses a tube-style body with a sliding indicator that marks the peak force. You hook it to the trigger, pull smoothly, and read where the indicator stopped.
Accuracy is adequate for safety checks and rough tuning. You'll reliably distinguish between a 3-pound pull and a 5-pound pull. You won't reliably distinguish between 3 pounds 4 ounces and 3 pounds 8 ounces. For many applications, that level of precision is enough.
The mechanical gauge's real advantage is zero maintenance. No batteries, no electronics, no calibration concerns beyond the factory spring. It works in any temperature, any humidity, and it's nearly impossible to break. If you want a gauge that lives permanently in a range bag and always works when you grab it, this is the one.
Street price is typically $25-$40, making it the cheapest option on this list and a reasonable add-on even if you already own a digital gauge.
RCBS trigger pull gauge
RCBS makes a mechanical trigger pull gauge that competes directly with the Lyman mechanical. It covers a 0-8 pound range and uses a similar tube-and-indicator design. Build quality is good; RCBS has a strong reputation for tooling; and accuracy is comparable to the Lyman mechanical.
The RCBS gauge is less commonly discussed in forums than the Lyman or Wheeler, but users who own one generally report satisfaction. It's a solid alternative if you find it at a good price, typically in the $30-$50 range. The main reason it gets less attention is simply market share; Lyman and Wheeler dominate the conversation, and the RCBS doesn't do anything notably different.
What about the cheap Amazon gauges?
You'll find trigger pull gauges on Amazon for $15-$25 from brands you've never heard of. Some of these are rebranded fishing scales with a hook attached. Others are low-cost mechanical gauges of uncertain calibration.
The problem isn't that they're all terrible; some of them actually read reasonably close to the name-brand options. The problem is consistency. Without a known calibration standard, you have no way to verify that a $15 gauge is reading accurately, and the whole point of a trigger pull gauge is to give you a number you can trust. If the number might be off by half a pound, you've spent money on a tool that doesn't do its job.
If budget is extremely tight, a cheap mechanical gauge is better than no gauge at all. But the Lyman mechanical at $25-$40 is such a modest investment that it's hard to justify the risk of an unknown-quality alternative.
How to get consistent readings
Owning a gauge is step one. Getting reliable, repeatable numbers out of it is step two, and this is where most people introduce error.
Technique matters more than the gauge
The single biggest source of measurement variation isn't the gauge; it's the person using it. Pull speed, pull angle, and where the hook contacts the trigger shoe all affect the reading.
Pull speed is the most critical variable. A fast, jerky pull will read higher than a slow, smooth pull on the same trigger. This is because of the way inertia and friction interact during the pull stroke. The standard technique is a slow, steady increase in force; think of it like slowly adding weight to a scale, not yanking on a rope. The pull should take roughly 2-3 seconds from initial contact to break.
Pull angle matters because a gauge pulled at an angle to the trigger's natural arc of travel introduces side loading, which adds friction and skews the reading high. The gauge should be pulled straight back, parallel to the bore axis, as closely as possible. This is easier said than done, especially on pistols with curved trigger shoes. Do your best to approximate a straight-back pull.
Hook placement on the trigger shoe should be consistent between measurements. The center of the trigger shoe is standard. Placing the hook near the top or bottom of the shoe changes the leverage and will give you different numbers on the same trigger.
Take multiple readings
A single measurement is a data point. Five measurements are useful data. Take at least five pulls, throw out the highest and lowest, and average the remaining three. If your readings vary by more than about 4 ounces across five pulls, your technique needs work; or the trigger actually has an inconsistency worth investigating.
Bench notes: what a good measurement session looks like
Clear the gun. Remove the magazine, lock the action open, visually and physically verify the chamber is empty. Then close the action and prepare to measure.
For a semi-auto, you'll need to cock the action between each measurement. On an AR-15, pull the charging handle. On a pistol, rack the slide. On a bolt action, lift and close the bolt. On a revolver, you can measure both single-action (cock the hammer manually) and double-action (let the gauge pull through the full DA stroke); just note which one you're recording.
Zero the digital gauge before your first pull. Most digital gauges have a tare/zero button. Press it with the gauge hanging free, no load applied.
Hook the gauge to the center of the trigger shoe. Hold the gun firmly in one hand (or in a vise if you have one; more on that below) and pull the gauge straight back with the other. Slow, steady pressure. When the trigger breaks, stop pulling and read the display.
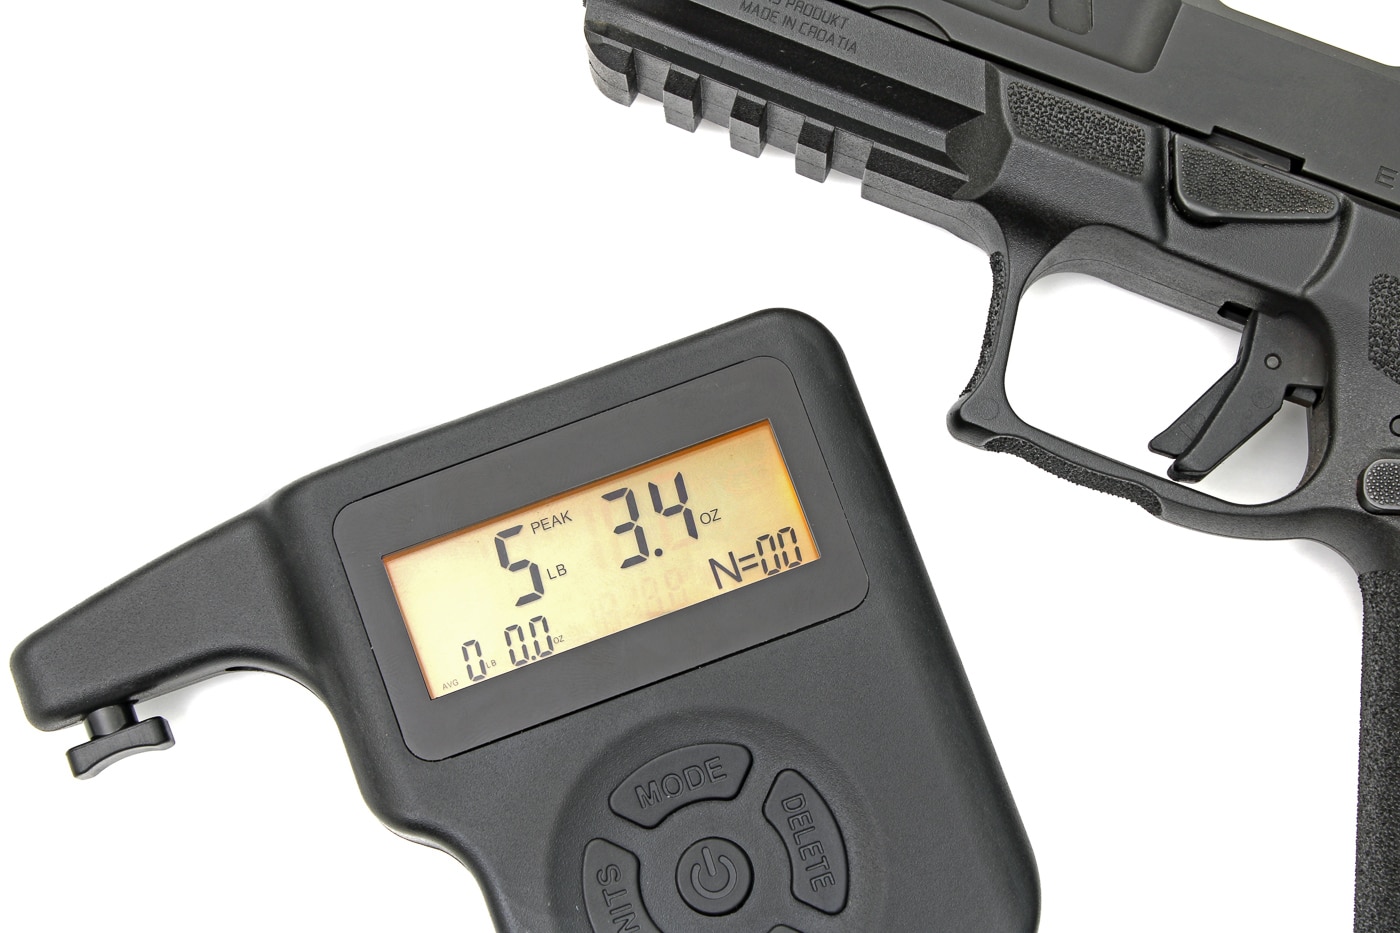
Record the number. Cock the action. Repeat. Five times minimum.
A gun vise or cradle makes this significantly easier and more repeatable. Holding a pistol in one hand while pulling a gauge with the other introduces wobble and angle variation. If you do a lot of trigger work, a simple gun vise is worth the investment. Tipton, Wheeler, and CTK all make affordable options.
Temperature and battery considerations for digital gauges
Load cells can be affected by temperature extremes. If your gauge has been sitting in a car trunk in 100-degree heat or 10-degree cold, let it acclimate to room temperature for 15-20 minutes before measuring. This isn't paranoia; load cell drift from temperature is a documented phenomenon, and while the effect is small within the Lyman and Wheeler's accuracy specs, it's free insurance to let the gauge stabilize.
Replace the 9-volt battery at least once a year if you use the gauge regularly. A low battery can cause erratic readings before the low-battery indicator triggers. Fresh battery, fresh confidence in your numbers.
What the numbers actually tell you
A trigger pull weight is one data point about trigger quality, not the whole picture. A 3-pound trigger can feel terrible if it's gritty, and a 5-pound trigger can feel great if it's clean and crisp. The gauge tells you weight. Your finger tells you character.
That said, pull weight is the one trigger characteristic you can objectively measure without specialized equipment, so it carries diagnostic value beyond just "how heavy is it."
Expected ranges by platform
These are general ranges for factory triggers. Aftermarket triggers and custom work will vary.
AR-15 mil-spec triggers typically run 5.5 to 8.5 pounds. There's significant variation even within mil-spec parts. Aftermarket single-stage triggers from companies like Timney, Geissele, and LaRue commonly fall in the 2.5 to 4.5 pound range. Two-stage triggers will show a lighter first stage (often 1.5-2.5 pounds) and a total pull weight at the second stage break.
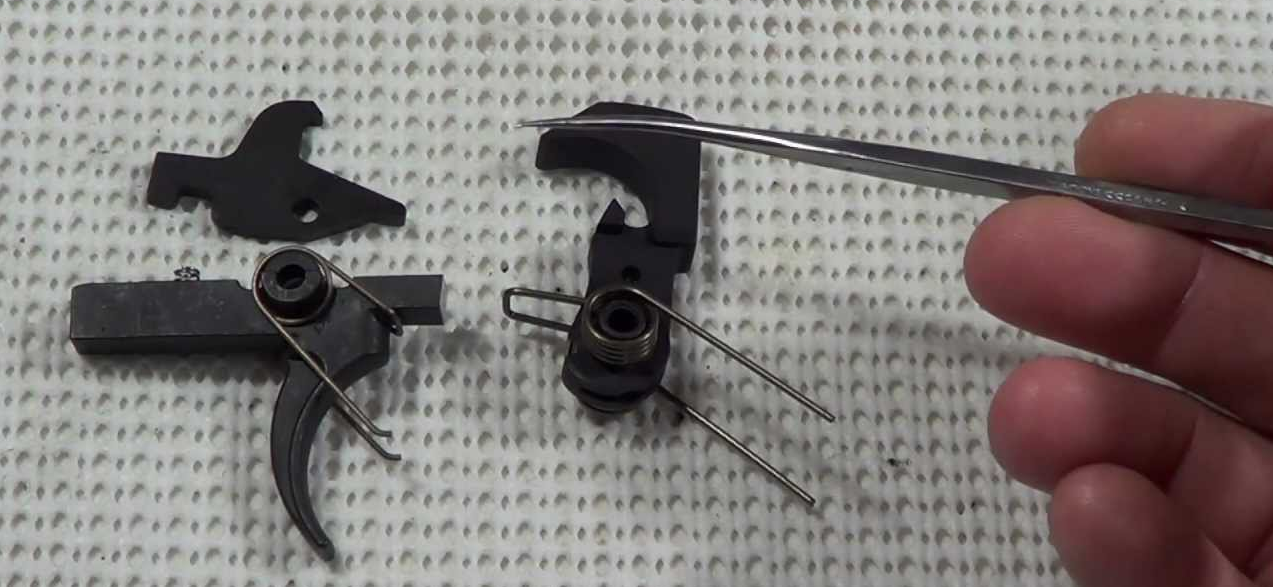
Glock factory triggers generally measure 5 to 6.5 pounds, depending on the model and generation. The Gen 5 trigger is typically slightly lighter than earlier generations. Aftermarket connectors and spring kits can bring this down to the 3.5-4.5 pound range.
1911 factory triggers vary enormously by manufacturer. A basic GI-style trigger might be 5-7 pounds. A quality production 1911 from a mid-tier manufacturer usually comes in at 4-5 pounds. Custom shop 1911s often run 3.5-4 pounds, and dedicated competition guns can go as low as 2-2.5 pounds.
Bolt-action rifles span a wide range. Hunting rifles from Remington, Savage, and Ruger typically ship at 3-5 pounds. Precision rifles with aftermarket triggers (Timney, TriggerTech, Jewell) commonly run 1.5-2.5 pounds. Going below 1.5 pounds on a bolt gun intended for field use is generally inadvisable; cold fingers and adrenaline don't mix well with ultralight triggers.
Revolvers in double-action mode typically measure 10-14 pounds for factory triggers. Single-action mode on the same gun usually falls between 3.5 and 5.5 pounds. If you're measuring a revolver's DA pull, make sure your gauge's range covers it; the 0-8 pound Lyman mechanical won't get there.
When a number is a red flag
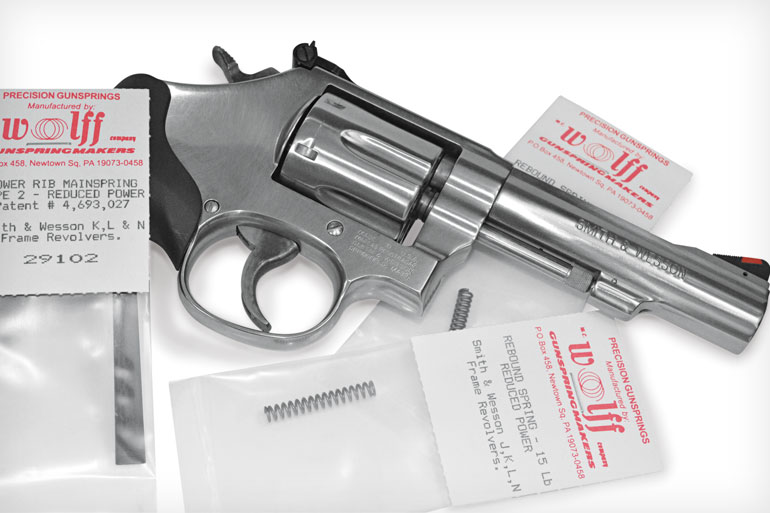
A trigger that measures significantly lighter than its expected range after work has been done deserves scrutiny. If you installed a reduced-power spring kit in a 1911 and the trigger now measures 1.5 pounds, that's light enough that the sear engagement may be marginal. Function-check it thoroughly: cock the hammer, push forward on it with your thumb, and see if it falls. Bump the back of the slide with your palm. If the hammer follows at any point, the trigger is too light or the sear engagement is too shallow, regardless of what the gauge says.
A trigger that reads inconsistently; 4 pounds on one pull, 6 pounds on the next; suggests a mechanical problem. Possible causes include a worn sear, a rough engagement surface, a spring that's binding or kinked, or a trigger pin that's walking. The gauge won't diagnose the specific cause, but it'll tell you something's wrong.
Common mistakes and troubleshooting
Measuring with a dirty gun
Carbon buildup and dried lubricant on trigger components add friction, which adds to your pull weight reading. If you're measuring to evaluate a trigger job or new parts, clean the fire control group first. If you're measuring to see what the trigger actually does in service conditions, measure it as-is. Just know which question you're answering.
Inconsistent pull speed
This is the number-one source of user error. If your five readings span more than 6-8 ounces, your pull speed is probably varying too much. Slow down. The pull should be boring; a gradual, steady ramp-up of force until the break. If you're jerking the gauge, your readings will be high and inconsistent.
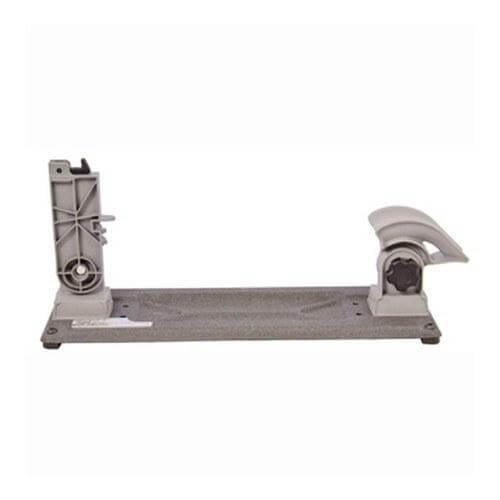
Wheeler Engineering Delta Series Vise Deals
Prices may change. May contain affiliate links.
Wrong hook placement
Hooking the gauge at the tip of the trigger (far from the pivot) gives a lighter reading than hooking it at the base (close to the pivot). This is basic lever mechanics. Always hook at the center of the trigger shoe where your finger would naturally rest. If you're comparing two guns or tracking changes over time, consistent hook placement is essential.
Forgetting to zero the digital gauge
Digital gauges can show a small offset when powered on, especially if the hook or attachment is adding weight. Zero the gauge before every measurement session. It takes two seconds and eliminates a potential source of error.
Measuring through the entire DA pull on a revolver and expecting SA numbers
This sounds obvious, but it comes up in forum threads regularly. If you hook a gauge to a double-action revolver and pull through the full stroke, you're measuring the DA pull weight; the force required to cock the hammer and release it. That number will be 10+ pounds on most revolvers. If you want the SA weight, cock the hammer first, then measure the pull from the SA position. These are two completely different measurements on the same gun.
Tools and accessories that help
Beyond the gauge itself, a few items make trigger measurement easier and more repeatable.
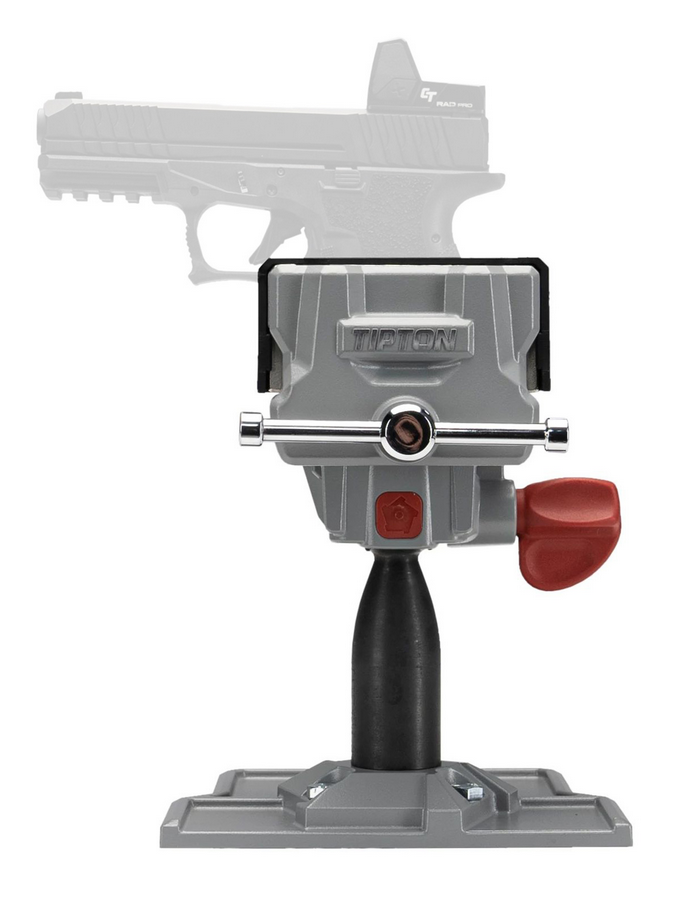
A gun vise is the single most useful accessory for this job. Holding a gun steady with one hand while pulling a gauge with the other is awkward, and the wobble introduces measurement error. The Tipton Best Gun Vise and the Wheeler Engineering Delta Series Vise are both popular options that hold rifles and handguns securely without marring the finish. If you don't want to buy a vise, even a sandbag rest helps; anything that lets you stabilize the gun so you can focus on a clean, consistent pull.
A set of calibration weights is useful if you want to verify your gauge's accuracy. You can hang known weights from the gauge's hook and check that the display matches. A set of precision weights in the 1-5 pound range covers the most common trigger weights. This isn't something you need to do before every session, but checking once when you first get the gauge (and annually thereafter) builds confidence in your numbers.
A notebook or spreadsheet for recording measurements is more useful than people think. Write down the gun, the date, the trigger configuration, and your five readings plus the average. Six months from now, when you're wondering if that trigger has changed, you'll have the data instead of a vague memory.
For anyone doing actual trigger work (polishing, stoning, adjusting), the gauge is just one tool in the chain. You'll also want a set of India stones or ceramic stones for sear work, slave pins for reassembly, and a good set of roll pin punches. But those are topics for their own articles.
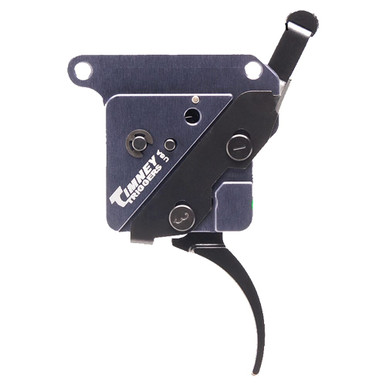
Timney Trigger Deals
Prices may change. May contain affiliate links.
Digital gauge care and longevity
Digital trigger pull gauges are reasonably durable, but they're still electronic instruments. A few habits will extend their useful life.
Remove the battery when storing the gauge for more than a couple of weeks. A leaking 9-volt will destroy the battery compartment contacts, and replacing those is more annoying than it should be. Store the gauge in its case (if it came with one) or in a padded pouch. The load cell is the most sensitive component, and while it can handle normal use, dropping the gauge onto concrete isn't a great longevity strategy.
Avoid storing the gauge in environments with high humidity. Moisture and electronics don't mix, and corrosion on the load cell contacts will cause erratic readings. A small silica gel packet in the storage case is cheap insurance.
If your digital gauge starts giving readings that seem off; consistently high, consistently low, or wildly inconsistent despite good technique; try a fresh battery first. If that doesn't fix it, check it against a known weight. If it's reading a 2-pound weight as 2.5 pounds, the load cell may have drifted or been damaged. At that point, replacement is usually more practical than repair for a sub-$100 tool.
Specific checks to run after trigger work
This is where the gauge earns its keep. After any trigger modification; spring swap, trigger group replacement, sear adjustment, connector change; run through these checks with the gauge as part of your verification process.
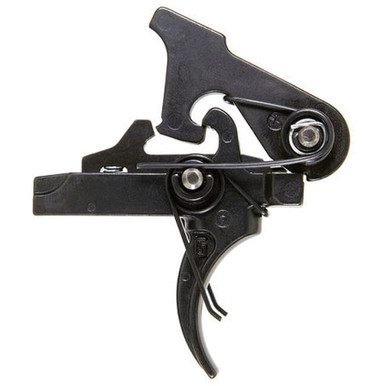
Geissele Trigger Deals
Prices may change. May contain affiliate links.
Baseline pull weight
Measure the pull weight five times, average the middle three readings. Compare to the expected range for the trigger you installed. If the manufacturer says 3.5 pounds and you're reading 5 pounds, something isn't right; possibly a binding pin, an incorrectly installed spring, or parts that aren't compatible.
Consistency check
Those five readings should cluster tightly. On a quality trigger with a digital gauge and good technique, you should see a spread of no more than about 4 ounces across all five readings. A wider spread suggests a mechanical issue; rough engagement surfaces, a spring that's catching on something, or parts that aren't mating properly.
Safety checks that go beyond the gauge
The gauge confirms pull weight. These manual checks confirm function:
Cock the action. With the safety engaged (if applicable), pull the trigger firmly. The hammer or striker should not fall. Disengage the safety and verify the trigger still needs to be pulled to fire; some poorly fitted safeties can cause the hammer to follow when the safety is disengaged.
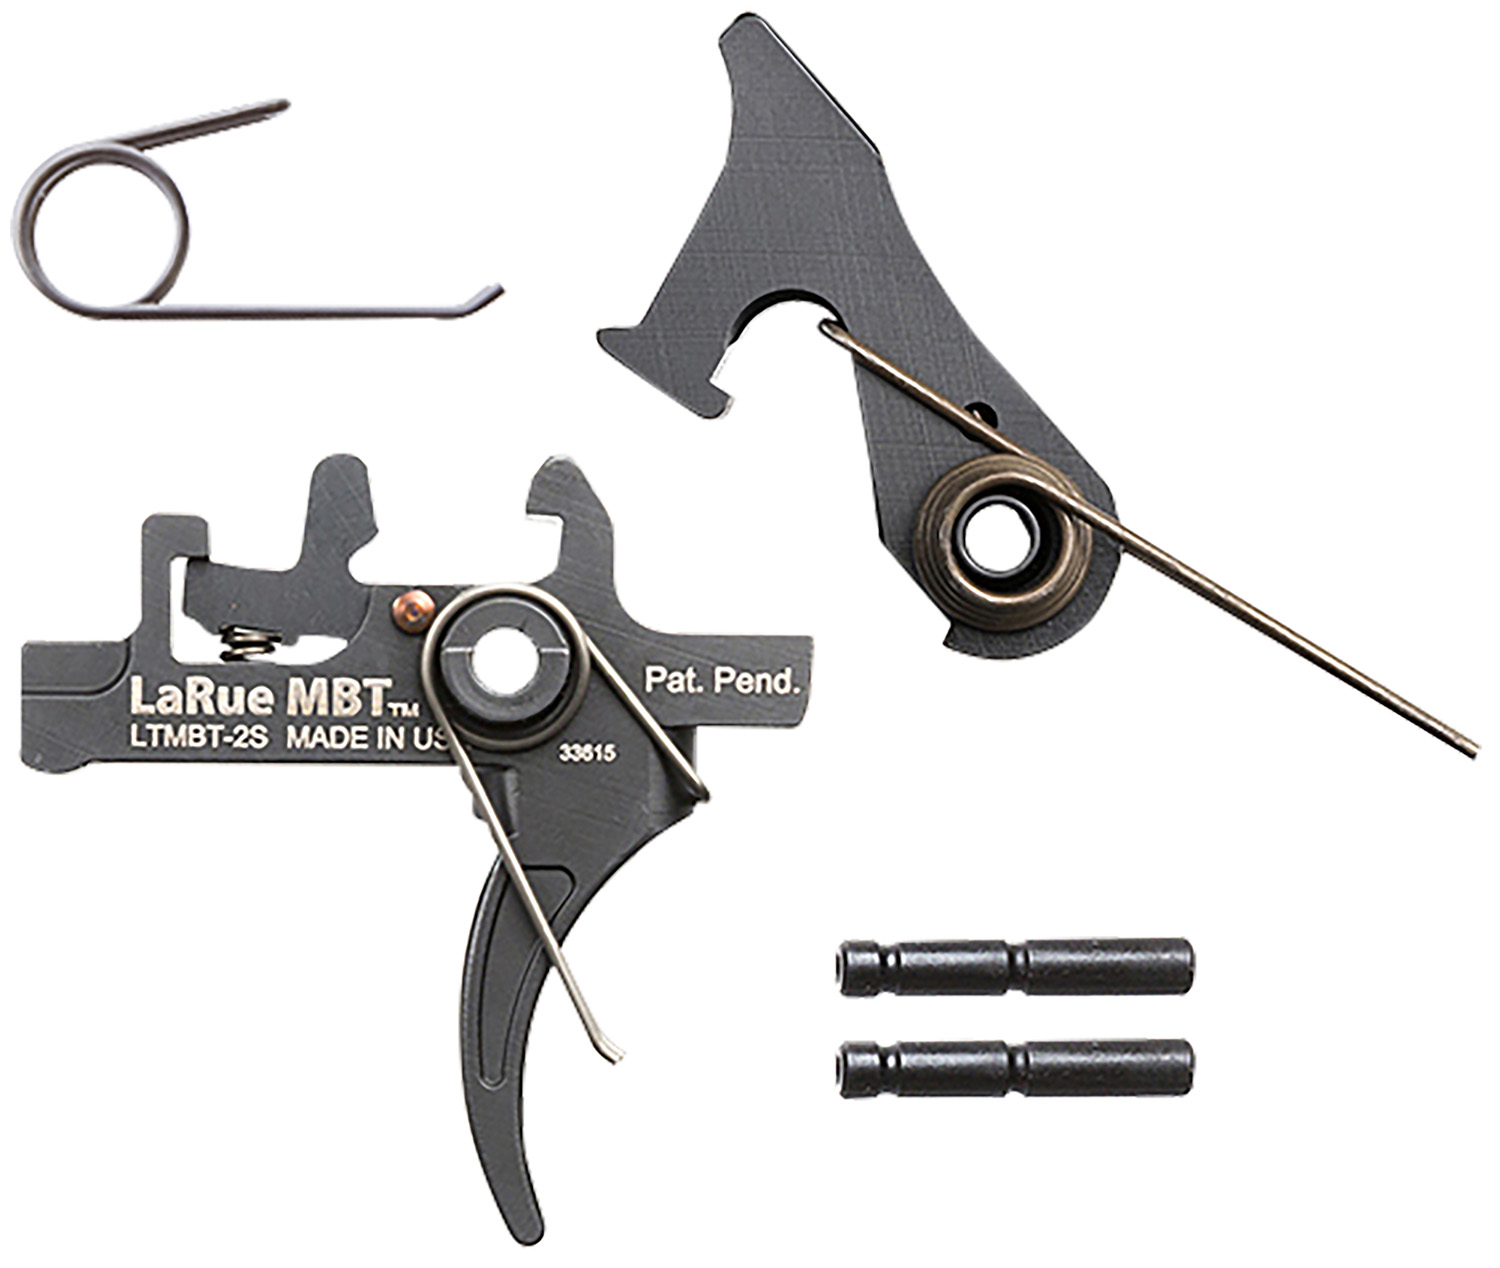
LaRue Trigger Deals
Prices may change. May contain affiliate links.
Cock the action. Push forward on the hammer or striker with your thumb, firmly. It should not move off the sear. If it does, the sear engagement is too shallow or the engagement surfaces are incorrectly angled. This is a stop-everything problem. Do not fire the gun until this is resolved.
For AR-15s specifically: with the action closed on an empty chamber, pull the trigger (the hammer falls). Hold the trigger back. Cycle the charging handle to reset the hammer. Slowly release the trigger. You should feel and hear the disconnector release the hammer to the sear (a distinct click). If the hammer follows the bolt carrier forward during the charging handle pull, you have a follow problem. If there's no click on trigger reset, the disconnector isn't engaging properly. Either condition means the trigger isn't safe to fire.
For semi-auto pistols: rack the slide to cock the action. Pull the trigger (hammer/striker falls on empty chamber). Hold the trigger back. Rack the slide again. Slowly release the trigger. You should feel the reset click. Pull the trigger again; the action should fire again. This confirms the disconnector is working and the trigger resets properly.
First range trip verification
After bench checks pass, the first range trip with a modified trigger should include deliberate testing. Load only two or three rounds in the magazine. Fire them at a normal cadence and observe for any doubling (two shots from one trigger pull) or hammer follow (the gun fires when the slide/bolt closes without a trigger pull). If either occurs, stop shooting immediately. The trigger work needs to be revisited.
TriggerTech Trigger Deals
Prices may change. May contain affiliate links.
Also pay attention to whether the trigger feels the same under recoil as it did on the bench. Occasionally, a trigger that passes all bench checks will behave differently under the dynamic forces of actual firing. This is uncommon with quality parts installed correctly, but it's why the first range trip is a test session, not a casual plinking day.
When the gauge says "go see a gunsmith"
A trigger pull gauge is a diagnostic tool, not a repair tool. There are situations where the numbers it gives you should prompt a trip to a professional rather than further DIY work.
If a trigger is significantly lighter than expected and you didn't intentionally lighten it, something has worn or changed. Sear surfaces wear over thousands of rounds, and a trigger that was safely set at 3 pounds from the factory might have worn to 2 pounds with reduced sear engagement. A gunsmith can measure the actual sear engagement depth and determine if the parts need replacement.
If pull weight is inconsistent and you've ruled out technique as the variable, the cause is internal; and diagnosing whether it's a worn sear, a bad spring, a trigger pin issue, or something else requires disassembly and inspection of the engagement surfaces. If you're comfortable with that level of work, go for it. If you're not sure what you're looking at once the parts are out, a smith will save you time and potentially save the parts from being damaged by inexperienced stoning or fitting.
If you've installed a trigger and it passes your bench checks but something just feels wrong; a hitch in the pull, an unusually long reset, a vague break point; trust that instinct. The gauge measures weight. It doesn't measure the quality of the break, the crispness of the reset, or the smoothness of the takeup. Those qualities matter for both safety and shootability, and they require hands-on evaluation by someone who knows what correct feels like.
The bottom line on which to buy
For most people doing their own trigger work, safety checks, and occasional competition prep, the Lyman Electronic Digital Trigger Pull Gauge is the best value under $150. It's accurate enough for any practical purpose, the peak-hold function makes measurement easy, and it's been proven reliable by thousands of users over many years.
The Wheeler Professional Digital Trigger Pull Gauge is an equally good choice. Buy whichever one is in stock and cheaper when you're ready to order. The performance difference between the two is smaller than the measurement variation introduced by your technique.
If you want a backup or a no-fuss gauge for the range bag, add the Lyman mechanical gauge. At $25-$40, it's cheap enough to own alongside a digital gauge, and it'll never run out of batteries.
The real investment isn't the gauge; it's learning to use it consistently. Five careful measurements with a $30 mechanical gauge will tell you more than one sloppy measurement with a $150 digital unit. Take your time, control your variables, record your numbers, and the gauge will pay for itself the first time it catches a problem you would have missed by feel alone.