You've put a few thousand rounds of .22 LR through your can and it's starting to sound different. Maybe it's a little louder. Maybe the end cap is stuck and took a strap wrench to remove. Maybe you weighed it on a kitchen scale and it's picked up two ounces since you bought it. That's lead fouling, unburned powder residue, and carbon; the unholy trinity of rimfire suppressor ownership; and if you don't deal with it, you're going to have a suppressor that's welded itself shut from the inside.
Centerfire suppressors largely take care of themselves. The higher pressures and temperatures burn off most fouling, and the vast majority of centerfire cans are sealed (non-user-serviceable) by design. Rimfire is a completely different animal. The .22 LR cartridge is dirty by nature, it's lead-bullet, wax-lubricated, and runs at pressures and temperatures too low to self-clean. Every round deposits a thin film of lead and carbon on your baffles, and over hundreds or thousands of rounds, that film becomes a thick, crusty layer that degrades performance and can eventually seize components together permanently. This is why almost every rimfire suppressor on the market is user-serviceable with removable baffles. The manufacturers know you're going to need to clean it. They designed it that way on purpose.
The good news: cleaning a rimfire can isn't hard. It's messy, it takes some patience, and the first time you do it you'll be mildly horrified at what comes out. But the process is straightforward once you understand what works, what doesn't, and what will actually damage your baffles. Here's the full breakdown.
Why rimfire cans get so dirty (and why it matters)
The core issue is the ammunition itself. Standard .22 LR uses an unjacketed lead bullet with a wax or grease lubricant. When that bullet passes through your suppressor, tiny particles of lead shave off and deposit on every surface the gas touches. The priming compound in rimfire cartridges also produces more residue than centerfire primers. Add in unburned powder, .22 LR doesn't burn particularly clean, and you've got a cocktail of lead, carbon, wax, and primer residue coating every baffle, every blast chamber wall, and every thread interface in your suppressor.
At low round counts, this is cosmetic. The can still works fine. But lead fouling is cumulative; it builds on itself. A thin layer becomes a thick layer. A thick layer starts to close the gaps between baffles and the tube wall. Eventually the baffles can become so fouled that they won't separate from each other or from the tube. You'll see forum posts from people who waited 5,000+ rounds before their first cleaning and had to send the suppressor back to the manufacturer because the baffles were essentially welded in place by lead.
The performance degradation is real too. A heavily fouled rimfire can will be measurably louder, not dramatically, but noticeably. The fouling changes the internal geometry that the baffles were designed around. Gas doesn't flow the way the engineers intended. You lose a few dB. More importantly, a fouled can is heavier (sometimes significantly, an ounce or two of lead adds up), and that extra weight is hanging off the end of what's probably a lightweight .22 LR host.
The practical reality is that you should be cleaning your rimfire suppressor every 500 to 1,000 rounds. Some manufacturers say every 500. Some say you can push it to 1,500 or 2,000. The sweet spot for most people is around every 1,000 rounds, or whenever you notice the end cap getting stiff. If you shoot a lot of .22, and suppressed .22 is so fun that most people shoot a lot of .22, that means you're cleaning your can a few times a year.
Teardown: getting the baffles out
Before you can clean anything, you need to disassemble the suppressor. Every user-serviceable rimfire can is a little different, but the general architecture is the same: a tube, an end cap (or front cap), a series of baffles that stack inside the tube, and a mount or rear cap that threads onto your host barrel.
The basic procedure
Unscrew the end cap first. On most rimfire cans, the Dead Air Mask HD, SilencerCo Sparrow 22, SilencerCo Switchback 22, Rugged Oculus, YHM Resonator R2, and similar, the end cap is at the muzzle end. It threads off by hand or with light tool assistance. If it's stuck, a strap wrench (the rubber kind you'd use on an oil filter) works well. Don't use pliers or channel locks directly on the suppressor tube, you'll mar the finish and potentially deform the tube.
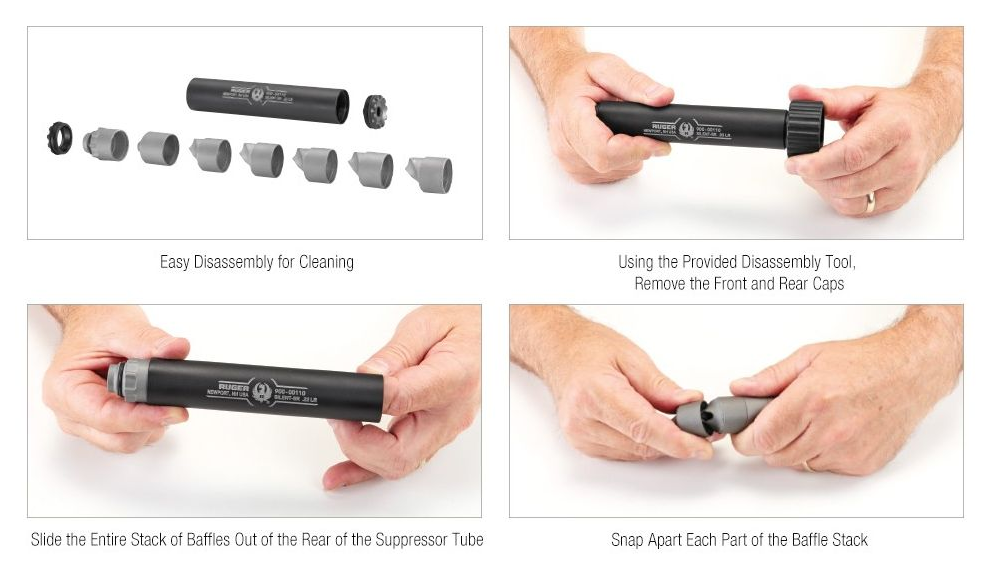
Once the end cap is off, the baffles should slide out. Some designs use a baffle stack that comes out as a single unit (the Dead Air Mask HD uses a monolithic core, for instance, though the individual baffles are still separate pieces stacked together). Others have truly individual baffles that slide out one at a time. Pay attention to the orientation and order. Most baffles are directional, they have a specific "blast side" and "muzzle side", and some stacks use baffles of different sizes or shapes at different positions. Take a photo with your phone before you pull anything apart the first time.
Silencer Central's Banish series and a few other designs use a baffle removal tool, a threaded rod that screws into the baffle stack from the back and lets you push or pull the whole stack out at once. If your suppressor came with a specific tool, use it. These tools exist because the manufacturer knows the baffles will get stuck.

When baffles won't come out
This is the most common first-timer panic moment. You unscrew the end cap, tip the can over, and nothing comes out. The baffles are stuck.
Don't force them. Seriously. Hammering a dowel rod through the bore to push baffles out is a last resort, not a first step. Instead, soak the entire assembled tube (end cap removed) in a solvent that attacks lead. Let chemistry do the work. We'll cover solvents in detail below, but a 24-hour soak in a lead-dissolving solution will usually free stuck baffles without any mechanical force.
If you're dealing with a truly seized suppressor, one that's had thousands of rounds without cleaning, you may need to soak, tap gently with a wooden dowel, soak again, and repeat. In extreme cases, the manufacturer can help. Dead Air, SilencerCo, and most reputable companies will clean and service your suppressor if you send it in, though there may be a fee and a turnaround time.
The lesson here: don't wait too long between cleanings. The difference between a 500-round cleaning and a 3,000-round cleaning is the difference between baffles sliding out with a gentle shake and baffles requiring a week of soaking and creative profanity.
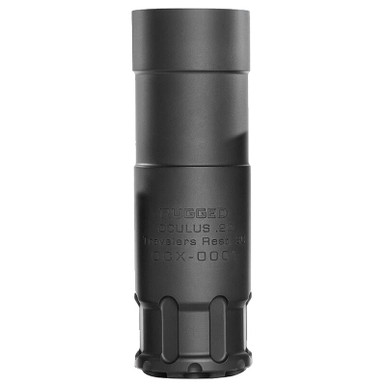
Rugged Oculus Deals
Prices may change. May contain affiliate links.
Baffle materials and what that means for cleaning
Not all baffles are created equal, and the material your baffles are made from dictates which cleaning methods and solvents are safe to use. Get this wrong and you can destroy your baffles. This is where most first-time buyers get confused.
Stainless steel baffles
Most modern rimfire suppressors use stainless steel baffles. The Dead Air Mask HD, SilencerCo Sparrow 22, Rugged Oculus, and many others are all-stainless or mostly stainless construction. Stainless steel is the most forgiving material to clean. You can use aggressive solvents, ultrasonic cleaners, wet tumblers, and mechanical scraping without worrying much about damage. Stainless won't be harmed by most common cleaning chemicals, and it's hard enough that a brass brush or pick won't scratch it in any meaningful way.
Aluminum baffles
Some rimfire cans use aluminum baffles to save weight. The thing nobody tells you: aluminum baffles require significantly more care during cleaning. You absolutely cannot use strong alkaline (high-pH) solutions on aluminum. This includes common degreasers like Simple Green (the original purple-cap formula is alkaline and will etch aluminum), many oven cleaners, and lye-based solutions. These will chemically attack the aluminum, pitting the surface and potentially weakening the baffles structurally.
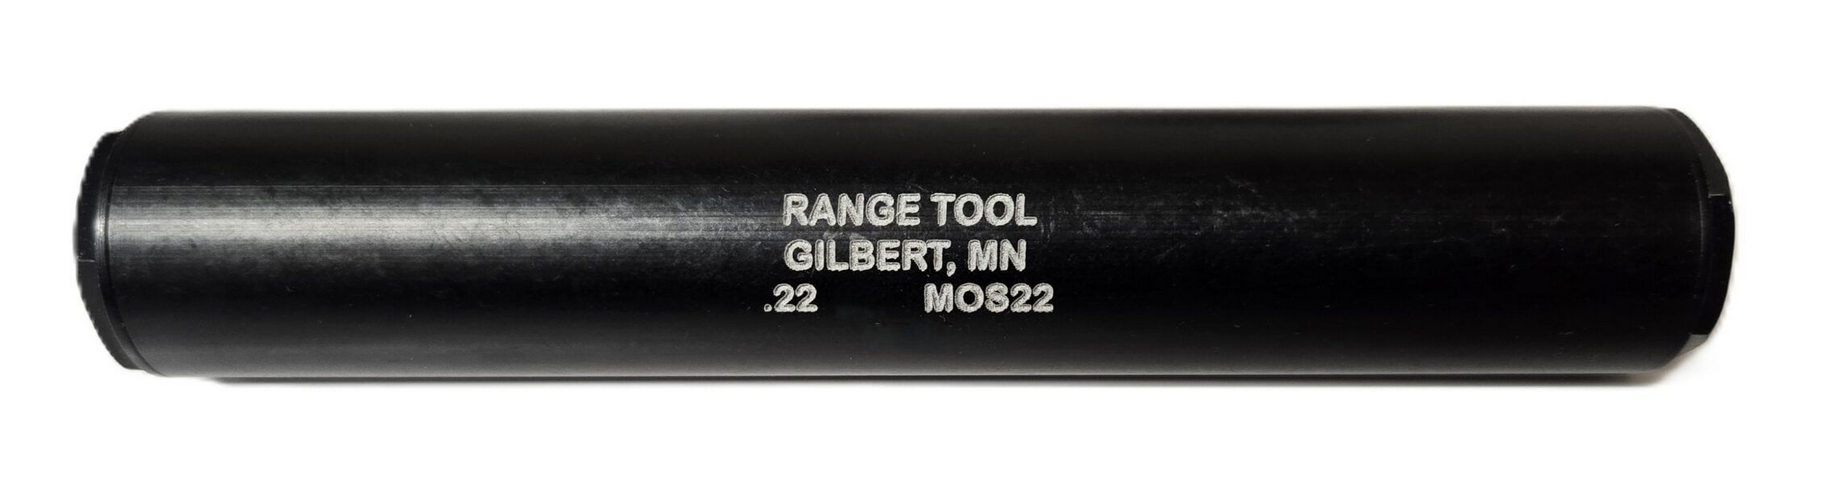
For aluminum baffles, stick with pH-neutral or mildly acidic solutions. White vinegar works. Hydrogen peroxide mixed with vinegar works. Purpose-built suppressor cleaning solutions that are labeled aluminum-safe work. CLR (Calcium Lime Rust remover) is popular in the community and is generally considered aluminum-safe, though you should limit soak times and rinse thoroughly. When in doubt, check your suppressor's manual or contact the manufacturer.
If you're not sure whether your baffles are aluminum or stainless, a magnet won't help, stainless steel (specifically the austenitic grades like 304 and 316 commonly used in suppressors) is also non-magnetic. Check the manufacturer's specs. Weight is a clue: if your rimfire can weighs under 4 ounces, there's a good chance aluminum is involved.
Titanium components
Some suppressors use titanium tubes or end caps, even if the baffles themselves are stainless or aluminum. Titanium is generally safe with most cleaning solvents, but avoid anything containing hydrofluoric acid (which you're unlikely to encounter in normal cleaning products, but it's worth mentioning). Titanium is also safe in ultrasonic cleaners.
The soak: choosing your method
Soaking is the foundation of rimfire suppressor cleaning. You're trying to dissolve or loosen lead fouling, carbon deposits, and powder residue so they can be wiped, brushed, or tumbled away. There are several approaches, and people have strong opinions about all of them.
The "dip", commercial lead-removing solutions
Purpose-built suppressor cleaning solutions exist specifically for this job. The most commonly referenced is the "Dip", a generic term that's become shorthand for any commercial lead-dissolving soak solution, though several specific products go by similar names.
These solutions are typically acidic formulations designed to dissolve lead without attacking steel or (in some cases) aluminum. You disassemble the suppressor, drop the baffles into the solution, and let them soak for anywhere from a few hours to overnight. When you pull the baffles out, much of the lead fouling will have dissolved into the solution, and the remaining carbon and residue will be loosened enough to wipe or brush off.
Commercial options include products from companies like Inland Manufacturing, Bore Tech (their Decimator system), and Infante Can Tonic (which is designed to work with an ultrasonic cleaner). Prices vary, but expect to spend $15-$30 per bottle, and a bottle will last through multiple cleanings.
The process is simple. Drop your disassembled baffles into a container of the solution, a glass jar or chemical-resistant plastic tub works fine. Make sure the baffles are fully submerged. Soak time depends on the product and the level of fouling, but 2-12 hours is typical for a moderately dirty can. Heavily fouled baffles might need 24 hours or a second soak with fresh solution.
After soaking, pull the baffles out, rinse them thoroughly with water, and use a nylon brush or brass brush (on stainless baffles) to scrub off any remaining residue. Dry everything completely, a hair dryer or compressed air works, and apply a thin coat of light oil before reassembly.
White vinegar and hydrogen peroxide
The budget option, and it works surprisingly well. A 50/50 mix of white vinegar and hydrogen peroxide (the standard 3% drugstore variety) creates a mildly acidic solution that dissolves lead effectively. This is probably the most popular DIY method in the NFA community, and for good reason, the ingredients cost a few dollars total and are available at any grocery store.
The mixture works through a chemical reaction where the acetic acid in vinegar and the oxidizing action of hydrogen peroxide combine to attack lead deposits. You'll see the solution turn cloudy or milky as lead dissolves into it. For heavy fouling, the solution may turn dark gray.
Soak times are similar to commercial products: a few hours for light fouling, overnight for heavier deposits. Some people warm the solution slightly (not hot, just lukewarm) to speed the reaction. This is safe for stainless steel and titanium baffles. For aluminum baffles, the vinegar/peroxide mix is generally considered safe for short soaks (a few hours), but extended soaks of 24+ hours may cause slight surface etching. Monitor aluminum baffles during the soak and pull them when the lead is dissolved rather than leaving them indefinitely.
One note: this mixture produces a mild chemical reaction that releases small amounts of gas. Do this in a ventilated area. Not because it's dangerous at these concentrations, but because it doesn't smell great and there's no reason to breathe it.
CLR (Calcium Lime Rust remover)
CLR is a popular choice because it's cheap, widely available, and effective on lead. It's a mild acid solution designed to dissolve mineral deposits, and it works on lead fouling through a similar mechanism. Soak your baffles in undiluted CLR for 2-8 hours, then brush and rinse.
CLR is generally considered safe for stainless steel and aluminum, but as with any chemical soak, don't leave aluminum baffles in for days at a time. Rinse thoroughly after soaking, CLR is acidic and will promote corrosion if left on metal surfaces.
Cherry juice (yes, really)
You'll see this mentioned in older forum posts. Cherry juice, specifically tart cherry juice concentrate, contains citric and malic acids that dissolve lead. It works. It's also sticky, messy, and not meaningfully better than vinegar/peroxide or CLR. It was a popular home remedy before purpose-built solutions became widely available. If you want to try it, go ahead, but there's no practical advantage over the methods above.
What NOT to use
A few things to avoid:
Oven cleaner (sodium hydroxide / lye) will destroy aluminum baffles. It's highly alkaline and will chemically dissolve aluminum. Even on stainless steel, it's unnecessarily aggressive and the fumes are nasty.
Original Simple Green (the green-label concentrate) has a high pH that can etch aluminum over time. Simple Green's "Aircraft" formula (the purple label) is specifically formulated to be aluminum-safe, if you want to use Simple Green, use that one.
Muriatic acid (hydrochloric acid) is way too aggressive. It'll remove the lead, sure. It might also damage your baffles, your container, your skin, and your lungs. There's no reason to use it when gentler options work fine.
Any abrasive blasting media (sandblasting, bead blasting) on finished baffles will change the surface finish and can remove material. Leave that to the manufacturer.
Ultrasonic cleaning
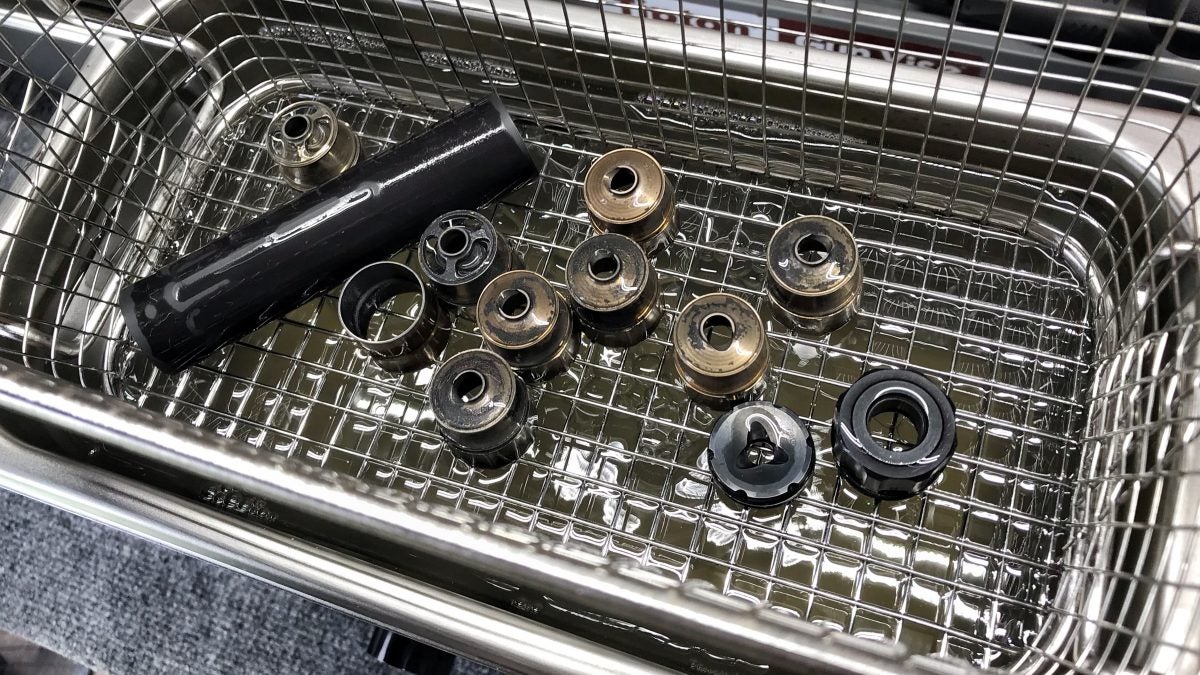
An ultrasonic cleaner is the upgrade that makes rimfire suppressor maintenance genuinely easy. These devices use high-frequency sound waves to create microscopic cavitation bubbles in a liquid bath. The bubbles collapse against surfaces and physically dislodge fouling at a microscopic level. Combined with the right cleaning solution, an ultrasonic cleaner can take baffles from heavily fouled to nearly new in 30-60 minutes.
What you need
A basic ultrasonic cleaner sized for suppressor baffles runs $40-$100. You don't need anything fancy, a 2.5-liter or larger tank from a brand like Vevor, iSonic, or similar will fit a full set of rimfire baffles with room to spare. Heated models are preferable, as warmer solution works faster. Look for a unit with at least 40kHz frequency and a timer function.
For solution, you can use the ultrasonic cleaner with plain water and a few drops of dish soap (this alone is surprisingly effective for light fouling), a 50/50 vinegar/peroxide mix, or a purpose-built ultrasonic suppressor solution like Infante Can Tonic. The combination of chemical and mechanical cleaning is more effective than either alone.
The process
Disassemble the suppressor completely. Place the baffles in the ultrasonic tank, use the included basket if your unit has one, or just set them on the bottom. Fill with your chosen solution to the fill line, making sure baffles are submerged. Run the cleaner for 15-30 minute cycles. Check progress between cycles. For moderately fouled baffles, two or three cycles usually does it. For heavy fouling, you might need to change the solution and run additional cycles.
After ultrasonic cleaning, rinse everything with clean water, dry thoroughly, and oil lightly before reassembly.
The thing nobody tells you about ultrasonic cleaning: the solution gets absolutely disgusting. After cleaning a set of rimfire baffles, the liquid will be a dark gray soup of dissolved lead and carbon. Dispose of it responsibly, lead is toxic. Don't pour it down the drain. Let it evaporate in a well-ventilated area and dispose of the residue as hazardous waste, or check your local regulations for lead-containing liquid disposal.
Is it worth buying an ultrasonic cleaner?
If you own one rimfire suppressor and shoot it occasionally, probably not. The soak-and-scrub method works fine and costs almost nothing. If you own multiple rimfire cans, shoot suppressed .22 regularly, or just hate scrubbing baffles by hand, an ultrasonic cleaner pays for itself in time saved after a few cleanings. It's also useful for cleaning other gun parts, brass, and small mechanical components, so it's not a single-purpose tool.
Wet tumbling
Wet tumbling is another mechanical cleaning method that works well for suppressor baffles. If you reload ammunition, you probably already own a wet tumbler, the same Frankford Arsenal, Lyman, or FART (Frankford Arsenal Rotary Tumbler) unit you use for brass works perfectly for baffles.
Setup
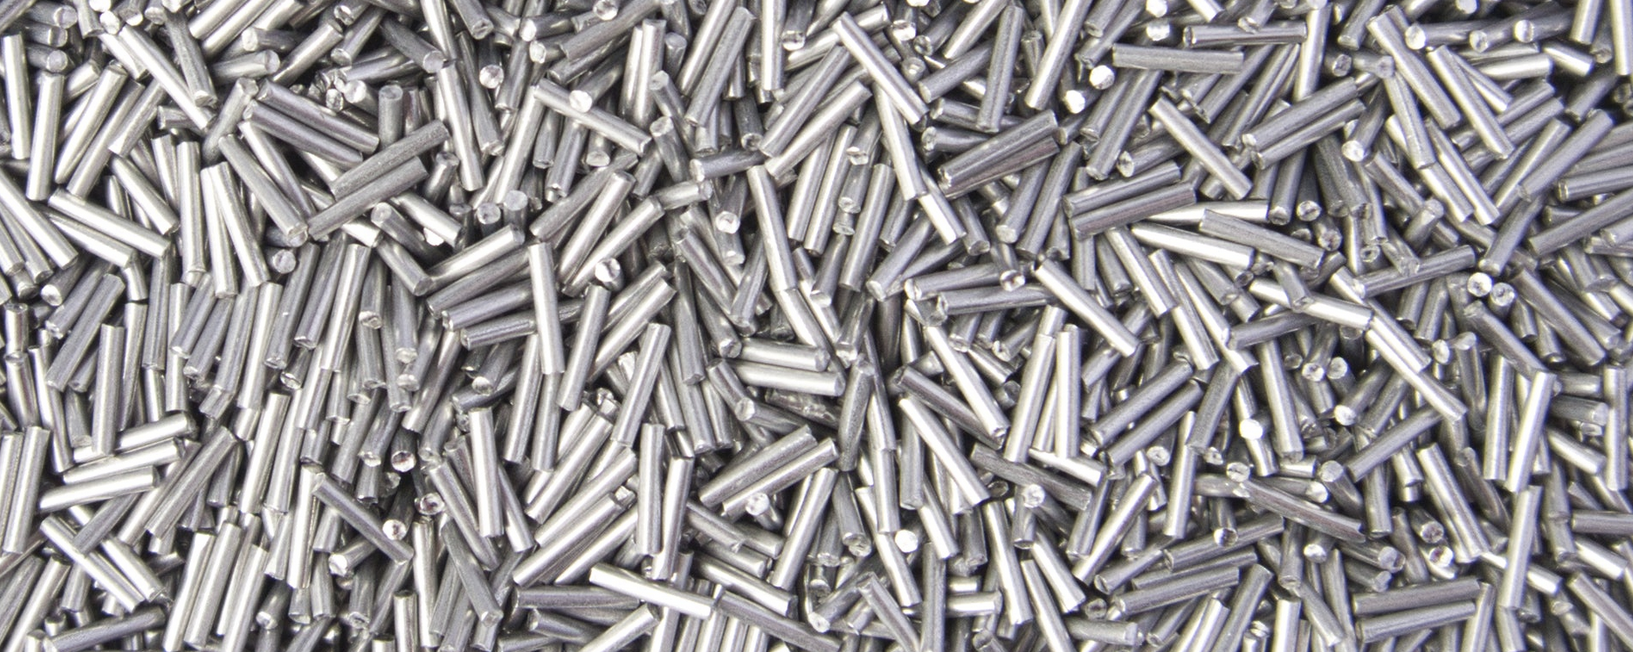
Place your disassembled baffles in the tumbler drum along with stainless steel tumbling pins (the same pins you'd use for brass). Add water, a squirt of dish soap or a purpose-built tumbling solution, and optionally a splash of white vinegar or a pinch of citric acid. Run the tumbler for 2-4 hours.
The stainless steel pins physically scrub the baffle surfaces as the drum rotates, and the solution loosens and dissolves fouling. The combination is highly effective. After tumbling, separate the baffles from the pins (a media separator or fine-mesh strainer works), rinse everything, dry, and oil.
Pros and cons
Wet tumbling is hands-off, you set it and walk away. It does a thorough job on all surfaces, including the interior passages and hard-to-reach areas between baffle features. The downside is time (2-4 hours minimum) and the fact that the tumbling pins can get lodged in baffle holes or features, requiring some fishing to retrieve them all. Some people put their baffles in a mesh bag inside the tumbler to keep pins and baffles separate while still allowing the cleaning action to work.
Don't wet tumble aluminum baffles with stainless steel pins for extended periods. The pins are harder than the aluminum and can peen or deform the baffle surfaces over time. Short tumble cycles (1-2 hours) are generally fine, but inspect your baffles for any signs of damage.
Mechanical cleaning: brushes, picks, and elbow grease
Sometimes you just need to scrub. After a soak or ultrasonic session, there will often be remaining carbon deposits that didn't fully dissolve. This is where manual cleaning comes in.
Tools that work
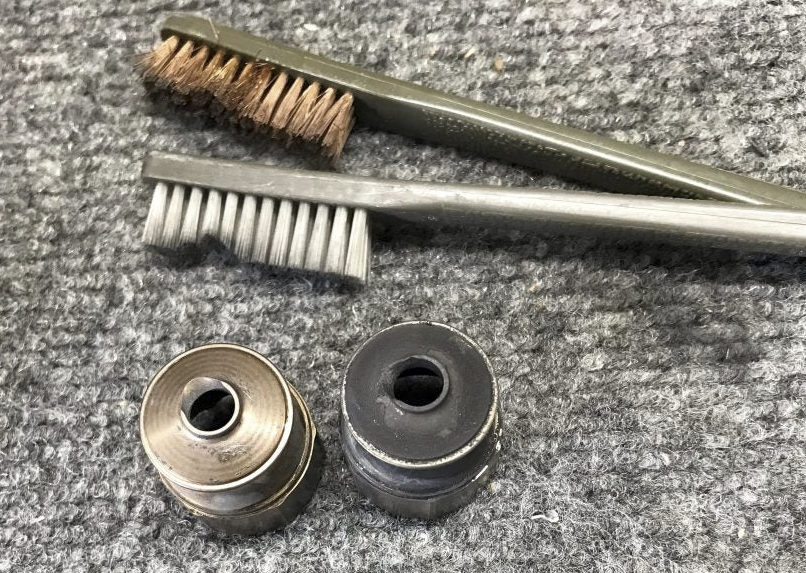
A brass brush (the kind sold for gun cleaning) is your primary tool for stainless steel baffles. Brass is softer than steel, so it won't scratch the baffle surface. Wrap the brush around baffle features and scrub. For the bore (the center hole the bullet passes through), a .22 caliber bore brush on a cleaning rod works well.
Nylon brushes are safer for aluminum baffles. They won't scratch or deform softer metals. They're also less aggressive, so you may need more scrubbing time.
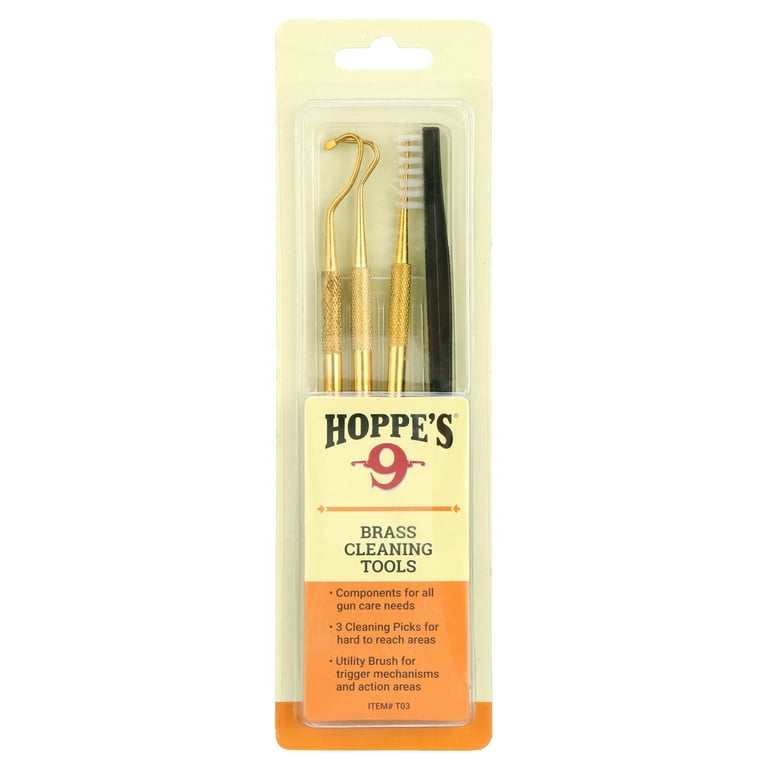
Dental picks, the stainless steel hooked picks you can buy in sets at any hardware store, are excellent for digging carbon out of corners, threads, and baffle features that a brush can't reach. A set of picks costs $5-$10 and lasts forever.
For the suppressor tube itself, a bore mop or large-caliber bore brush (something in the .40-.45 caliber range works for most rimfire suppressor tubes) lets you scrub the interior walls. The tube typically doesn't foul as heavily as the baffles, but it still accumulates deposits, especially near the blast chamber (the first chamber closest to the barrel).
What not to do
Don't use a wire wheel or Dremel on your baffles. It's tempting, especially when you're staring at a stubborn carbon ring that won't come off, but power tools remove material and change the baffle geometry. A few thousandths of an inch matter in suppressor design.
Don't scrape stainless steel baffles with a stainless steel tool. Use a softer material (brass, copper, nylon) to avoid scratching the baffle surface. Scratches create nucleation points where future fouling adheres more readily, making your next cleaning harder.
Steel wool is controversial. Fine steel wool (0000 grade) is sometimes used on stainless baffles for stubborn deposits. It works, but it can leave micro-scratches and embedded steel particles. If you use it, follow up with a thorough rinse and oiling.
The full cleaning process, start to finish
Here's a complete walkthrough for a typical rimfire suppressor cleaning. This assumes stainless steel baffles and moderate fouling (roughly 1,000 rounds since last cleaning).
Step 1: Disassemble
Remove the suppressor from the host firearm. Unscrew the end cap. Remove the baffles, noting their order and orientation. If baffles are stuck, proceed to Step 2 with the baffles still in the tube (end cap removed, tube submerged in solution).
Step 2: Soak
Place all baffles, the end cap, and the tube in your chosen cleaning solution. For this walkthrough, we'll use a 50/50 mix of white vinegar and hydrogen peroxide in a glass jar. Submerge everything. Let it soak for 4-8 hours or overnight.
If you're using an ultrasonic cleaner, place the baffles in the tank with solution and run 3-4 cycles of 15-30 minutes each, checking progress between cycles.
Step 3: Scrub
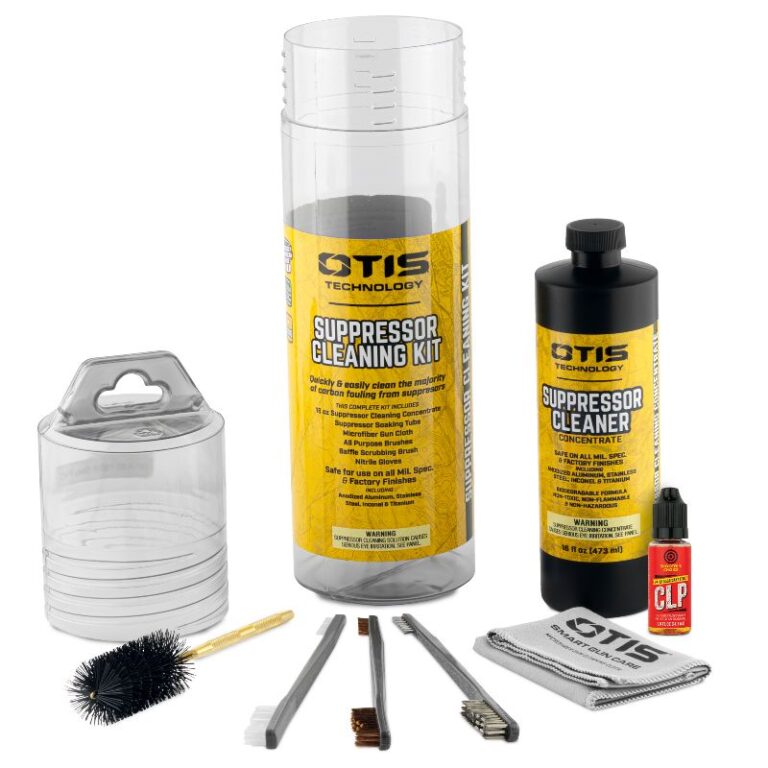
Remove the baffles from the solution. Using a brass brush, scrub each baffle thoroughly, paying attention to the blast side (the concave face that catches the most gas), the bore, and any threads or mating surfaces. Use dental picks for stubborn deposits in corners and features.
Scrub the interior of the tube with a bore mop or large-caliber brush. Clean the end cap threads and sealing surfaces.
If significant fouling remains after scrubbing, repeat the soak for another few hours and scrub again. Two soak-and-scrub cycles handles most situations.
Step 4: Rinse
Rinse all components thoroughly with clean water. You want to remove all traces of the cleaning solution. Residual acid (from vinegar, CLR, or commercial solutions) will promote corrosion if left on the metal.
Step 5: Dry
Dry everything completely. Compressed air is ideal, blow out every hole, thread, and crevice. A hair dryer on low heat works too. Don't reassemble a wet suppressor. Trapped moisture leads to corrosion, and corrosion between mating surfaces leads to seized baffles, the exact problem you're trying to prevent.
Step 6: Lubricate and reassemble
Apply a very thin coat of light oil or anti-seize compound to the baffle surfaces and threads. This is important: the oil creates a barrier that makes your next cleaning easier. Some people use a light CLP (like Ballistol or Break Free), some use a thin anti-seize paste on threads specifically. The goal is to prevent metal-to-metal contact that leads to galling and seizing.
Reassemble the baffles in the correct order and orientation. Thread the end cap back on hand-tight. Don't over-torque it, you want to be able to remove it again next time.
Step 7: Apply anti-seize to threads (seriously)
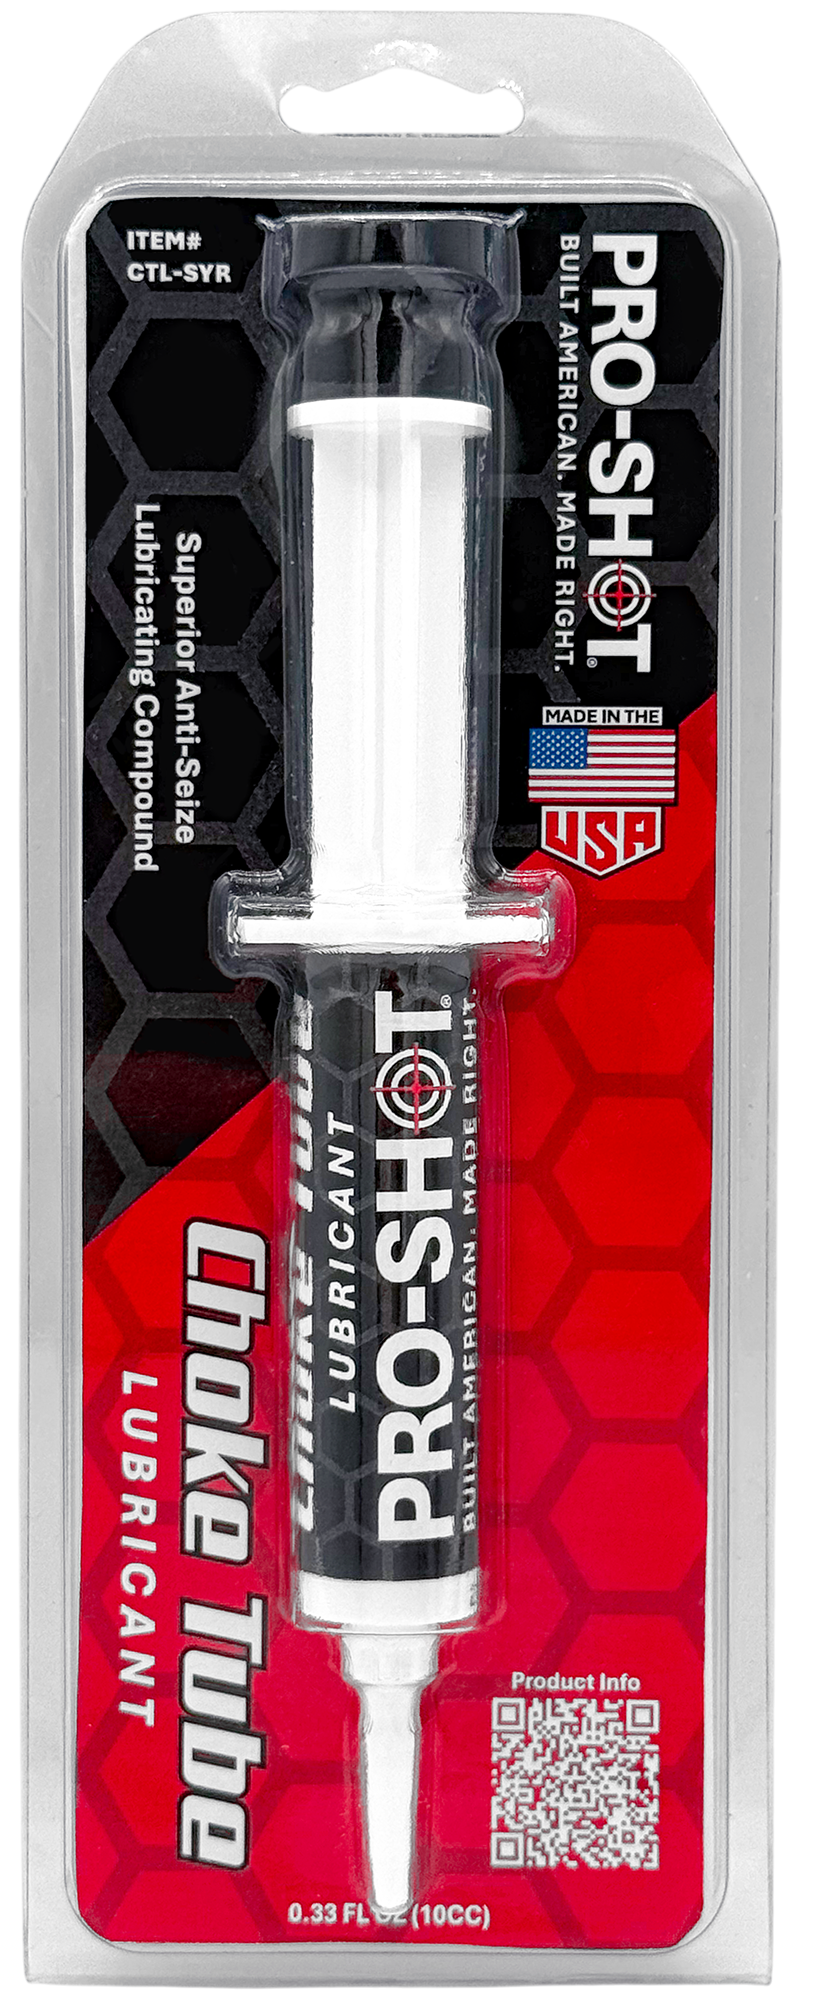
This deserves its own callout because it's the single most important maintenance step that people skip. A thin application of anti-seize compound (copper or nickel-based) on the end cap threads and the barrel mount threads prevents the components from seizing together under heat and fouling. If you do nothing else from this article, do this. Your future self will thank you when the end cap unscrews by hand after another 1,000 rounds instead of requiring a vise and a strap wrench.
Common mistakes and gotchas
After seeing hundreds of forum threads about rimfire suppressor cleaning, the same mistakes come up repeatedly. Here are the big ones.
Using the wrong solvent on aluminum baffles. This is the number-one way people damage their suppressors during cleaning. Strong alkaline solutions (oven cleaner, original Simple Green, lye-based degreasers) will etch, pit, and potentially destroy aluminum baffles. If you're not 100% sure of your baffle material, use a pH-neutral or mildly acidic solution and check the manufacturer's documentation.
Waiting too long between cleanings. The jump from "baffles slide out easily" to "baffles are permanently stuck" happens faster than you'd think. At 500 rounds, cleaning is a 30-minute job. At 3,000 rounds with no prior cleaning, it's a multi-day project involving repeated soaks and possibly a call to the manufacturer. The 1,000-round interval isn't arbitrary, it's the point where fouling is heavy enough to matter but not so heavy that disassembly becomes a fight.
Reassembling without lubrication. Clean, dry metal surfaces gall and seize much more readily than lubricated ones. Bare stainless-on-stainless threads will lock up under heat and pressure. Always apply a thin coat of oil or anti-seize before reassembly.

Hoppe's No. 9 Brass Cleaning Tools kit Deals
Prices may change. May contain affiliate links.
Not drying thoroughly before reassembly. Water trapped between baffles or in threads causes corrosion. Corrosion causes seizing. Blow everything out with compressed air and make sure it's bone dry.
Trying to clean a sealed (non-serviceable) centerfire can. This article is about rimfire suppressors specifically because they're the ones that need cleaning. Most centerfire suppressors, your Dead Air Sandman-S, SilencerCo Omega 36M, Surefire SOCOM series, etc., are sealed and not designed to be disassembled by the user. Centerfire cans run hot enough that most fouling burns off, and the remaining deposits don't significantly affect performance over the life of the suppressor. If you try to disassemble a sealed centerfire can, you'll void the warranty and likely damage the suppressor. Leave them alone. A quick wipe of the exterior and mount threads is all they need.
Running centerfire ammo through a rimfire can "to clean it out." You'll see this advice on forums occasionally. The theory is that the higher pressures and temperatures of centerfire ammo will burn out the rimfire fouling. The reality is that most rimfire suppressors are not rated for centerfire pressures and you will damage or destroy the suppressor. Never fire ammunition through a suppressor that isn't rated for it. The exception is .22 Magnum or .17 HMR through a can rated for those cartridges, but those are still rimfire, just higher-pressure rimfire.
Specific suppressor notes
Different rimfire cans have different quirks worth knowing about.
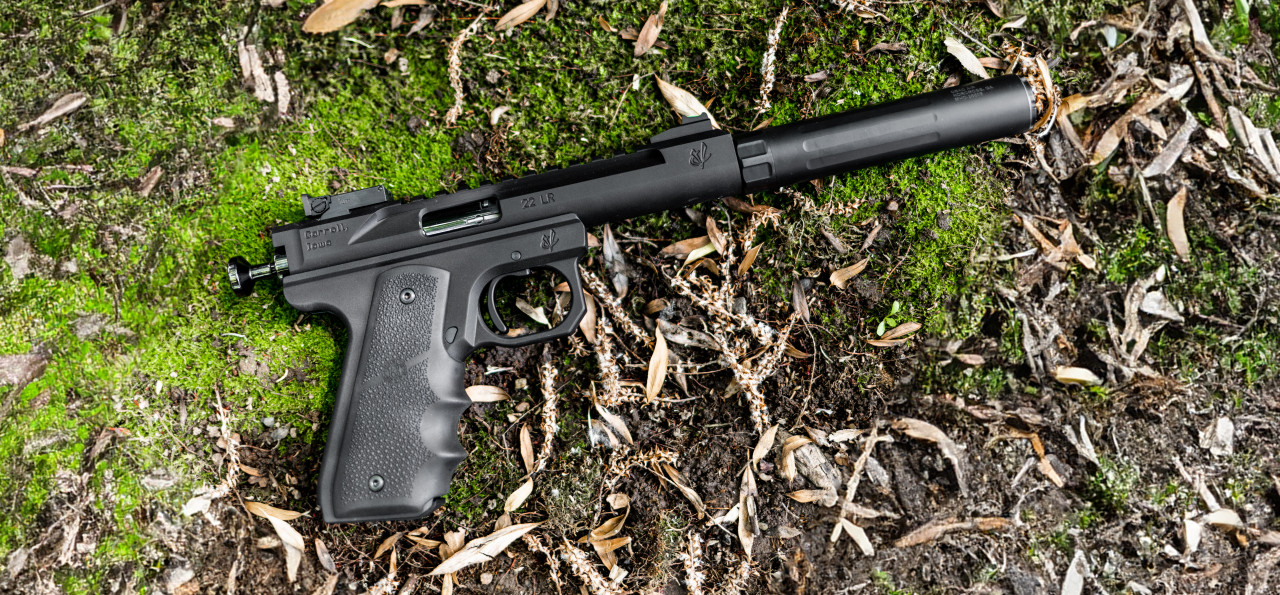
Dead Air Mask HD
The Mask HD is one of the most popular rimfire suppressors on the market, and for good reason. It's all stainless steel construction, which means you can use any cleaning method without worrying about material compatibility. The baffles are a stacked design that comes out as a unit. Dead Air's own documentation recommends cleaning every 500-1,000 rounds. The Mask HD responds well to the vinegar/peroxide soak method, and the stainless construction means you can also wet tumble or ultrasonic clean without restrictions. Apply anti-seize to the end cap threads, the Mask HD's end cap is known to seize if you don't.
SilencerCo Sparrow 22
The Sparrow has been around for years and is a proven design. SilencerCo has published specific cleaning guidance recommending a commercial lead-dissolving dip, and they've documented three pretreatment methods (solvent soak, ultrasonic, and wet tumble) in their own literature. The Sparrow's baffles are stainless steel. One quirk: the Sparrow's baffles are individually numbered and must go back in the correct order. Don't mix them up.
SilencerCo Switchback 22
The Switchback is a modular design that can run in short, medium, or long configurations. This means more pieces to keep track of during cleaning, but the same cleaning methods apply. All stainless construction.
Rugged Oculus
The Oculus is another modular (two-length) rimfire can with stainless steel baffles. Rugged's baffles are designed to be easy to remove, and the suppressor disassembles quickly. Standard cleaning methods apply.
YHM Resonator R2
Technically a centerfire can, but it's worth noting because some people run .22 LR through centerfire-rated cans. If you do this, the can will foul like a rimfire suppressor but may or may not be user-serviceable. Check whether your centerfire can is sealed or serviceable before attempting disassembly.
Cans with aluminum baffles
If you own an older rimfire suppressor or a lightweight model with aluminum baffles, everything above about aluminum-safe solvents applies. Stick with vinegar/peroxide, CLR, or aluminum-safe commercial solutions. Avoid alkaline cleaners, extended soak times, and aggressive mechanical cleaning. Nylon brushes instead of brass.
How clean is clean enough?
You don't need to get your baffles back to factory-new appearance. That's not the goal, and chasing a mirror finish is a waste of time. The goal is to remove enough fouling that the baffles move freely, the suppressor assembles and disassembles without excessive force, and the internal geometry is reasonably close to the design spec.
After a good cleaning, your baffles will still show some discoloration. They'll have a darkened, slightly rough patina that won't come off without aggressive abrasives. That's fine. Carbon staining on stainless steel is cosmetic. As long as the bore is clear, the baffle surfaces are free of thick buildup, and the threads are clean and lubricated, your suppressor is clean enough.
Some people obsess over getting every last trace of carbon off. If that's your thing, more power to you. But from a functional standpoint, a "good enough" cleaning that removes the bulk of lead fouling and keeps components moving freely is all you need. Save the deep-clean perfectionism for the once-a-year overhaul if you want, and do quick cleanings at regular intervals in between.
A note on lead safety
Lead fouling isn't just a suppressor maintenance issue, it's a health issue. Lead is toxic, and the residue you're removing from your baffles is concentrated lead. Take basic precautions:

Work in a well-ventilated area, preferably outdoors or in a garage with the door open. Wear nitrile gloves, lead absorbs through skin. Don't eat, drink, or smoke while handling fouled baffles or cleaning solution. Wash your hands thoroughly with cold water and soap when you're done (cold water keeps pores closed and reduces lead absorption). Dispose of used cleaning solution responsibly, it contains dissolved lead and shouldn't go down the drain or into the ground.
These aren't paranoid precautions. They're the same basic lead hygiene practices that anyone who shoots at an indoor range should already be following. A few minutes of care prevents a problem you really don't want.
Setting up a cleaning schedule
The best approach is to make rimfire suppressor cleaning a routine rather than a crisis. Here's what works:
Track your round count. You don't need to be exact, a rough estimate is fine. If you shoot 200 rounds of .22 LR per range trip and go twice a month, you're hitting 1,000 rounds in about two and a half months. That's your cleaning interval.
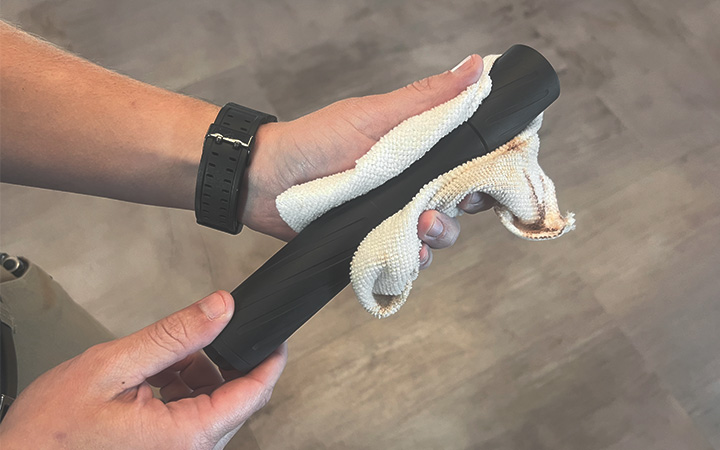
After every shooting session, wipe down the exterior of the suppressor and the mount threads with a lightly oiled cloth. This takes 30 seconds and prevents surface corrosion.
Every 1,000 rounds (or whenever the end cap starts getting stiff), do a full teardown and soak cleaning as described above. Budget 30-60 minutes of active time plus soak time.
Once a year, or every 3,000-5,000 rounds, do a thorough deep clean: extended soak, ultrasonic or wet tumble, careful inspection of all components for wear or damage, fresh anti-seize on all threads.
If you apply anti-seize at every reassembly and clean at reasonable intervals, your rimfire suppressor will last essentially forever. The baffles don't wear out from use, they wear out from neglect.