
You've been loading the same brass for six firings and your groups are opening up. The neck tension feels inconsistent when you seat bullets, and you're starting to see the telltale signs of work hardening. Your brass is telling you it needs annealing, but you're wondering if buying an annealer makes sense or if you should just replace the cases.
Here's the thing: annealing isn't about extending brass life indefinitely. It's about maintaining consistent neck tension and shoulder properties so your ammunition performs the same way firing after firing. When done right, annealed brass gives you predictable seating force, consistent bullet release, and better ES/SD numbers. When done wrong, you've just turned expensive brass into scrap metal.
The decision comes down to volume, cartridge cost, and how much precision matters for your shooting. If you're loading 100 rounds of .223 per year for plinking, annealing doesn't make economic sense. If you're burning through 500 rounds of 6.5 Creedmoor or .300 Win Mag annually and chasing single-digit ES, an annealer pays for itself quickly.
Why brass needs annealing
Every time you fire a cartridge, the brass case undergoes stress that work-hardens the metal. The neck expands under pressure, then gets sized back down during reloading. The shoulder gets pushed forward slightly, then bumped back during sizing. This repeated expansion and compression changes the grain structure of the brass, making it progressively harder and more brittle.
Work-hardened brass creates two main problems. First, neck tension becomes inconsistent because harder brass springs back differently after sizing. You'll notice this when seating bullets; some require noticeably more force than others, even with identical charge weights and components. Second, the brass becomes more prone to splitting, especially around the neck and shoulder junction where stress concentrates.
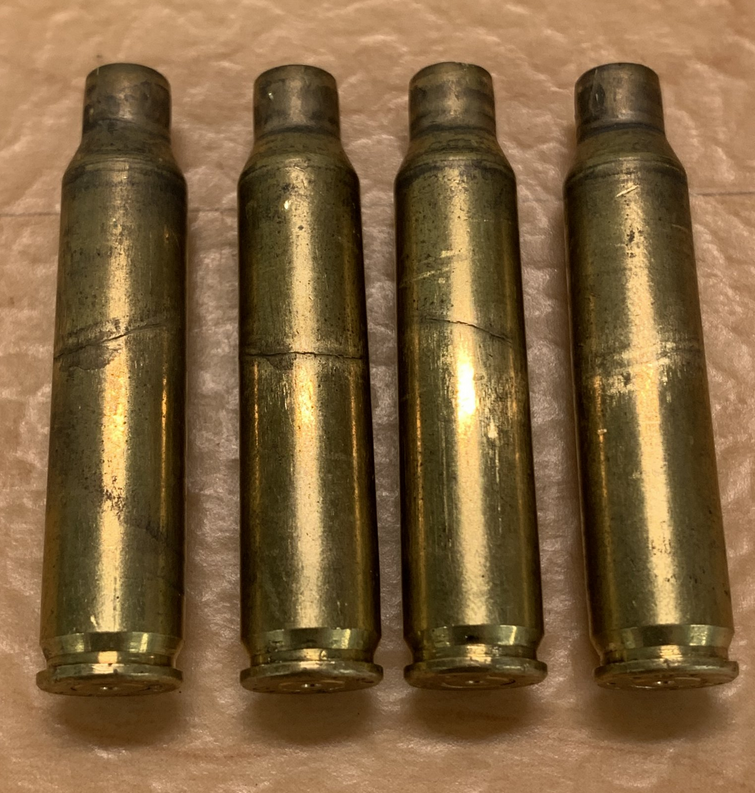
The solution is controlled heating that restores the brass's original grain structure without affecting the case head, where you need the brass to stay hard for strength. Proper annealing heats the neck and shoulder to around 750°F for a specific time, then allows rapid cooling. This recrystallizes the brass, making it soft and malleable again.
What the manual says versus what actually happens: most reloading manuals suggest annealing every 3-5 firings. In practice, the timing depends on your cartridge, sizing die setup, and how hard you're pushing your loads. Magnum cartridges with aggressive sizing need annealing sooner. Moderate loads in properly sized cases can go longer.
When annealing makes financial sense
The math on annealing is straightforward once you factor in brass cost and shooting volume. Premium brass like Lapua, Norma, or ADG runs $1-3 per case depending on cartridge. If annealing extends case life from 5 firings to 15 firings, you're saving $1-2 per case every time you anneal instead of replacing.
For high-volume cartridges like .223 or .308 with cheap brass, the economics are different. Lake City .223 brass costs pennies per case, so annealing doesn't make sense unless you're shooting competitively and need the consistency. But for anything in the .260 Rem/.6.5 Creedmoor class and up, especially magnums, annealing pays for itself quickly.
I've loaded enough to know that cartridge choice drives the decision more than anything else. If you're shooting .300 Norma Mag with $3 Lapua brass, an annealer pays for itself in 200-300 rounds. If you're loading .223 with mixed range brass, you'll never break even on the equipment cost.
Rma armament Norma Brass Deals
Prices may change. May contain affiliate links.
The volume threshold sits around 200-300 cases per year for most precision cartridges. Below that, you're better off buying new brass when the old stuff gets too hard. Above that, annealing becomes cost-effective, especially if you're using premium brass that's expensive to replace.
Consider your shooting style too. If you're a hunter who loads 40 rounds per year and keeps the same brass for a decade, annealing every few years makes sense. If you're burning through brass quickly at matches, the consistency benefits matter more than the cost savings.
Annealing methods compared
Flame annealing
The traditional method uses a torch to heat case necks while rotating them in a drill or annealing machine. You heat until the brass glows faintly in dim light, then drop the cases into water. This works, but it's inconsistent and easy to overheat.
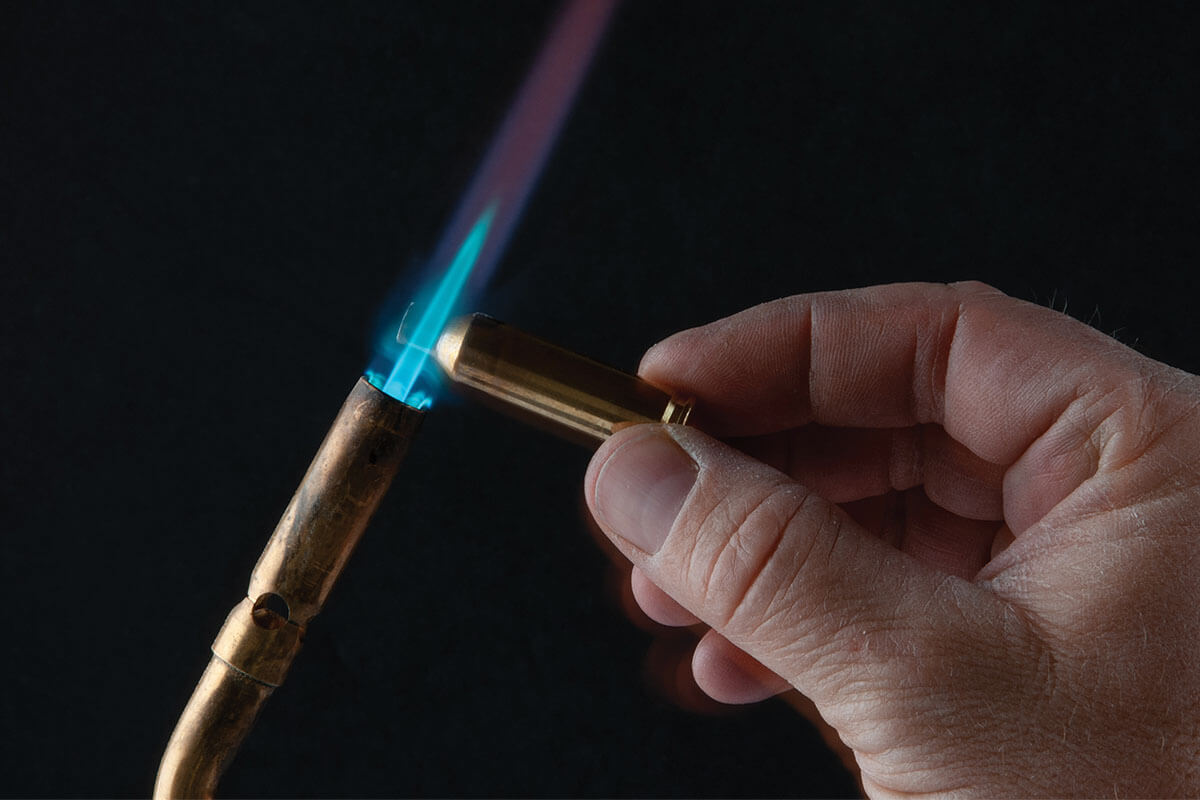
The problem is usually temperature control. Too little heat and you don't properly anneal the brass. Too much heat and you soften the case head, creating dangerous pressure issues. Most flame annealing setups rely on visual cues that vary with lighting conditions and operator experience.
Modern flame annealers like the Annealeez solve some of these problems by controlling rotation speed and flame position. You still need to watch for color changes, but the process is more repeatable than handheld torch methods. Expect to spend 15-20 seconds per case with flame annealing.
Induction annealing
Induction annealers use electromagnetic fields to heat the brass precisely and consistently. The AMP annealer is the gold standard here; it measures the brass's electrical properties during heating and stops at the exact moment when annealing is complete. No guesswork, no color watching, no timing.
The AMP system requires specific pilots for each cartridge, which adds cost but ensures precise heating patterns. Setup involves running sample cases to establish the annealing code for your specific brass and cartridge combination. Once programmed, it processes cases in 3-5 seconds each with laboratory-level consistency.
Other induction options like the Annie and Ugly Annealer offer similar precision at lower cost but require more setup work. They use time-based cycles rather than real-time feedback, so you need to establish proper timing through testing.
Salt bath annealing
Salt bath annealing submerges case necks in molten salt heated to exactly 750°F. The salt provides even heat distribution and precise temperature control. You dip the cases for a specific time (usually 6-8 seconds), then quench in water.
The main advantage is temperature precision; molten salt maintains exactly 750°F without hot spots or temperature variation. The downside is safety and setup complexity. You're working with molten salt at 750°F, which requires proper ventilation, safety equipment, and careful handling procedures.
Salt bath systems work well for high-volume operations but aren't practical for most home reloaders. The safety requirements and equipment costs make them more suitable for commercial operations or serious competitors processing thousands of cases.
Equipment recommendations
Entry level: Annealeez ($200-250)
The Annealeez gets you into consistent annealing without breaking the bank. It uses a simple flame setup with controlled rotation and timing. You still watch for color changes, but the consistent rotation and flame position eliminate most variables.
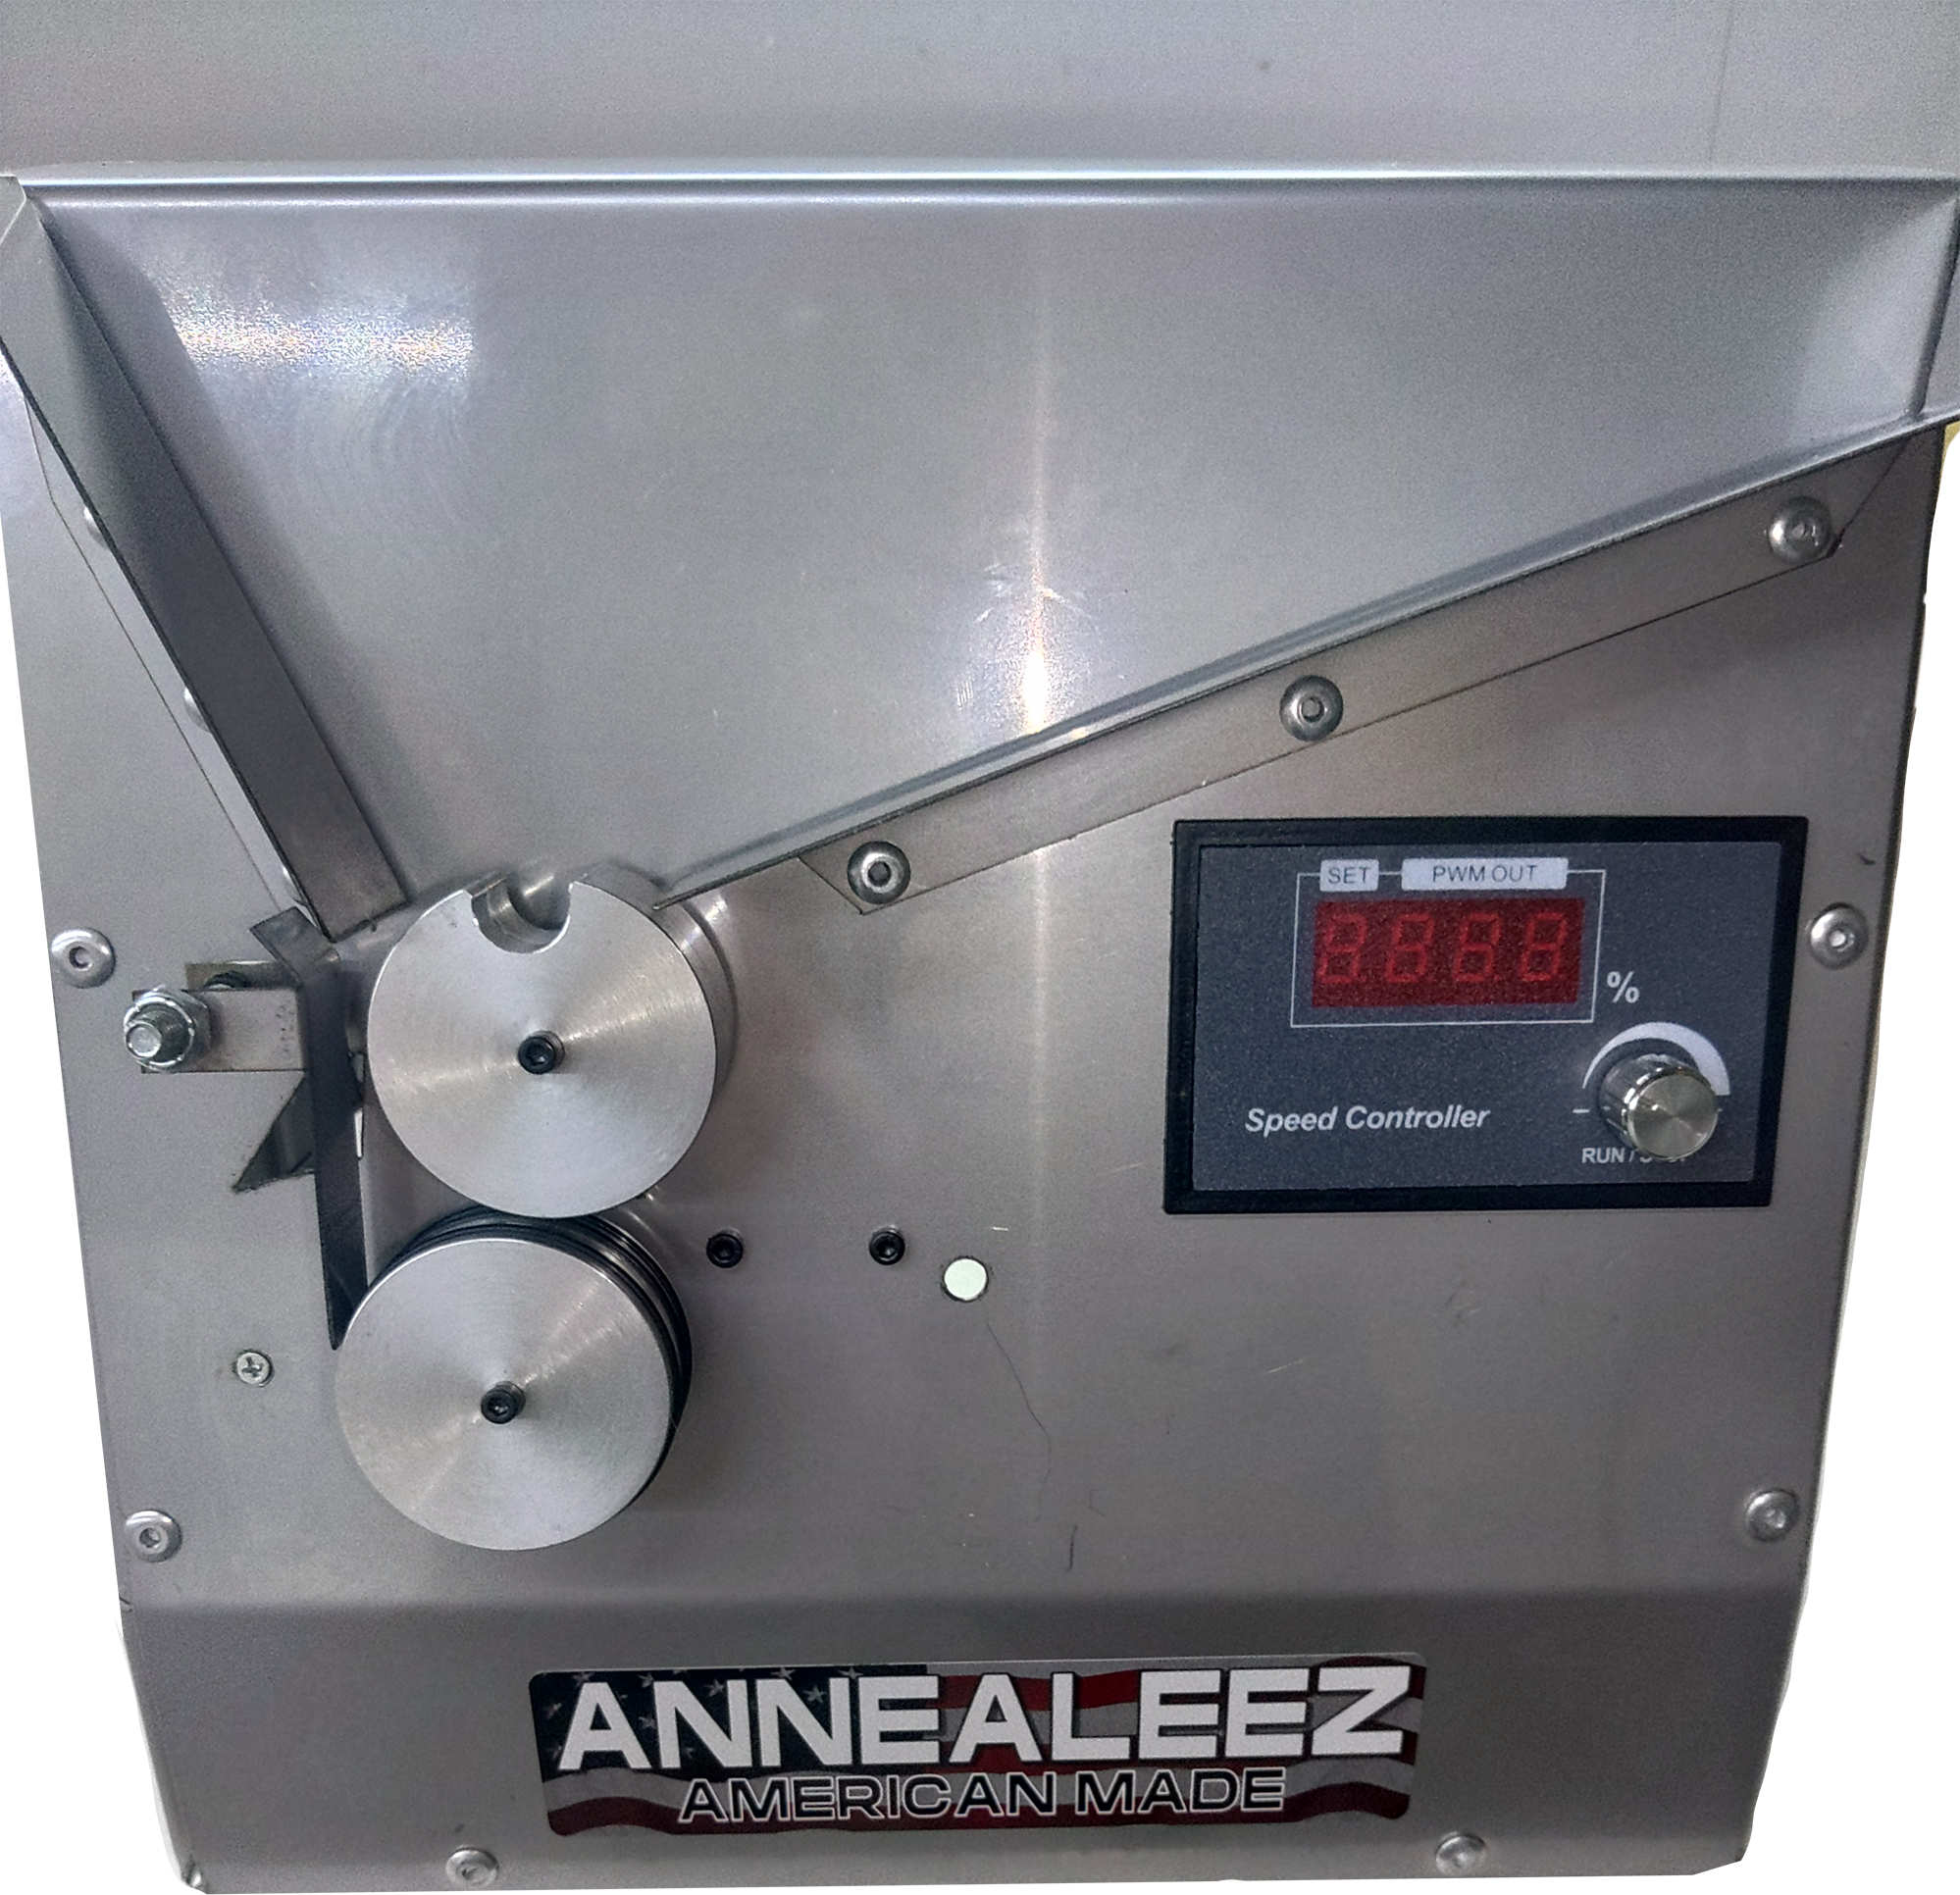
Setup is straightforward; mount the unit, connect a propane torch, and adjust the flame position for your cartridge. Processing time runs about 15 seconds per case. The unit handles most rifle cartridges with simple collet changes.
The limitation is still operator-dependent timing. You need to watch each case and drop it when the neck shows proper color. This works fine for moderate volumes but becomes tedious for large batches.
Mid-range: Ugly Annealer ($800-900)
The Ugly Annealer uses induction heating with timer-based control. You establish the proper annealing time for your brass through testing, then the machine processes cases automatically. No flame watching, consistent results, and much faster processing.
Setup requires running test cases to determine proper timing. You start with conservative times and gradually increase until you achieve proper annealing without overheating. Once established, the machine runs automatically at about 5 seconds per case.
The Ugly Annealer handles most rifle cartridges with appropriate coil sizing. Build quality is solid, and the timer-based operation is reliable once you've established proper settings for your brass.
Premium: AMP Mark II ($1,500-1,800)
The AMP annealer represents the current state of the art. It measures brass properties during heating and stops automatically when annealing is complete. No timing, no guesswork, no operator variation; just consistent results every time.
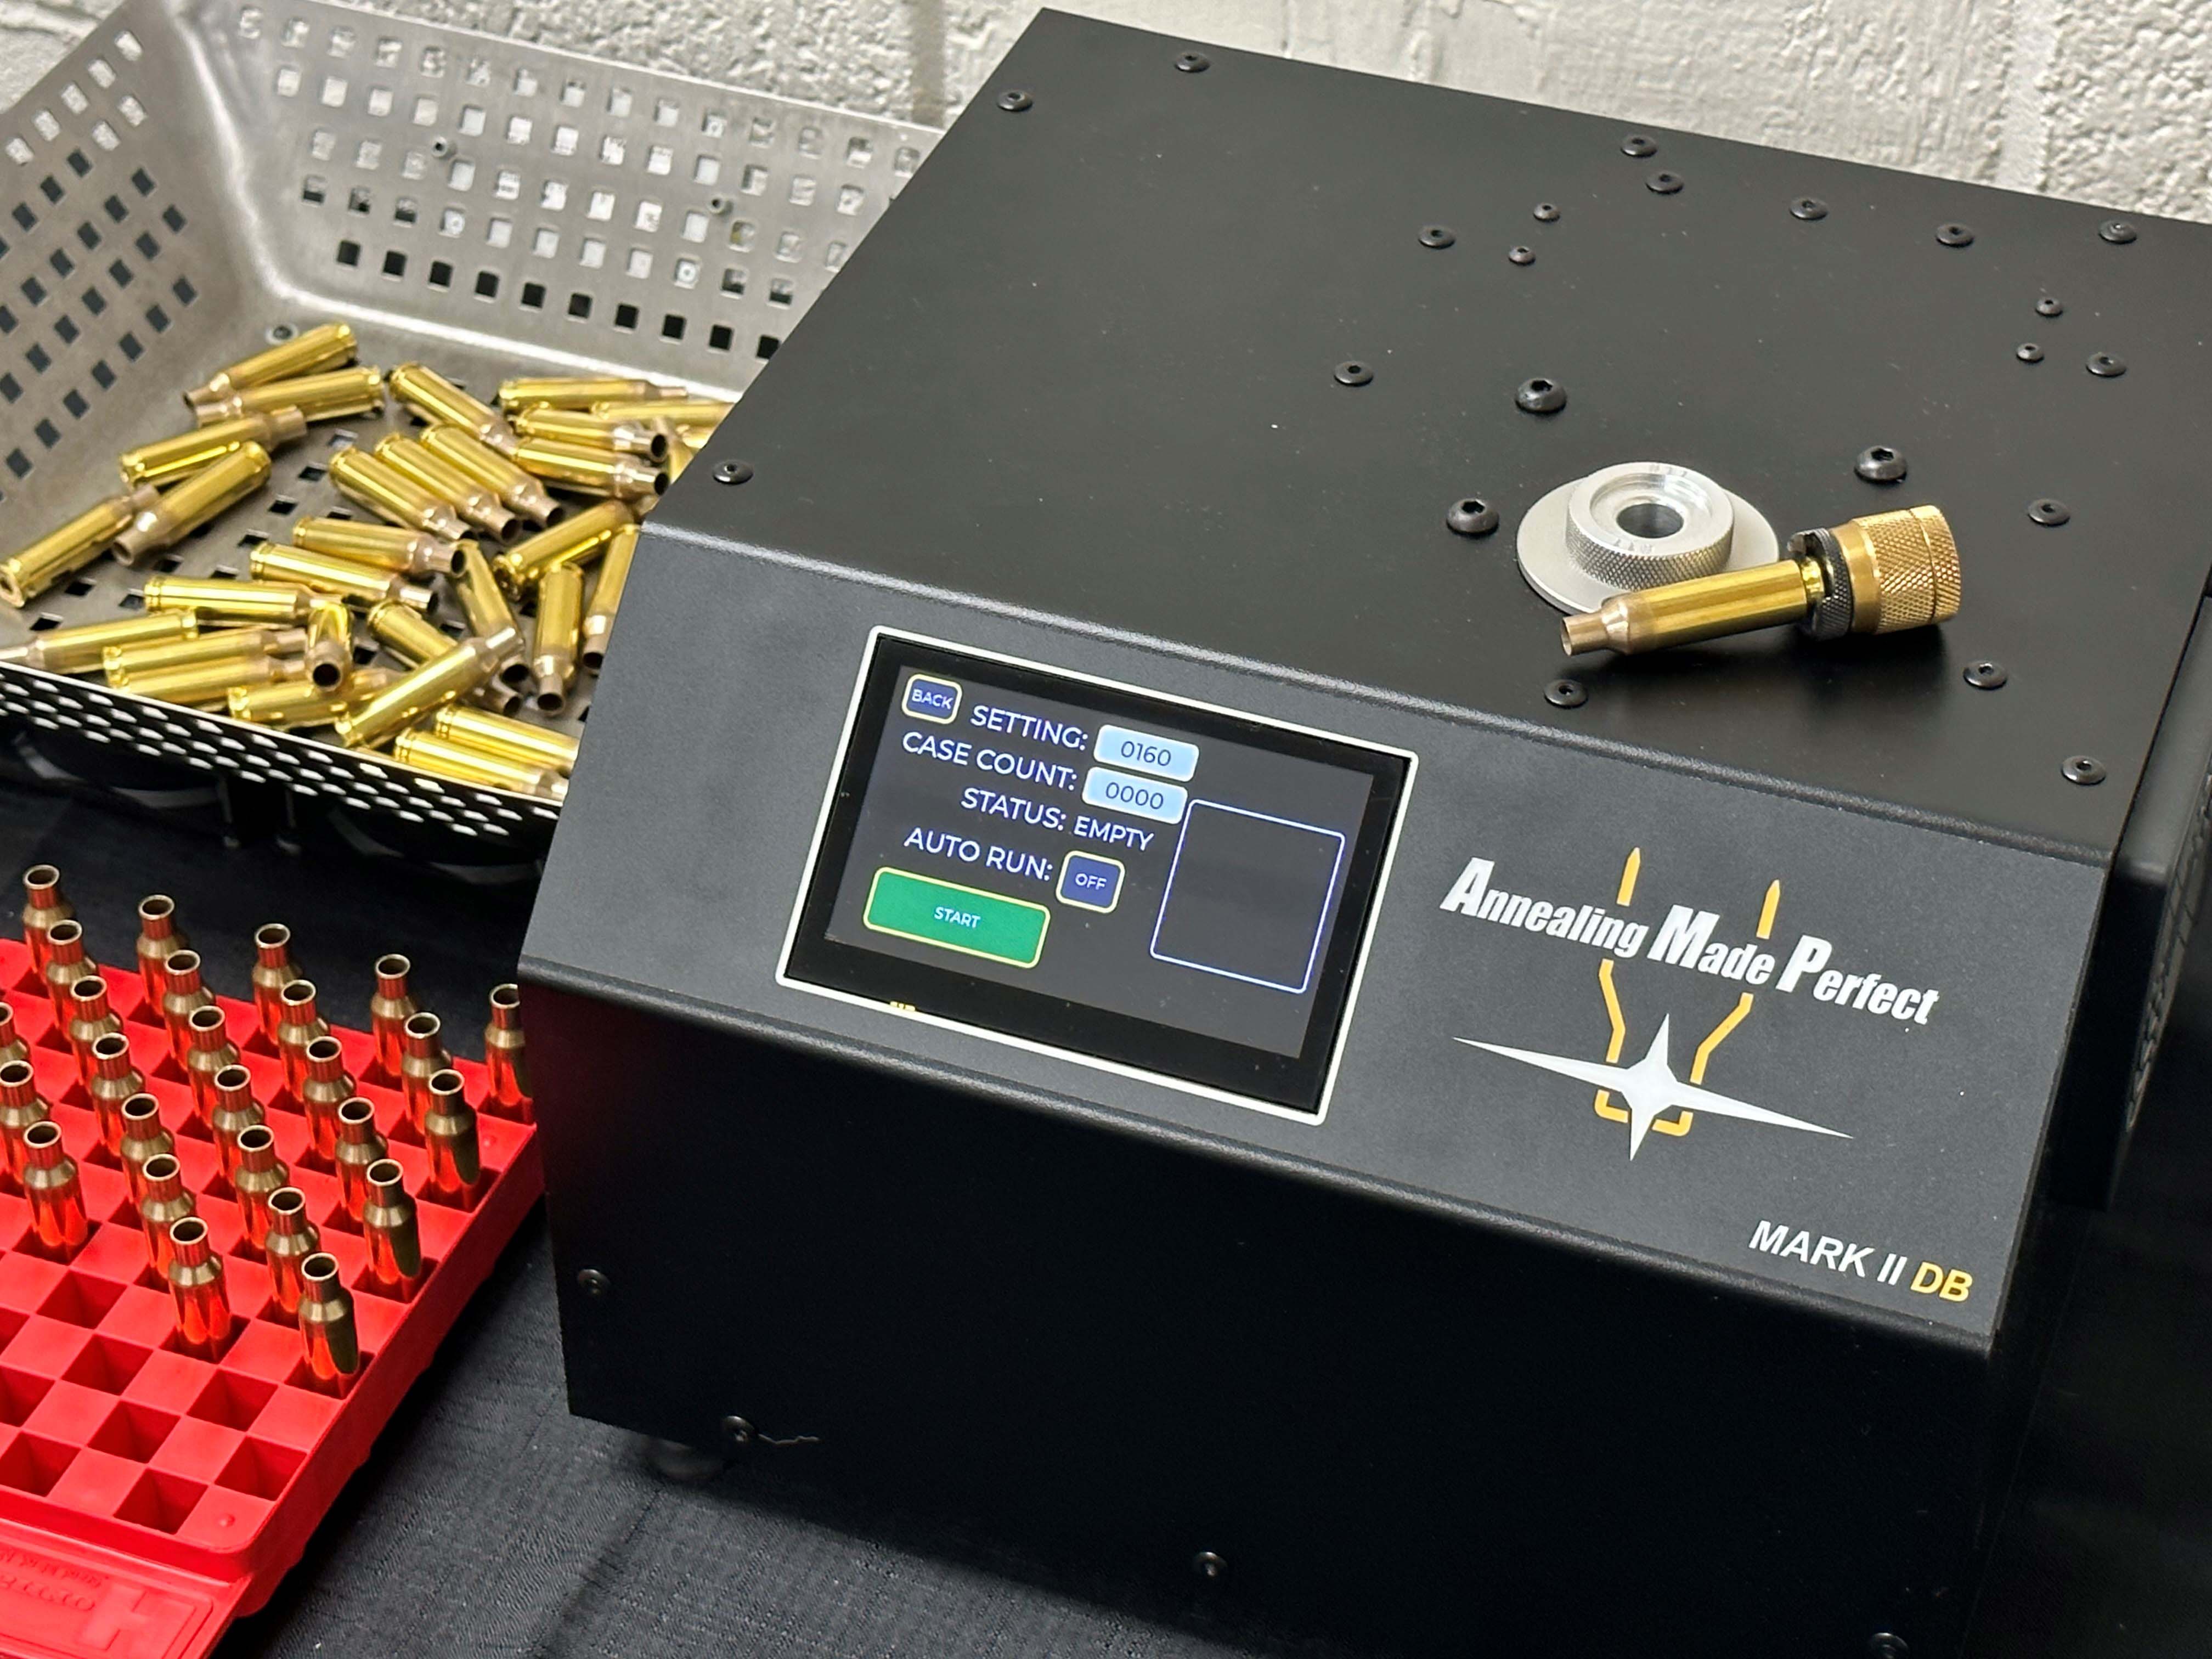
The system requires specific pilots for each cartridge ($50-75 each), but this ensures precise heating patterns. Initial setup involves running sample cases to establish the annealing code, which the machine stores for future use.
Processing speed is exceptional at 3-5 seconds per case, and the consistency is unmatched. If you're processing large volumes of expensive brass or chasing maximum precision, the AMP pays for itself through improved consistency and reduced brass loss.
Bench notes: testing your annealing
Proper annealing verification requires measuring neck tension before and after the process. Use a bullet puller to test seating force on sample cases, or measure neck expansion after firing. Properly annealed brass should show consistent seating force and uniform neck expansion.
Visual inspection helps too. Annealed brass shows a distinct color change; the neck and shoulder area becomes slightly darker and loses the bright brass appearance. The color line should stop well below the shoulder-body junction to avoid softening the case body.
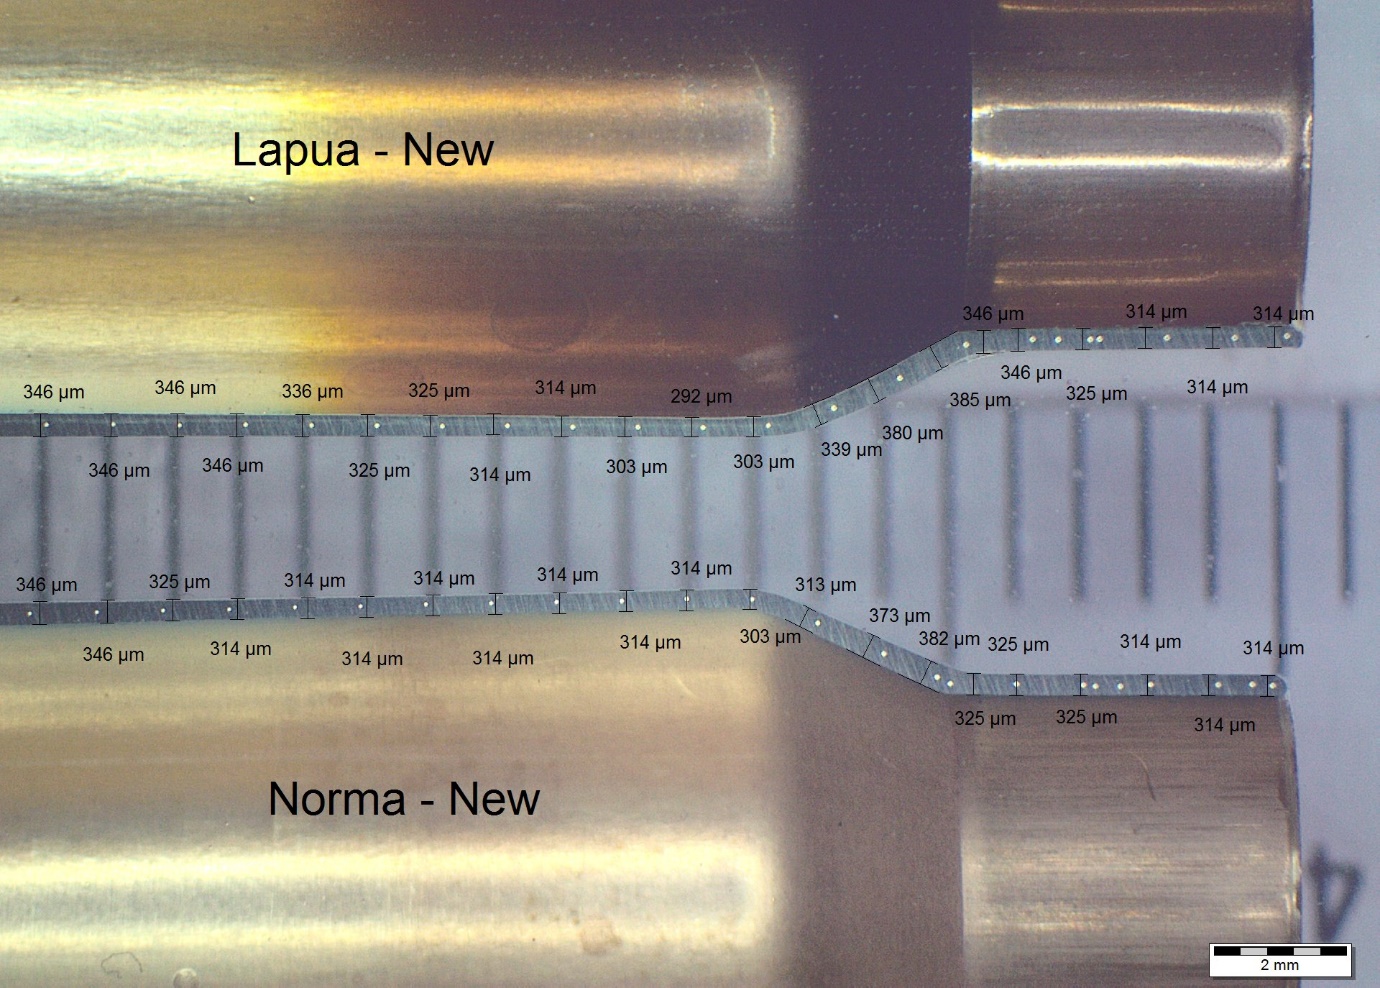
Hardness testing provides the most accurate verification but requires specialized equipment. Most reloaders rely on seating force consistency and visual inspection to confirm proper annealing. If your bullet seating force becomes more consistent after annealing, you've achieved the goal.
Common annealing mistakes
Overheating the case body. The biggest safety risk is softening brass below the shoulder, which can cause case head separation under pressure. Always keep heat focused on the neck and upper shoulder area. If you see color changes extending down the case body, you're applying too much heat.
Inconsistent timing with flame methods. Lighting conditions affect your ability to see color changes consistently. What looks right in bright shop lighting might be completely different in dim conditions. Use consistent lighting and practice on scrap brass before annealing good cases.
Skipping the test phase with induction annealers. Every brass lot behaves differently, even from the same manufacturer. Always run test cases to establish proper settings before processing your entire batch. Start conservative and work up; you can always add more heat, but you can't undo overheating.
Annealing too frequently. More isn't better with annealing. Excessive annealing cycles can actually weaken the brass through repeated heating and cooling. Most brass needs annealing every 3-5 firings, not after every loading session.
Ignoring case head inspection. Annealed cases still wear out from primer pocket expansion and case head stretching. Don't assume annealing eliminates the need for case inspection. Check primer pockets, measure case head expansion, and retire cases that show signs of fatigue regardless of annealing history.
When annealing isn't worth it
If you're shooting factory ammunition exclusively, annealing offers no benefits. The brass gets discarded after one firing, so there's no point in treating it for reuse. Save your money for components or better ammunition.
Low-volume recreational shooting rarely justifies annealing equipment costs. If you load 50 rounds per year for hunting, buying new brass every few years costs less than any annealing setup. The exception is expensive magnum brass where even small quantities represent significant investment.
Mixed range brass presents another situation where annealing doesn't make sense. You don't know the firing history, previous heat treatment, or alloy composition. The inconsistency in the brass itself outweighs any benefits from annealing.
Competition shooters using new brass for each match don't need annealing either. If you're loading fresh brass for every important match to eliminate variables, annealing becomes irrelevant. The consistency benefits matter most when you're reusing brass multiple times.
Setting up your annealing process
Start with a dedicated workspace away from reloading powder and primers. Annealing involves high temperatures and open flames in some cases, so fire safety is paramount. Keep a fire extinguisher nearby and ensure adequate ventilation.
Organize your workflow for efficiency and safety. Sort cases by cartridge and firing count before starting. Process one cartridge type completely before switching to avoid confusion with different timing or temperature settings.
Document your settings for each cartridge and brass combination. Record annealing times, temperature settings, or AMP codes in your reloading log. This eliminates guesswork for future sessions and ensures consistent results.
Quality control should include sample testing from each batch. Pull bullets from a few annealed cases to verify consistent seating force. Check neck expansion after firing to confirm proper annealing. Keep notes on case life and performance to refine your process.
What to do next
If you're considering annealing, start by calculating your annual brass usage and replacement costs. Factor in cartridge type, brass quality, and shooting volume to determine if annealing makes economic sense for your situation.
For moderate volumes with premium brass, the Ugly Annealer offers the best balance of cost and performance. If you're processing large quantities or need maximum consistency, the AMP annealer justifies its premium price. Entry-level flame annealers work for occasional use but require more operator skill and attention.
Test your annealing process with sample cases before committing entire batches. Establish proper settings through careful testing, then document everything for future reference. Proper annealing will show up as improved consistency in your chronograph data and tighter groups on target.