You've got a suppressor that's starting to sound like a diesel truck at idle instead of the whisper-quiet can it used to be. The carbon buildup is real, and now you're staring at two cleaning paths: scrubbing by hand like your grandfather cleaned his deer rifle, or dropping serious cash on an ultrasonic cleaner that promises to do the work while you grab a beer.
Here's the thing: both methods work, but they work differently depending on what you're shooting, how often you shoot, and how much you value your time versus your money. Most guys overthink this decision and end up with a garage full of cleaning gear they don't need, or they stick with manual methods long past the point where it makes sense.
I'll break down exactly when each method wins, what the real costs look like, and which suppressors respond better to which approach. No generic "it depends on your needs" nonsense—just the practical differences that matter when you're actually doing the work.

How carbon buildup actually happens
Carbon doesn't just magically appear in your suppressor. It's the result of incomplete combustion byproducts getting superheated and then rapidly cooled as they hit the baffles. Think of it like the difference between a clean-burning gas stove and a sooty candle—same basic process, different efficiency levels.
Rimfire rounds are the worst offenders. The waxy lubricants in .22 LR ammunition don't burn completely, leaving behind a sticky residue that acts like glue for carbon particles. Run a few hundred rounds of bulk .22 through a suppressor and you'll see what I mean—the buildup isn't just carbon, it's carbon mixed with unburned lubricants that create a cement-like coating.
Centerfire cartridges produce different types of fouling depending on powder burn rates and bullet composition. Fast-burning pistol powders tend to create finer carbon particles that pack into tight layers, while rifle powders often leave chunkier deposits that are easier to break loose mechanically.
The real problem isn't the carbon itself—it's how it changes the internal geometry of your suppressor. Those precision-machined baffles and expansion chambers work because of specific volume ratios and gas flow patterns. Pack them with carbon and you're essentially shooting through a different suppressor entirely, one that's louder and less effective at reducing flash.
Manual cleaning: the old school approach
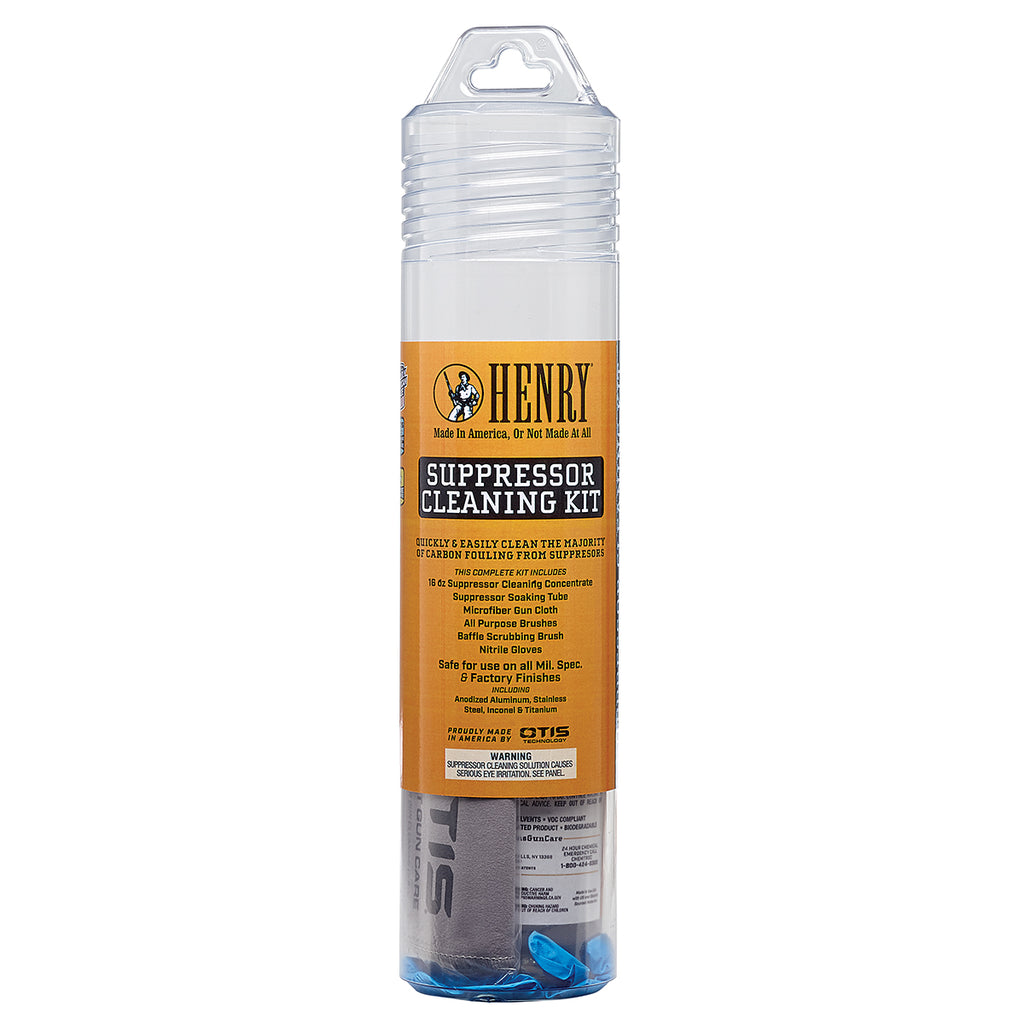
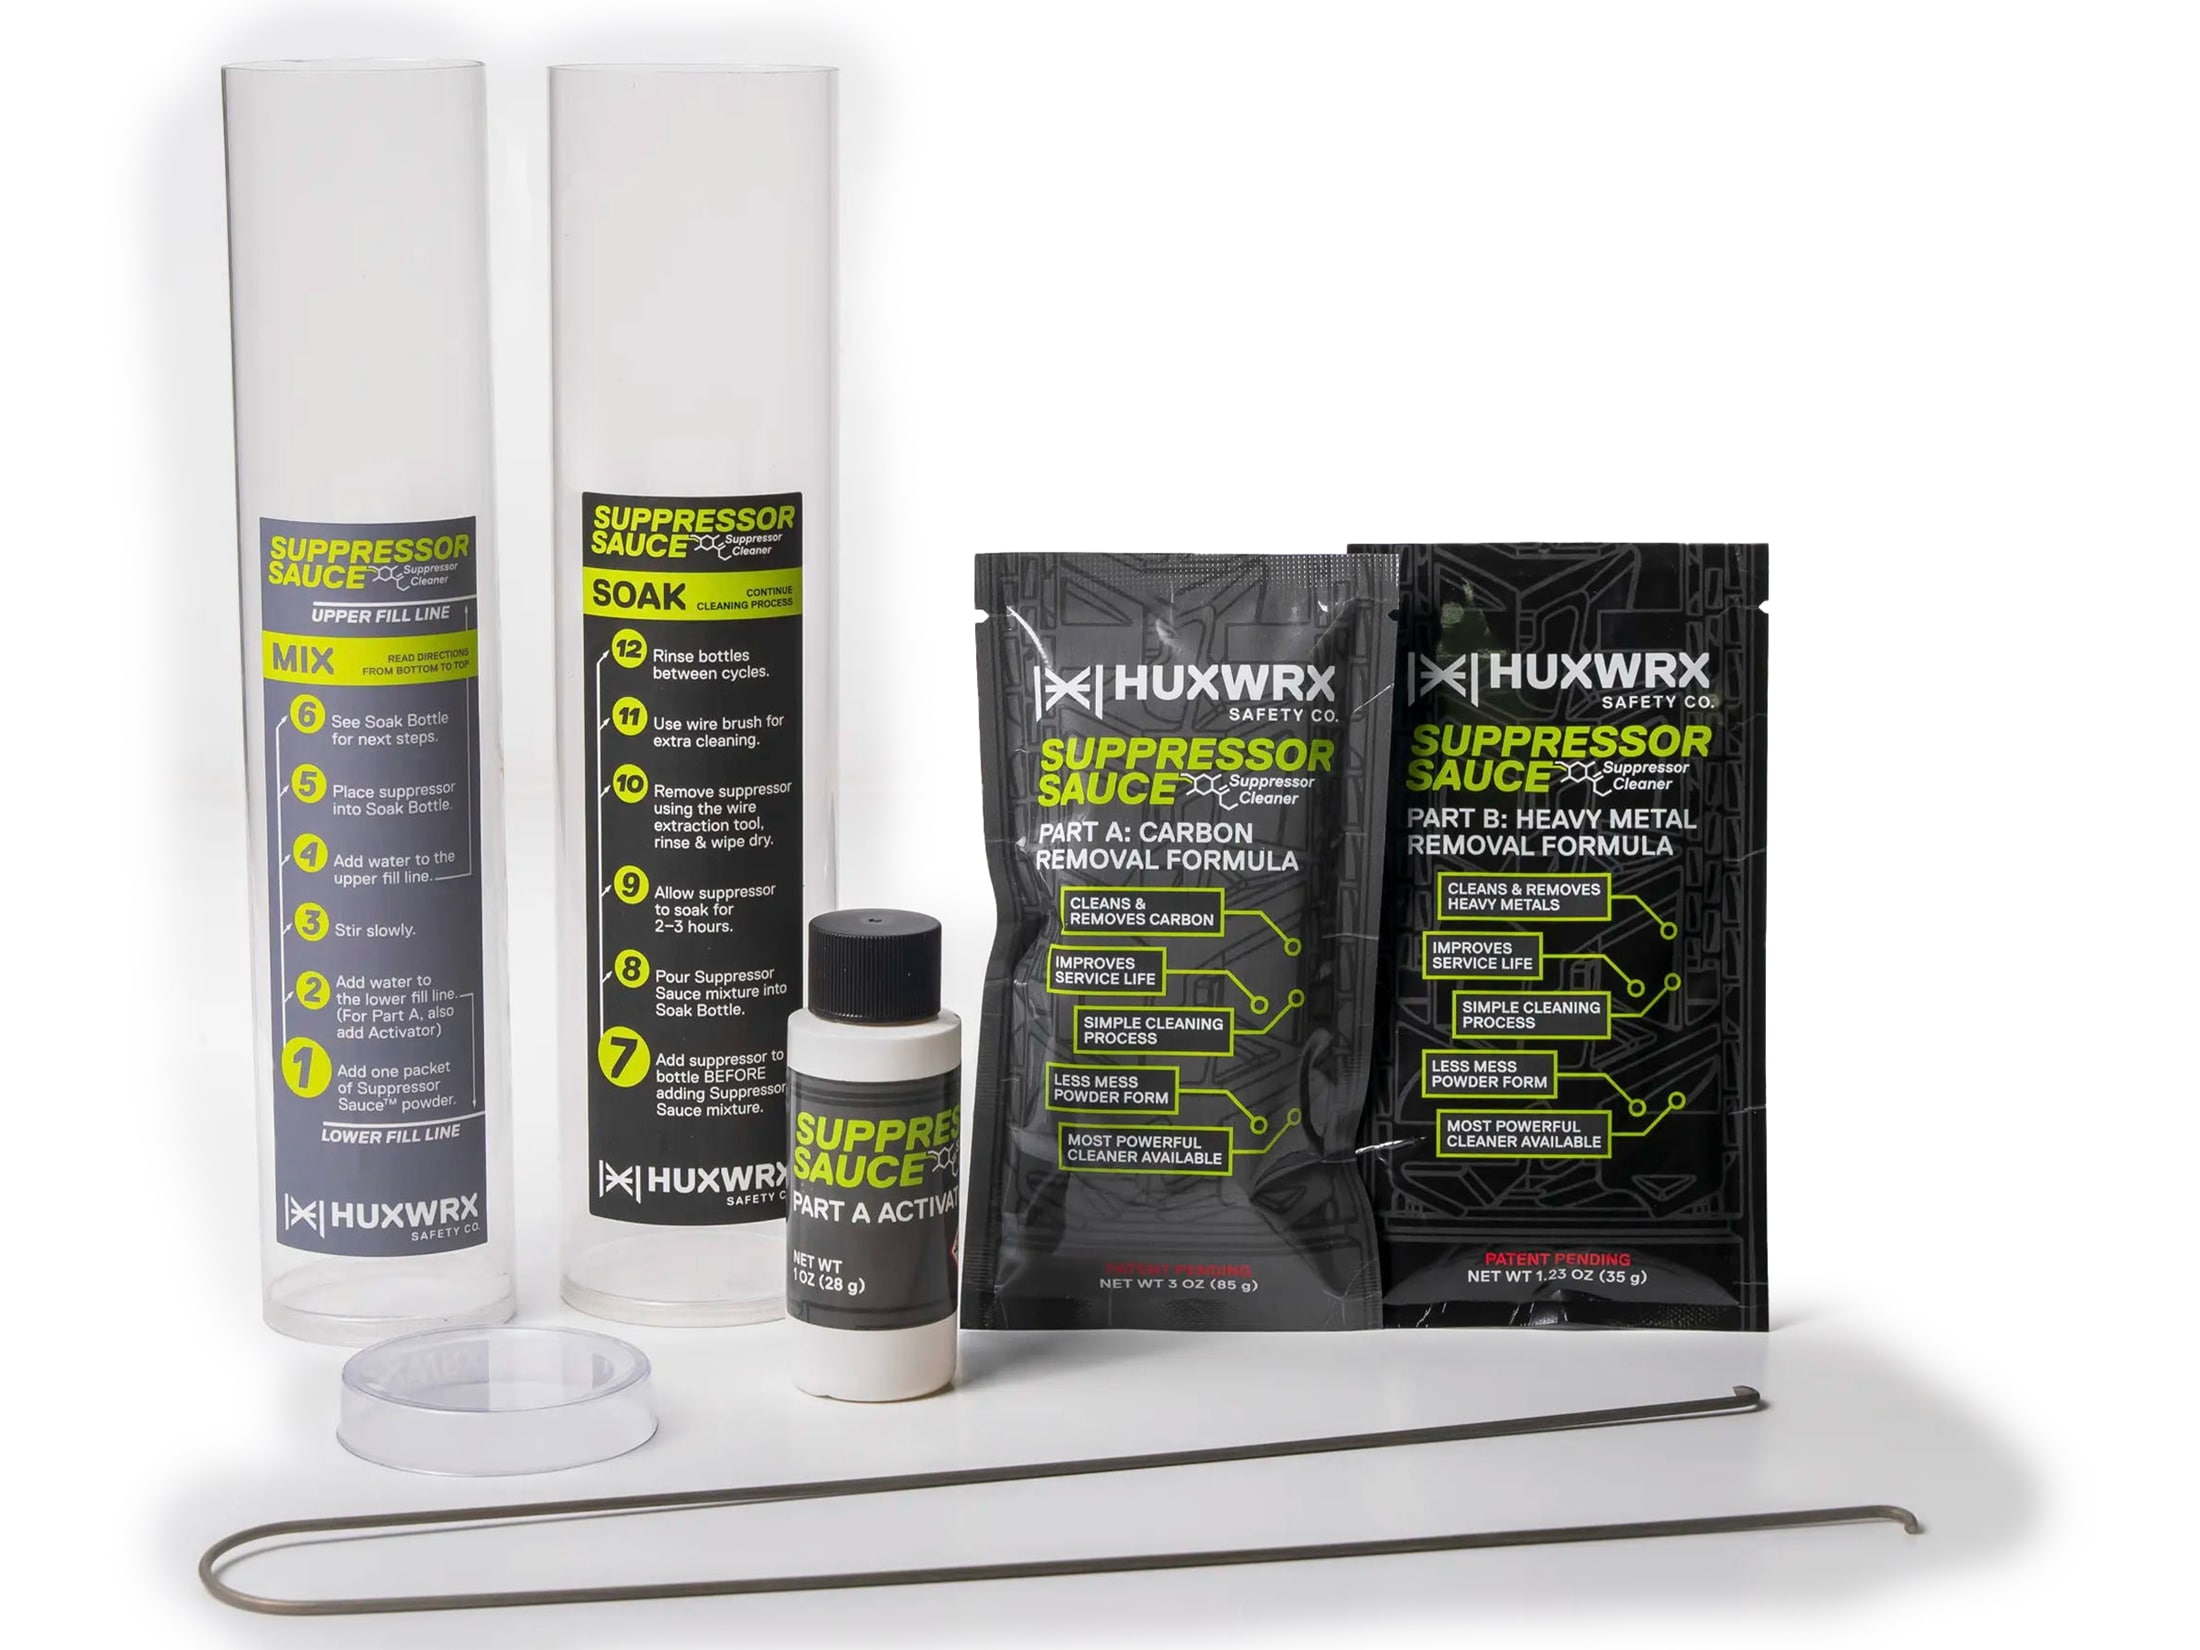
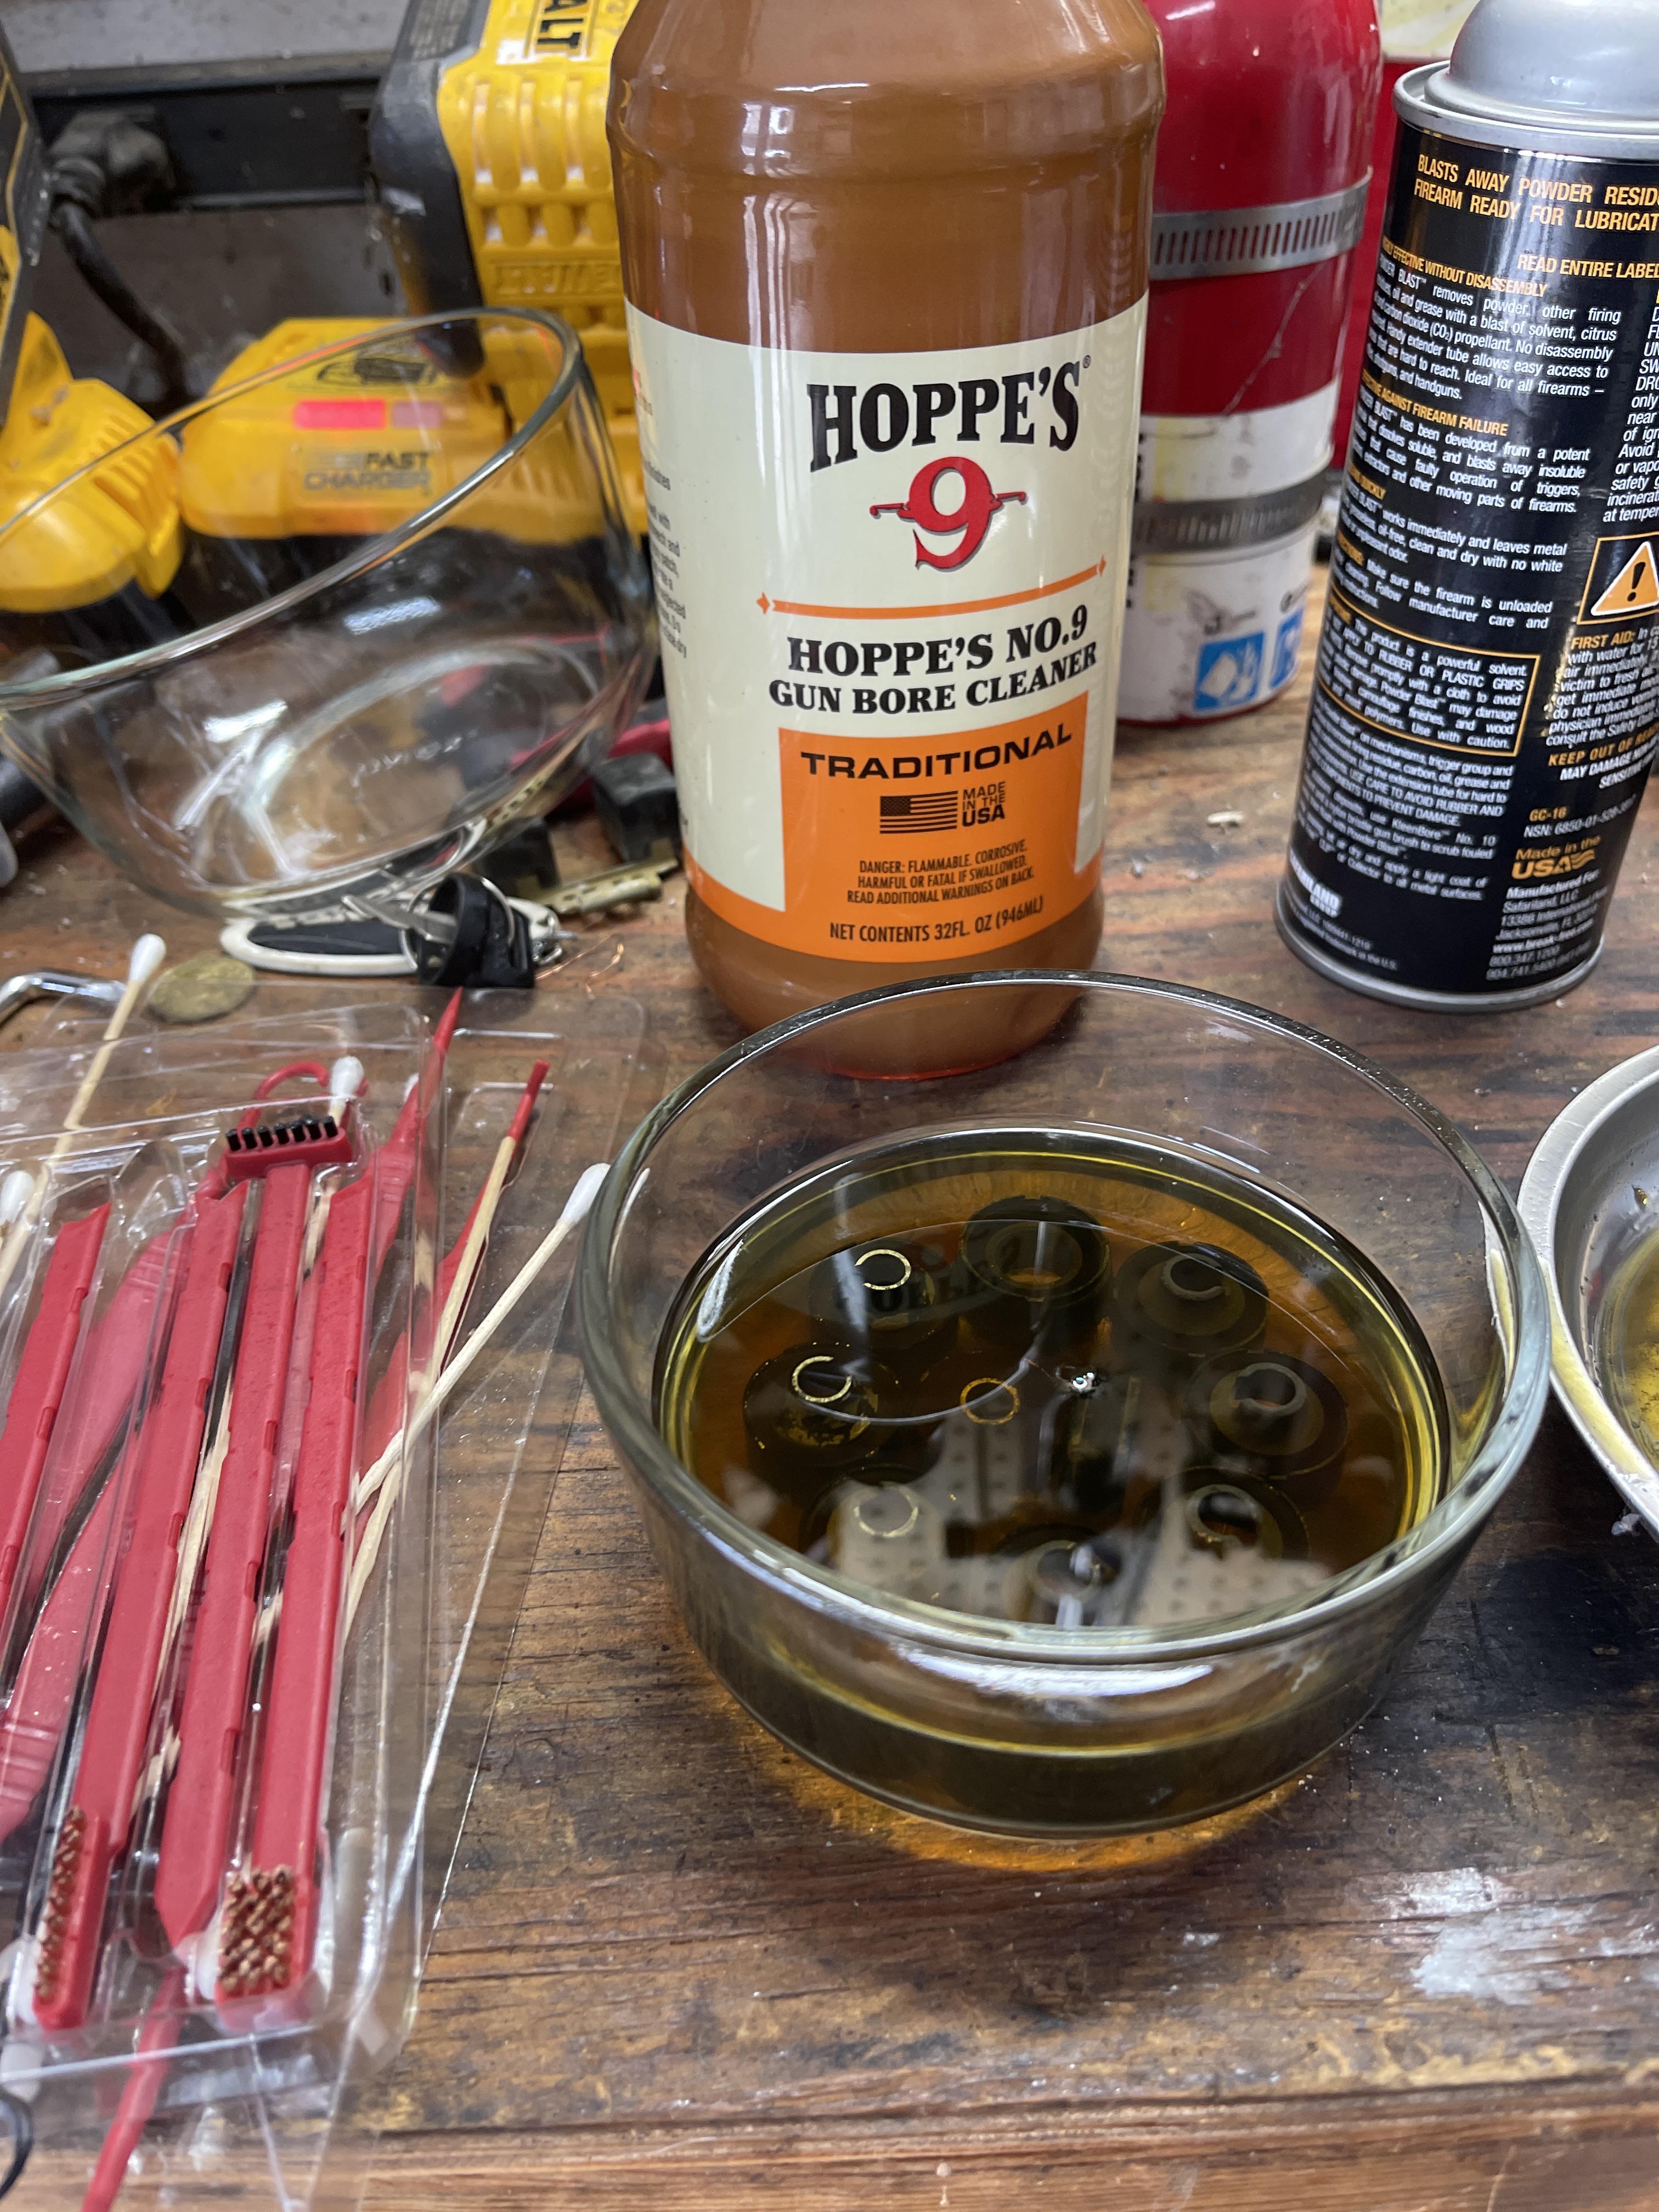
Manual cleaning means taking your suppressor apart (if possible) and going at the carbon with brushes, picks, and solvents. It's tedious, messy, and requires you to actually understand how your suppressor is built, but it works and the upfront costs are minimal.
The process starts with disassembly, which immediately separates suppressors into two camps: user-serviceable and sealed. If you've got a rimfire can or a modular design like the SilencerCo Omega series, you can take it apart and see exactly what you're dealing with. Sealed cans like most rifle suppressors require different tactics since you're working through the ends.
For disassembled suppressors, the manual process is straightforward but time-intensive. Each baffle gets individual attention with carbon scrapers, bronze brushes, and penetrating solvents. The key is patience—trying to rush the process by using more aggressive chemicals or tools usually means damaged baffles or stripped threads.
Carbon scrapers work better than you'd expect if you use them correctly. The trick is working at angles that follow the baffle geometry instead of fighting against it. Most guys try to scrape straight across surfaces when they should be following the gas flow patterns that created the buildup in the first place.
What manual cleaning feels like
The first time you manually clean a heavily fouled rimfire suppressor, plan on spending 2-3 hours if you're being thorough. It's not difficult work, but it's repetitive and detail-oriented. You'll go through a lot of cotton swabs, and your fingers will be black despite wearing gloves.
The satisfaction factor is real though. There's something deeply satisfying about seeing a carbon-caked baffle come clean under patient scrubbing. You also learn exactly how your suppressor works and where fouling tends to accumulate, which helps with maintenance scheduling.
The mess factor is also real. Even with good ventilation and drop cloths, you'll end up with carbon dust and solvent residue in places you didn't expect. Do this work in the garage or basement, not at the kitchen table.
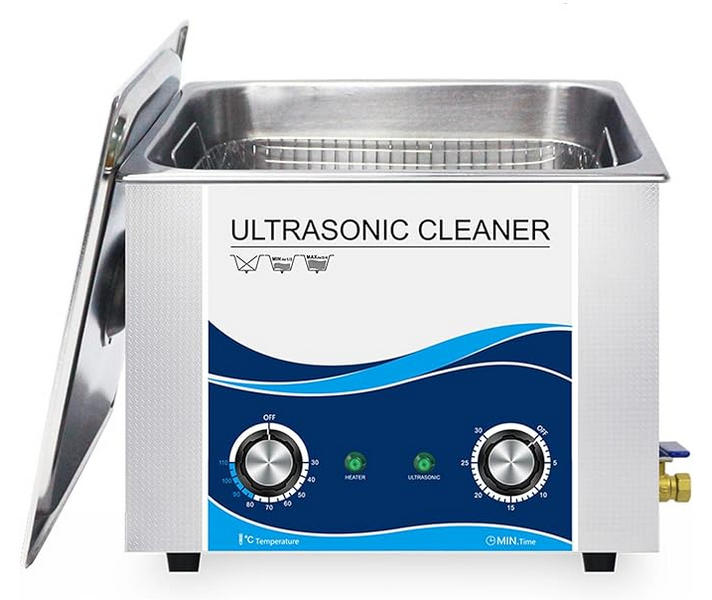
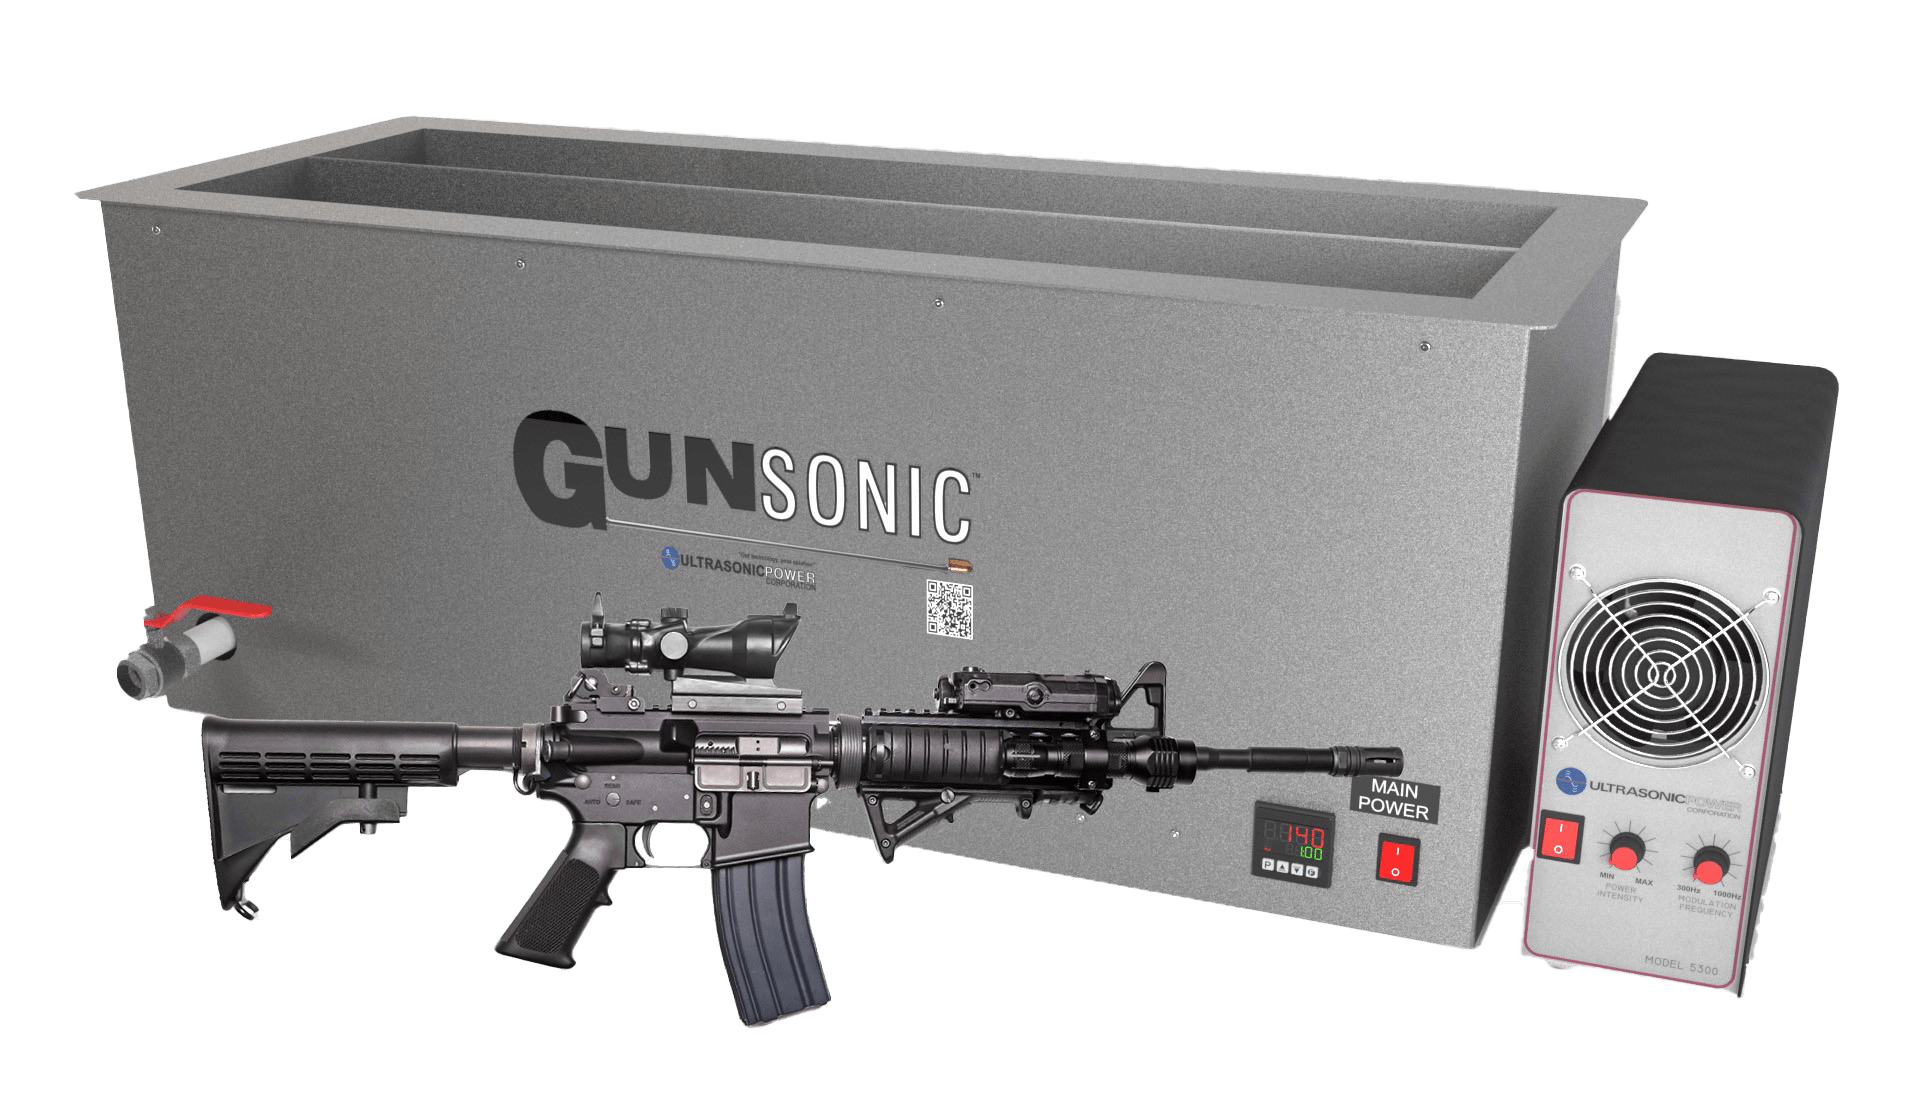
Ultrasonic cleaning: the modern solution
Ultrasonic cleaners use high-frequency sound waves to create microscopic bubbles in cleaning solution. When these bubbles collapse—a process called cavitation—they create tiny shock waves that knock carbon and fouling loose from surfaces, including areas you can't reach with brushes or picks.
The technology isn't new, but it's become more accessible as prices have dropped and purpose-built gun cleaning units have hit the market. Professional gunsmiths and military armorers have used ultrasonic cleaners for decades because they work faster and more thoroughly than manual methods for certain types of fouling.
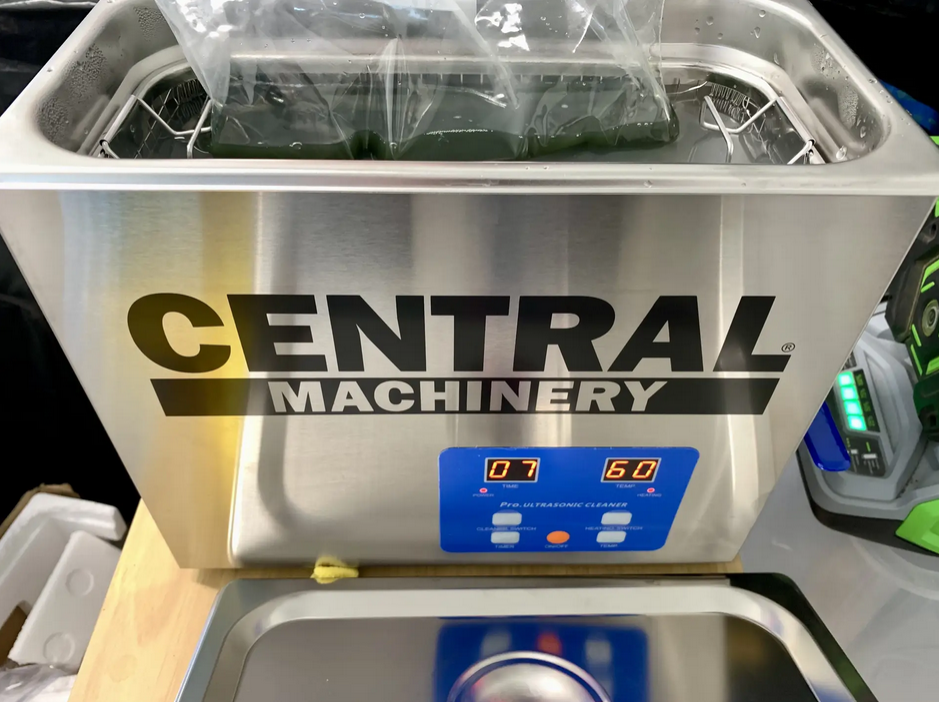
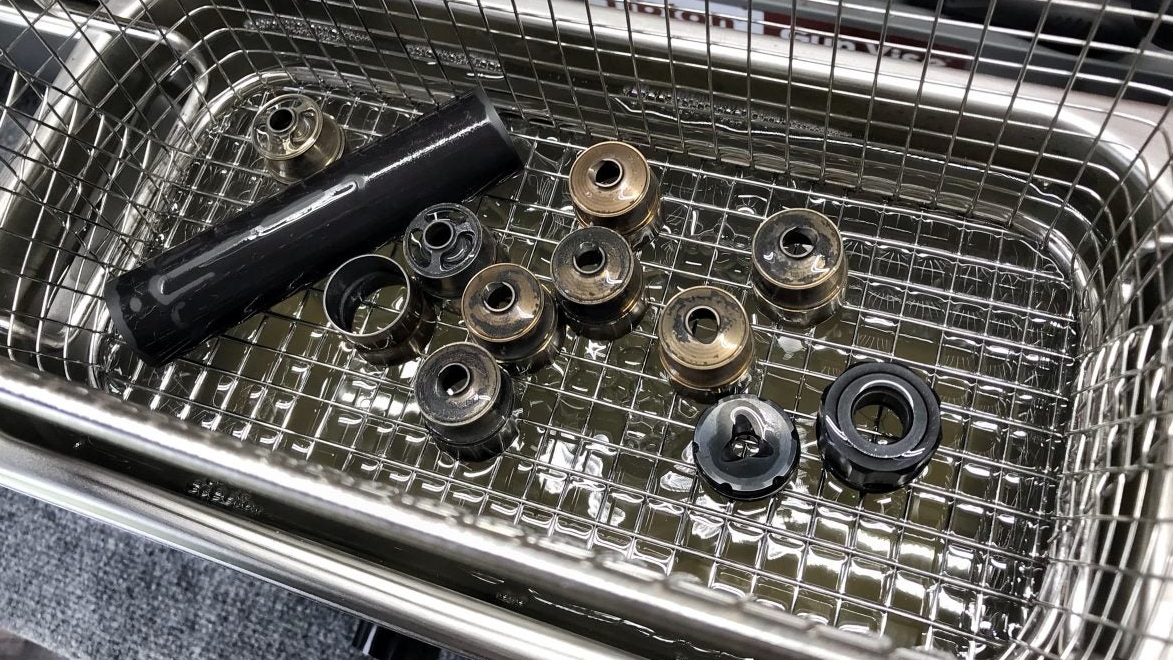
Here's how it actually works: you fill the tank with cleaning solution, drop in your suppressor parts, set the timer, and walk away. The cavitation action reaches into every crevice and corner, breaking loose carbon deposits that would take hours to scrape off manually. When the cycle finishes, most of the fouling just rinses away.
The catch is that ultrasonic cleaning isn't magic. It works exceptionally well on certain types of fouling—particularly the fine, powdery carbon from rimfire ammunition—but struggles with thick, baked-on deposits that have been building up for thousands of rounds. Think of it as very thorough but not very aggressive.
Tank size matters more than you might think. A 2-liter unit handles most pistol suppressors and rimfire cans, but rifle suppressors often require 6-liter or larger tanks to fully submerge the baffles. Trying to clean parts that aren't fully submerged defeats the purpose of the process.
Cleaning solution chemistry
The cleaning solution you choose makes a huge difference in results, regardless of whether you're scrubbing by hand or using an ultrasonic cleaner. Generic degreasers work, but purpose-built carbon solvents work better because they're formulated to break down the specific types of fouling that suppressors accumulate.
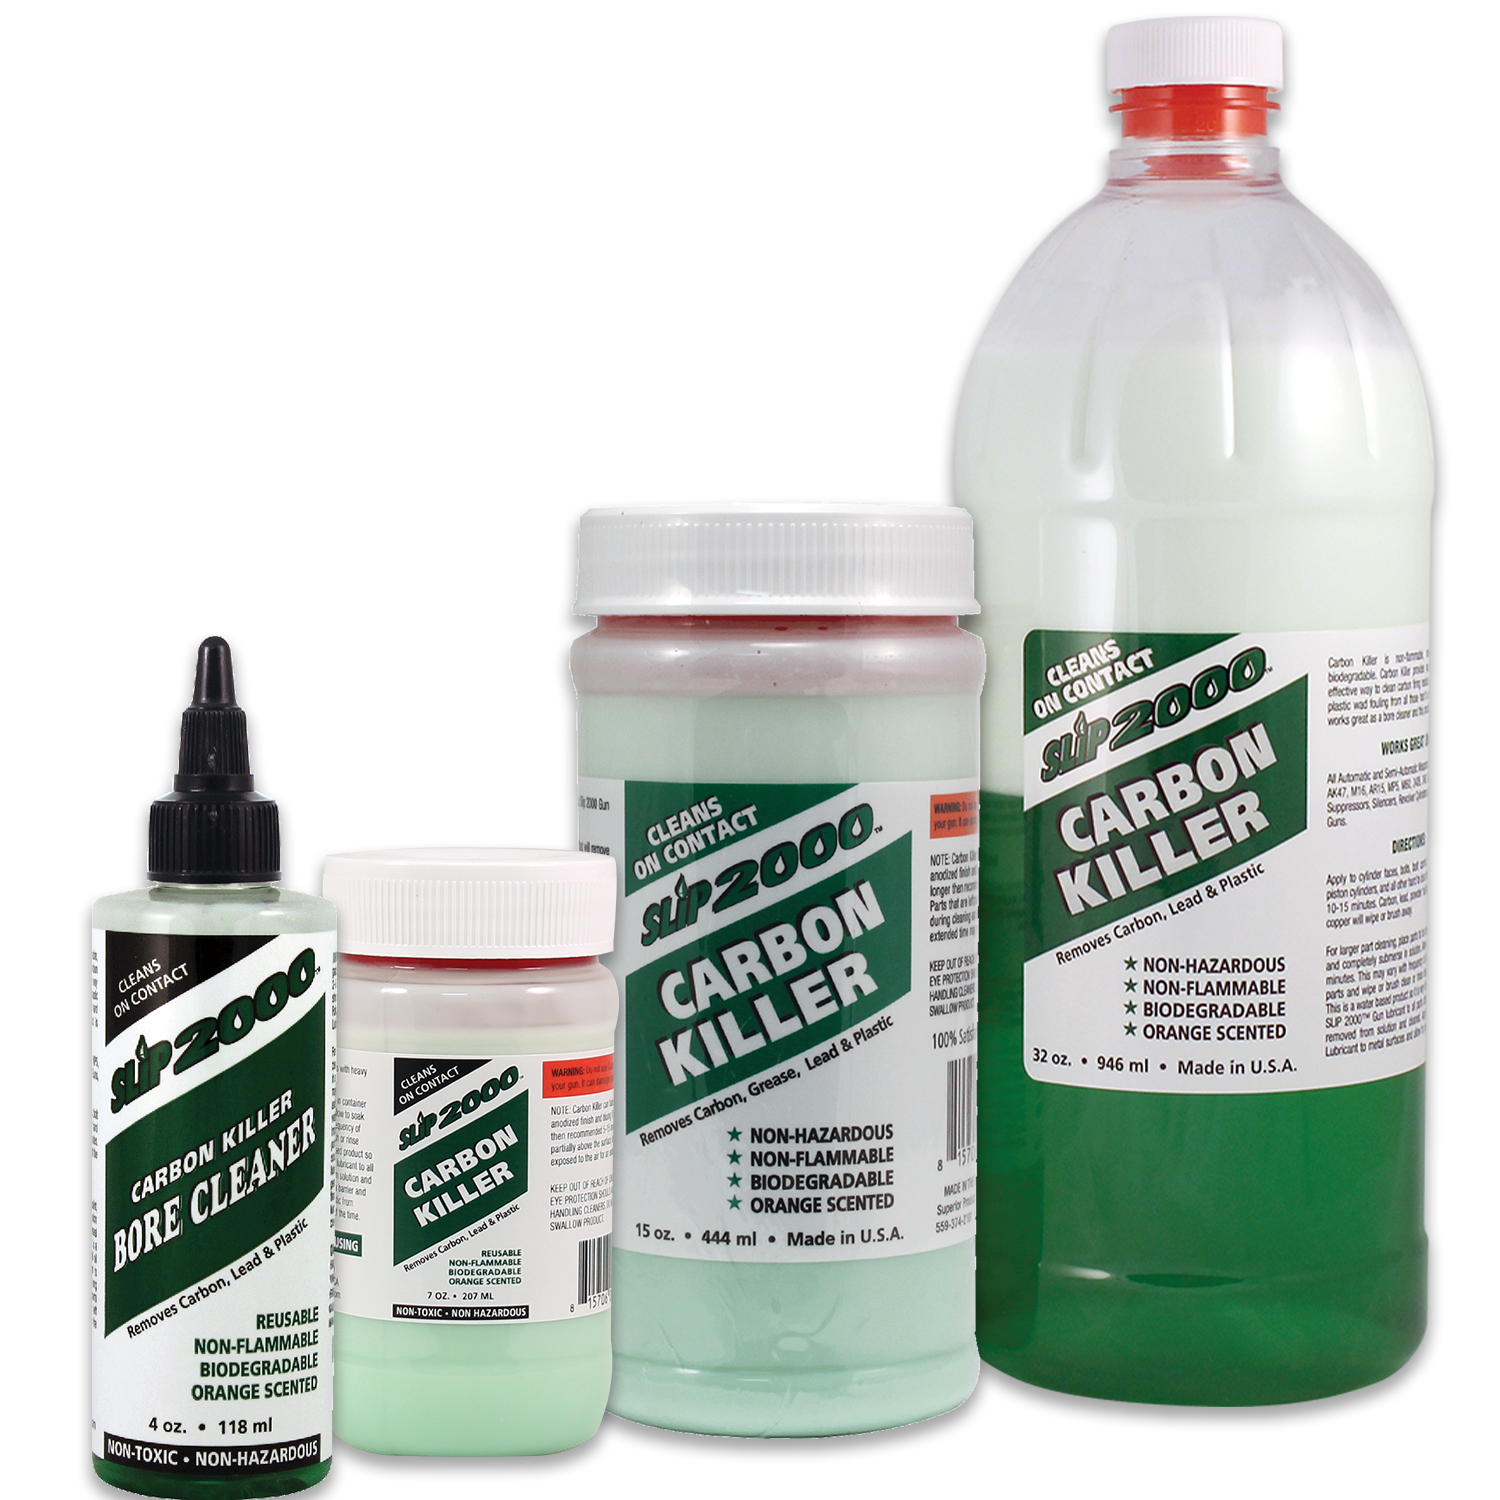
For manual cleaning, penetrating solvents like Slip 2000 Carbon Killer excel at softening baked-on carbon so it scrapes away easier. These products work by breaking down the molecular bonds that hold carbon particles together, essentially turning concrete-hard deposits back into something that resembles the original soot.
Ultrasonic cleaning solutions are different animals entirely. They need to be thin enough to transmit sound waves effectively while still having enough cleaning power to work on carbon. Most commercial ultrasonic gun cleaning solutions are water-based with surfactants and mild solvents—think industrial-strength dish soap rather than aggressive chemical strippers.
The pH balance matters too. Highly alkaline solutions can etch aluminum baffles, while acidic cleaners can corrode steel components. The best ultrasonic solutions are pH-neutral or slightly alkaline, aggressive enough to work on carbon but gentle enough not to damage suppressor materials.
Temperature affects cleaning performance significantly. Warm solutions work faster and more effectively than cold ones, but too much heat can damage seals and coatings. Most ultrasonic units have built-in heaters that maintain optimal temperatures automatically, usually around 140-160°F.
Material considerations
Not all suppressor materials respond the same way to different cleaning methods, and this is where a lot of guys make expensive mistakes. What works perfectly on a stainless steel baffle stack might damage an aluminum or titanium suppressor.
Stainless steel suppressors are the most forgiving. They handle aggressive solvents, high temperatures, and mechanical scrubbing without issues. Most manual cleaning techniques work fine on stainless steel, and ultrasonic cleaning is completely safe as long as you're using appropriate solutions.
Aluminum suppressors require more care. The material is softer than steel, so aggressive scraping can leave scratches or gouges that affect performance. Ultrasonic cleaning is actually gentler on aluminum than manual methods, but you need to watch the solution chemistry carefully. Highly alkaline cleaners can cause pitting or discoloration.
Titanium suppressors are tough but have their own quirks. The material handles heat and chemicals well, but it can develop a rainbow discoloration from certain cleaning processes. This is purely cosmetic and doesn't affect performance, but it bothers some owners. Ultrasonic cleaning with neutral pH solutions avoids most discoloration issues.
Coated suppressors add another variable. Cerakote and similar finishes can handle most cleaning processes, but they're not indestructible. Aggressive scraping will wear through coatings over time, while ultrasonic cleaning is generally coating-safe as long as temperatures stay reasonable.
Time and effort comparison
The time investment difference between manual and ultrasonic cleaning is dramatic, but it's not just about total hours—it's about active versus passive time. Manual cleaning requires your constant attention, while ultrasonic cleaning mostly runs itself.
A heavily fouled rimfire suppressor that takes 2-3 hours to clean manually might run through an ultrasonic cleaner in 30-45 minutes of actual cleaning time. But that doesn't include setup, solution preparation, and post-cleaning inspection and lubrication. The real advantage is that most of the ultrasonic time is hands-off.
For lightly fouled suppressors, the time difference is less dramatic. A suppressor that only needs basic carbon removal might take 30 minutes manually versus 20 minutes ultrasonically, but you still have to factor in setup and cleanup time for both methods.
Frequency matters too. If you're cleaning one suppressor twice a year, the time savings from ultrasonic cleaning probably aren't worth the equipment investment. If you're running multiple suppressors regularly and cleaning them monthly, the time savings add up quickly.
The learning curve is steeper for manual cleaning. You need to understand how to disassemble your specific suppressor, which tools work best for different types of fouling, and how to avoid damaging delicate components. Ultrasonic cleaning is more straightforward—fill tank, add parts, press button—but you still need to understand solution selection and post-cleaning procedures.
Equipment costs and practical considerations
Manual cleaning requires minimal upfront investment but ongoing consumable costs. A basic kit with carbon scrapers, brushes, picks, and solvents runs $50-100 depending on quality. The real costs come from replacement brushes, solvents, and consumables like cotton swabs and patches.
Ultrasonic cleaners start around $200 for basic 2-liter units and scale up quickly. Professional-grade units with heating, timers, and larger tanks can run $500-1500. Then you need cleaning solutions, which cost $20-40 per gallon and need periodic replacement as they become contaminated.
The break-even point depends on usage patterns. If you're cleaning one suppressor a few times per year, manual methods are more economical. If you're running multiple suppressors regularly or dealing with heavy rimfire fouling, ultrasonic cleaning pays for itself through time savings and more thorough results.
Storage and workspace requirements differ significantly. Manual cleaning needs good ventilation, adequate lighting, and space to lay out parts and tools. Ultrasonic cleaners need dedicated counter space, electrical outlets, and ventilation for solution vapors. Neither method works well in cramped spaces.
Maintenance costs for ultrasonic units include periodic solution changes, occasional tank cleaning, and eventual replacement of heating elements or transducers. Quality units last years with proper care, but they're not maintenance-free. Manual cleaning tools last indefinitely if you take care of them.
Which suppressors benefit most from each method
Rimfire suppressors are where ultrasonic cleaning really shines. The waxy, sticky fouling from .22 LR ammunition responds exceptionally well to cavitation action, and the fine particle size means it rinses away cleanly once it's been loosened. Manual cleaning of heavily fouled rimfire cans is genuinely miserable work.
Pistol suppressors fall somewhere in the middle. The carbon from pistol powders is usually softer and easier to remove manually than rifle carbon, but ultrasonic cleaning still works faster and reaches areas that are difficult to access with brushes. The deciding factor is often how frequently you shoot and how much you value your time.
Rifle suppressors present the biggest challenge for both methods. The high pressures and temperatures create hard, baked-on carbon that's difficult to remove regardless of method. Ultrasonic cleaning helps with the fine particles and residue, but thick deposits often need mechanical removal first. This is where hybrid approaches work best.
Sealed suppressors—those that can't be disassembled—favor ultrasonic cleaning because it's the only way to reach internal surfaces effectively. Manual cleaning of sealed cans is limited to what you can reach from the ends, which isn't much. The cavitation action of ultrasonic cleaning penetrates throughout the internal volume.
Modular suppressors that come apart easily can benefit from either method, but manual cleaning gives you more control over the process. You can focus extra attention on heavily fouled areas while giving lightly fouled sections just basic cleaning. Ultrasonic cleaning treats everything equally, which isn't always optimal.
Common mistakes and troubleshooting
The biggest mistake with manual cleaning is rushing the process. Carbon buildup didn't happen overnight, and it won't come off overnight either. Trying to speed things up with more aggressive chemicals or tools usually results in damaged components or incomplete cleaning.
Using the wrong solvents is another common error. Household cleaners, brake cleaners, and other non-gun-specific products can damage seals, coatings, or the suppressor materials themselves. Stick with products designed for firearms cleaning, even if they cost more.
With ultrasonic cleaning, the most common mistake is expecting it to work on everything. Thick, baked-on carbon deposits need mechanical removal first. Running heavily fouled parts through multiple ultrasonic cycles without pre-cleaning just wastes time and contaminates the solution faster.
Solution contamination is a real issue that many people ignore. As cleaning solutions become loaded with carbon and fouling, they become less effective and can actually redeposit contamination onto parts. Change solutions regularly based on usage, not just time.
Temperature control matters more than most people realize. Too cold and the cleaning action is sluggish. Too hot and you risk damaging seals or coatings. Most units have built-in temperature control, but older or cheaper units might need monitoring.
Troubleshooting stubborn carbon
When standard cleaning methods aren't working, the problem is usually that you're fighting chemistry with the wrong tools. Carbon that's been heat-cycled thousands of times becomes increasingly difficult to remove because the molecular structure changes.
For manual cleaning, this means stepping up to more aggressive solvents and longer soak times. Products like Slip 2000 Carbon Killer are specifically formulated for stubborn deposits, but they need time to work. Apply the solvent and let it sit for 30-60 minutes before attempting mechanical removal.
For ultrasonic cleaning, stubborn deposits usually require pre-treatment or multiple cycles with fresh solution. Don't just keep running the same contaminated solution—it won't get more effective with time. Clean the tank, add fresh solution, and try again.
Sometimes the answer is combining methods. Use ultrasonic cleaning to remove the bulk of the fouling, then manually address problem areas that didn't come completely clean. This hybrid approach often works better than either method alone for heavily fouled suppressors.
Product comparison: cleaners that actually work
For manual cleaning, Slip 2000 Carbon Killer stands out for its ability to soften baked-on carbon without damaging suppressor materials. It's not cheap, but it works on deposits that other solvents can't touch. The key is patience—let it soak and do its job.
Breakthrough Clean Battle Born High Purity Oil works well for post-cleaning lubrication of threaded components and moving parts. It's thin enough not to attract fouling but provides adequate protection against corrosion. Don't over-apply—a little goes a long way.
For ultrasonic cleaning, the Hornady Hot Tub series offers good value for occasional users. The 2-liter model handles most pistol suppressors and rimfire cans, while the 9-liter version accommodates rifle suppressors. Build quality is solid and the controls are straightforward.
Professional users should look at the Infante P115 series. These units are built for continuous use and offer precise temperature and time control. They're expensive but worth it if you're cleaning multiple suppressors regularly or running a shop.
Hornady One Shot Sonic Clean solution works well for general gun cleaning but isn't optimized specifically for carbon removal. For heavily fouled suppressors, purpose-built solutions like those from L&R Manufacturing perform better, though they cost more per gallon.
Setting up your cleaning routine
Successful suppressor maintenance is about consistency, not perfection. It's better to clean lightly and frequently than to let fouling build up to the point where removal becomes a major project. Most suppressors benefit from cleaning every 500-1000 rounds, depending on ammunition type and shooting conditions.
Keep a simple log of round counts and cleaning dates. This doesn't need to be elaborate—a notebook or phone app works fine. The goal is to establish patterns so you can predict when cleaning will be needed rather than waiting until performance degrades noticeably.
Pre-cleaning inspection saves time and effort. Look for obvious fouling buildup, check thread condition, and note any performance changes before deciding on cleaning method and intensity. Light fouling might need only basic cleaning, while heavy buildup requires more aggressive approaches.
Post-cleaning inspection is just as important. Check for damage, ensure all fouling is removed, and verify that threaded components move smoothly. This is also when you apply appropriate lubricants to threads and moving parts.
Document what works for your specific suppressors and ammunition combinations. What cleans easily, what requires extra attention, and which methods work best for your shooting patterns. This information becomes valuable as you develop efficient routines.
The key is finding the balance between thorough cleaning and practical time investment. Perfect isn't necessary—clean enough to maintain performance and prevent damage is the goal. Your suppressor doesn't need to look new, it just needs to work properly.