Understanding Common Wear Points In Shotgun Actions: Inspection Tips For Owners
Shotguns serve a multitude of purposes, from hunting to sport shooting, and even home defense. With their versatility comes the responsibility of maintenance, particularly when it comes to understanding the wear points in their actions. This article focuses on how to inspect these critical areas, ensuring your shotgun remains reliable and safe for use. We’ll cover what you should look for, why it matters, and how to perform your inspections methodically.
Before diving into the nitty-gritty, let’s clarify our scope. This article will focus on common wear points in pump-action and semi-automatic shotguns. We will examine the symptoms of wear, methods for inspection, and corrective actions that can keep your shotgun running smoothly. Remember, if you encounter anything that feels beyond your skill set, don’t hesitate to reach out to a qualified gunsmith.
Common wear points in shotgun actions
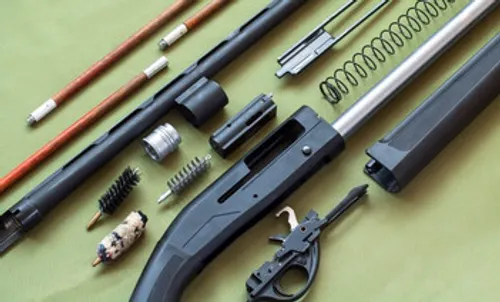
Both pump-action and semi-automatic shotguns have unique mechanisms that can wear over time. Here are some common wear points to inspect regularly:
1. Bolt assembly
The bolt is the heart of your shotgun’s action. Over time, it can wear down due to repeated cycling and exposure to dirt and debris. Look for:
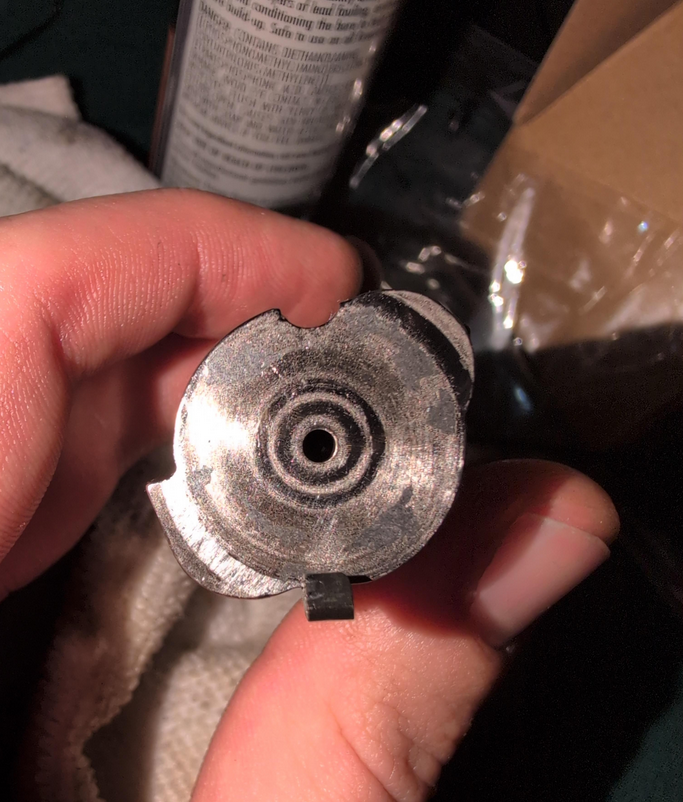
Wear marks: Pay attention to the locking lugs; they should have even contact surfaces without excessive wear or gouging.
Firing pin condition: A damaged firing pin can lead to light strikes or misfires. Check for bending or unusual wear patterns.
Spring fatigue: Inspect the extractor and ejector springs for any signs of weakness. A weak spring can lead to feeding issues.
2. Chamber area
The chamber is where the shell is seated before firing, and it takes a lot of abuse. Signs of wear here can lead to extraction problems:
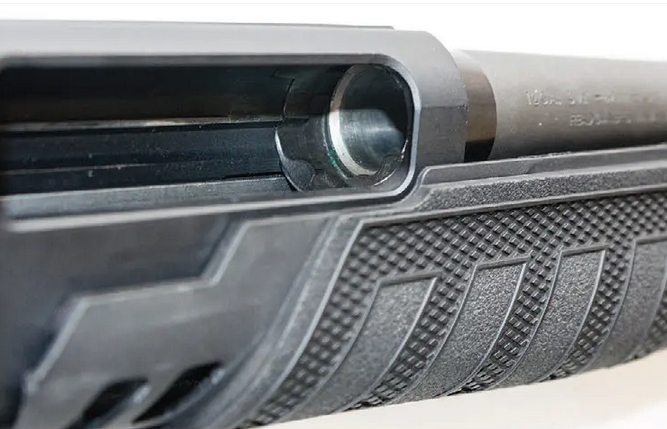
Roughness or scoring: Use a flashlight to inspect the chamber walls for any scoring or rough patches. These can impede shell extraction.
Cracks or bulges: Any visible cracks can lead to catastrophic failure—stop right there and consult a gunsmith if you see this.
3. Magazine tube
In pump-action shotguns, the magazine tube is crucial for holding shells ready for action. Inspect it for:
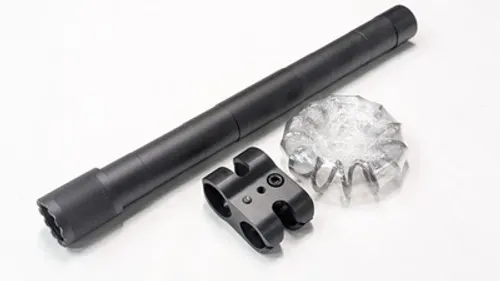
Corrosion: Rust can form inside the magazine tube, especially if moisture has been trapped. Use a cleaning rod with a brush attachment to check for smoothness.
Follower movement: The follower should move freely without binding. If it sticks, there may be debris or corrosion present.
4. Action bars
Action bars connect the fore-end to the bolt assembly in pump-action shotguns. Wear can manifest as:
Uneven wear: Check for flat spots or excessive wear on the action bars themselves. This can affect cycling performance.
Binding: The action bars should slide smoothly within their channels. If you feel resistance, there may be debris or misalignment.
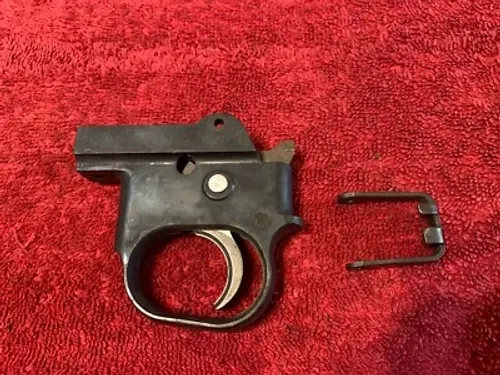
5. Trigger assembly
The trigger assembly is where precision meets reliability. Over time, components may wear, leading to unreliable operation:
Trigger pull weight: If you notice a significant change in trigger pull weight, it could indicate wear on the sear or trigger components.
Sear engagement: Look for signs of excessive wear on the sear engagement surfaces—this could lead to accidental discharges.
Tools for inspection
Before you get started, gather some essential tools to make your inspection easier:
Bench block: Provides a stable surface for working on your shotgun.
Roll-pin punches: Useful for removing pins without damaging the surrounding material.
Torque wrench: Ensures that screws are tightened to factory specifications.
Headspace gauges: Critical for checking proper chamber dimensions.
Stones: For smoothing out rough edges on components if necessary.
Feeler gauges: Helpful for checking tolerances between moving parts.
Inspection process
Now that we know what to look for, let's discuss how to conduct an effective inspection.
Step 1: Preliminary examination
Start with a visual inspection of your shotgun while it’s still assembled:
Look for any obvious signs of damage or corrosion on the exterior.
Cycle the action several times while observing how smoothly it operates.
Listen for any unusual sounds—grinding or excessive rattling might indicate internal issues.
Step 2: Controlled disassembly
Disassemble your shotgun according to the manufacturer’s instructions. Make sure you document each step so you can reassemble it correctly later.
Remove the barrel and stock, exposing the action and bolt assembly.
Carefully remove the bolt assembly and set it aside.
Take out the trigger group and magazine tube if applicable.
Step 3: Detailed inspection
With components separated, inspect each part methodically:
Bolt assembly
Check locking lugs for wear patterns using a magnifying glass if needed.
Test firing pin movement—should be smooth with no binding.
Inspect extractor and ejector springs by compressing them; they should return to their original shape promptly.
Chamber area
Use a flashlight to look inside; feel for roughness with your fingers.
Inspect for cracks by running your finger along the edges—any irregularities should raise red flags.
Magazine tube
Shine a light inside and look for rust or debris accumulation.
Check follower movement by pushing it manually; it should glide smoothly without hesitation.
Action bars
Slide them back and forth in their channels while checking for binding—any grit should be cleaned out immediately.
Look at contact points for uneven wear; this could affect cycling reliability.
Trigger assembly
- Remove any pins carefully and inspect sear engagement surfaces visually and by touch—rough spots should be smoothed out but not overly polished.
Step 4: Corrective actions
If you find any issues during your inspection, here's how you might address them:
Minor scratches or roughness can often be smoothed with stones or fine-grit sandpaper—just be careful not to alter critical dimensions.
Weak springs should be replaced with factory-spec parts; don’t try to stretch or modify them.
For significant damage like cracks in the chamber or bolt assembly, consider this a stop line—take it to a qualified gunsmith.
Bench note
One critical fit observation: always ensure that action screws are tightened properly according to factory specs but avoid over-torquing them. Unevenly tightened screws can lead to misalignment issues that affect accuracy downrange.
Common mistakes
When inspecting shotgun actions, many enthusiasts make a few common errors:
Skipping regular inspections thinking “it’s fine” until something breaks.
Overlooking small signs of wear that can escalate into larger problems if ignored.
Failing to document findings during inspections, making it hard to track changes over time.
Using incorrect tools that may damage delicate components instead of aiding in proper inspection.
Attempting repairs beyond their skill level instead of consulting a professional when unsure.
Final thoughts on maintenance habits
Regular inspections are key to keeping your shotgun performing at its best. Make it a habit to check wear points at least once every few months or after heavy use—especially before hunting season or competitive shooting events.
By understanding what to look for and how to address issues, you can extend the life of your shotgun significantly while ensuring safe operation each time you pull the trigger.
Take pride in maintaining your firearms; it reflects not just on your skills as an owner but also on your respect for safety and reliability in shooting sports. So grab your tools, give that shotgun some TLC, and remember—when in doubt about any repairs or adjustments, don’t hesitate to consult a qualified gunsmith!