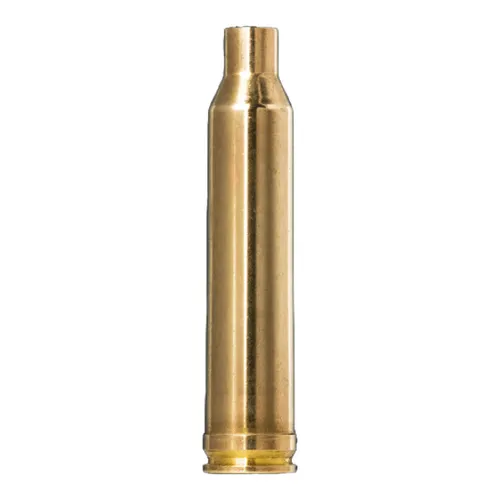
Understanding brass preparation for 7mm Remington Magnum reloading
When it comes to reloading for the 7mm Remington Magnum, proper brass preparation is crucial for achieving consistent performance and accuracy. This cartridge is known for its versatility, capable of handling everything from long-range precision shooting to big game hunting. However, to unlock its full potential, you must pay careful attention to how you prepare your brass before loading. In this article, we'll explore the steps involved in brass preparation, the tools required, and the common pitfalls to avoid.
The importance of brass preparation
Brass preparation sets the foundation for a successful reloading session. Properly prepped brass ensures consistent performance and can lead to tighter groups and improved accuracy on the range. More importantly, it minimizes the risk of pressure-related issues that can arise from inconsistent case dimensions or improper handling.

The 7mm Remington Magnum operates at higher pressures than many other cartridges, making it essential to start with well-prepared brass. This process involves inspecting, cleaning, resizing, trimming, and more. Each step contributes to the overall quality of your loaded ammunition.
Safety first: manual verification and workspace setup
Before diving into brass preparation, I want to emphasize the importance of safety. Always have your reloading manuals on hand for reference, and ensure you're using data that aligns with current standards for the 7mm Remington Magnum. It's crucial to cross-check your methods against reputable sources to avoid any mishaps.
Set up your workspace with safety in mind. Ensure good ventilation, wear safety glasses, and keep your area tidy. This minimizes distractions and potential hazards. A clean bench helps you focus on each step of the process without worrying about misplaced tools or components.
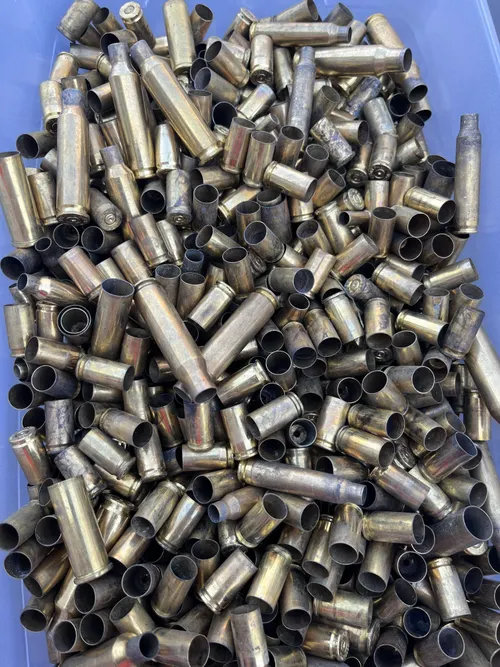
Step 1: Inspecting the brass
Start by visually inspecting each piece of brass. Look for signs of wear or damage such as dents, cracks, or bulges. These imperfections can compromise the structural integrity of the case and lead to failures during firing.
You should also check the primer pocket for residue or deformation. A damaged primer pocket can lead to improper seating of primers, which may cause misfires or inconsistent ignition. I’ve found that using a magnifying glass can help spot smaller imperfections that might otherwise go unnoticed.
Checklist for inspection:
Check for cracks or bulges in the case body.
Inspect the neck for deformities.
Ensure primer pockets are clean and undamaged.
Look for signs of excessive stretching or case head separation.
Step 2: Cleaning the brass
Once you've inspected your brass, it's time to clean it. This step removes dirt, grime, and any residual lubricant from previous loading sessions. Clean brass not only looks better but also helps prevent contamination when charging with powder.
You have two main options for cleaning: ultrasonic cleaners or tumbler media (such as corn cob or walnut shell). Ultrasonic cleaners do an excellent job of getting into tight spaces but can be more expensive. Tumblers are generally more accessible and effective for most reloaders.
Be sure to dry your brass thoroughly after cleaning. Any moisture left in the cases can affect powder performance and lead to issues at the range.
Checklist for cleaning:
Choose between ultrasonic cleaning or tumbling.
Dry thoroughly after cleaning.
Inspect again post-cleaning for any damage.
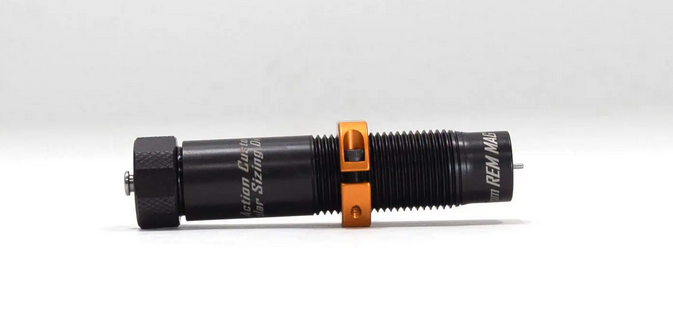
Step 3: Resizing the brass
Resizing is a critical step in preparing your brass for reloading. It ensures that cases will fit properly in your chamber and allows them to be reused multiple times. For the 7mm Remington Magnum, you’ll typically use a full-length resizing die.
When resizing, it's important to adjust your die according to your specific chamber dimensions. I recommend using a headspace gauge to measure the shoulder bump accurately. A common recommendation is about 0.002–0.003 inches of shoulder bump to ensure proper chambering while preventing excessive stretching of the case.
Common mistakes in resizing:
Incorrect die adjustment: Always verify your die settings with a headspace gauge.
Neglecting lube application: Ensure even lubrication on cases to prevent stuck cases in the die.
Over-resizing: Full-length resizing is necessary for semi-auto rifles, but bolt actions may only require neck sizing after initial fire-forming.
Step 4: Trimming the brass
After resizing, trimming is vital for maintaining consistent case length. Over time and with repeated firings, brass cases can stretch beyond acceptable lengths, which can lead to inconsistent chambering and increased pressures.
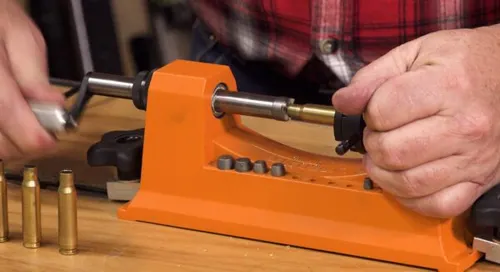
For the 7mm Remington Magnum, the maximum case length is typically around 2.620 inches. I often trim my cases to around 2.615 inches to ensure I stay within safe limits while allowing for some wear over subsequent loadings.
Use a case trimmer or a lathe-style trimmer for this step. Make sure to chamfer and deburr both the inside and outside of the case mouth after trimming to facilitate smooth bullet seating.
Trimming checklist:
Measure case length before trimming.
Trim cases to approximately 2.615 inches.
Chamfer and deburr case mouths post-trimming.
Step 5: Primer pocket uniformity
Uniformity in primer pocket depth is essential for consistent ignition. If you're using once-fired brass or mixed headstamps, some primer pockets may be deeper than others. To address this issue, consider using a primer pocket uniformer tool.

This tool will help create a uniform depth across all primer pockets, ensuring that primers seat consistently and ignite uniformly across your loads.
Common mistakes with primer pockets:
Ignoring primer pocket depth: Always check uniformity; inconsistent depths can lead to misfires.
Failing to clean pockets: Residue can accumulate and affect seating; keep them clean.
Step 6: Final inspection before loading
Before moving on to loading your prepared brass, conduct one last inspection. Check each case's overall condition: ensure they are clean, resized correctly, trimmed accurately, and have uniform primer pockets.
This final inspection is crucial because it’s much easier to catch errors before loading than after you’ve charged cases with powder.
Final inspection checklist:
Confirm cleanliness of each case.
Verify proper resizing and trimming.
Ensure uniformity in primer pocket depth.
Step 7: Recording your process
As you prepare your brass, it's vital to keep detailed records of each batch. Logging data such as case headstamp, number of firings, resizing method, and any measurements taken can help you identify trends over time.
I recommend using a simple notebook or spreadsheet to log this information systematically. This practice will help you refine your reloading process and make informed decisions about future loads.
Logging checklist:
Record case headstamp and number of firings.
Note resizing method and measurements.
Keep track of any issues encountered during preparation.
Understanding pressure signs
As you develop loads for your 7mm Remington Magnum, being aware of pressure signs is crucial. High-pressure loads can manifest in various ways: flattened primers, sticky extraction, or case head expansion.
Always start at the lower end of published load data and work your way up while monitoring these signs closely. It’s wise to back off at the first indication of excessive pressure rather than pushing forward in pursuit of velocity gains.
Common pressure signs:
Flattened primers: Indicates high pressure; back off on charge weight.
Sticky extraction: Suggests excessive pressure; check load data.
Case head expansion: Measure carefully; excessive expansion warrants caution.
Range Notes
When you finally take your prepared ammunition to the range, pay attention not just to group sizes but also to how your rifle behaves under different conditions. This includes observing how each batch performs concerning velocity consistency and accuracy over time.
Keep an eye on SD (standard deviation) values—lower SD indicates more consistent performance across shots. Aim for single-digit SDs for precision shooting; anything above that may require revisiting your brass preparation steps or load development process.
Common mistakes in brass preparation
Skipping case inspections: Always inspect each piece thoroughly; missed defects can lead to dangerous situations.
Improperly adjusting dies: Ensure dies are set according to your specific chamber dimensions; use gauges if needed.
Neglecting cleanliness: Dirty cases can impact powder performance; always clean thoroughly before loading.
Ignoring length consistency: Failing to trim cases appropriately can lead to inconsistent chambering; always measure before loading.
Not logging data: Keeping records helps identify trends; without them, you'll miss valuable insights into your loading practices.
Conclusion
Brass preparation is a foundational aspect of successful reloading for the 7mm Remington Magnum. By following these steps—inspection, cleaning, resizing, trimming, ensuring primer pocket uniformity, final inspection, and logging—you'll set yourself up for success at the range.
Remember that patience and diligence in this process pay off significantly when it comes time to shoot. Consistent ammo leads to better results downrange—an outcome every reloader strives for.
As you continue refining your techniques, stay mindful of safety practices and lean heavily on published data from reputable manuals as your primary source of information.
With careful attention to detail at each stage of preparation, you’ll find satisfaction in building reliable ammunition that performs well in various conditions.