The impact of reticle design on long-range ballistics
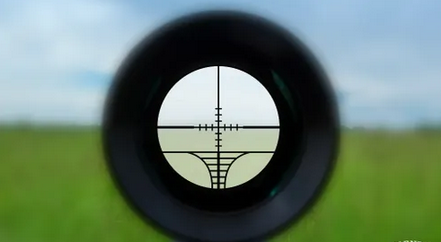
Understanding how reticle design influences long-range shooting is critical for maximizing your accuracy and effectiveness. Whether you’re engaging steel at 1,000 yards or hunting in the backcountry, the reticle is the interface between you and your target. It affects how you estimate distance, make adjustments, and ultimately, how well you hit your mark.
In this article, we’ll explore various reticle designs, their applications in long-range ballistics, and how they can impact your shooting experience. We’ll cover everything from subtensions to first focal plane (FFP) versus second focal plane (SFP) designs, as well as practical considerations for mounting and using these reticles effectively.
Understanding reticle types and designs
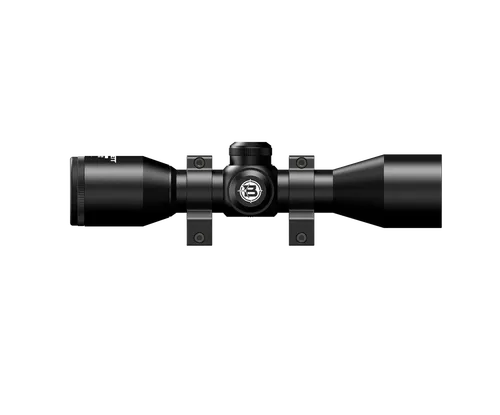
Reticles serve as aiming points in optics, but their designs vary widely, affecting usability, target acquisition speed, and precision. Here’s a breakdown of common reticle types used in long-range shooting:
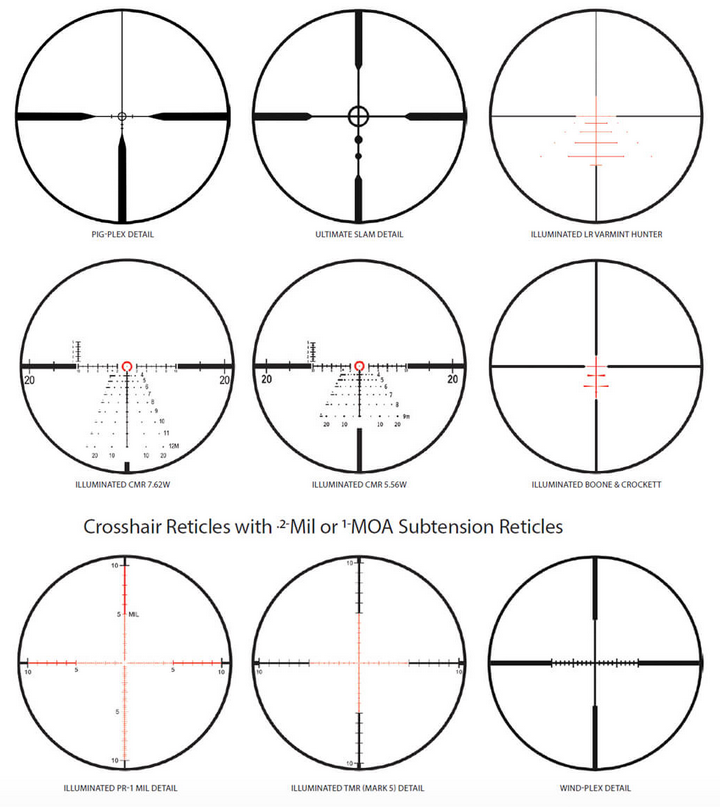
Crosshair reticles
The classic crosshair reticle consists of two intersecting lines that form a simple "plus" shape. While straightforward, this design can be limiting at longer distances since it lacks any form of holdover reference. For basic shooting at moderate ranges, it may suffice, but when you start dialing in for windage and elevation, you’ll find it lacking.
Mil-dot reticles
Mil-dot reticles feature dots along the crosshairs that provide reference points for estimating range and holdover. Each dot typically corresponds to one mil (1/1000th of the target distance), allowing shooters to make quick calculations based on the size of the target. For example, if a target is 1 meter tall and occupies 2 mils in your scope, it’s approximately 500 meters away.
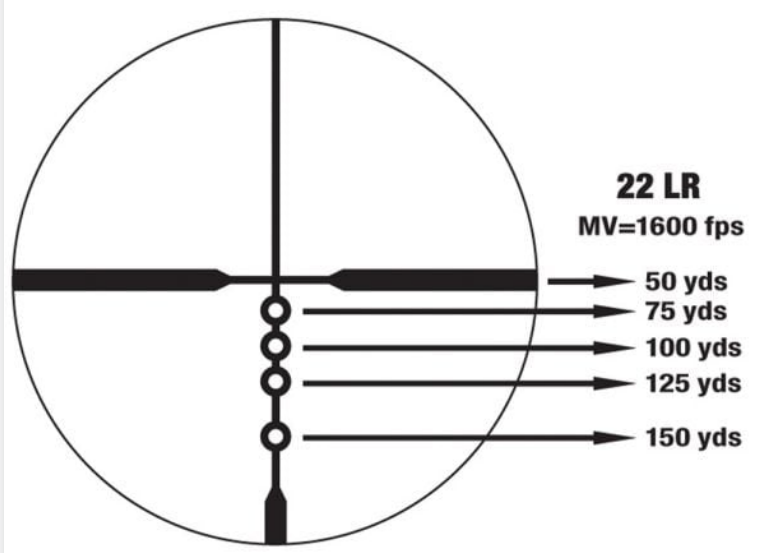
BDC (Bullet Drop Compensator) reticles
BDC reticles are designed with built-in holdover points for specific distances. They are tuned to particular calibers and bullet weights, making them user-friendly for shooters who prefer not to dial their turrets. However, this design does require knowledge of your specific load's trajectory. If you're using a different bullet weight or velocity than what's specified, the BDC may not serve you well.
FFP vs. SFP reticles
The choice between first focal plane (FFP) and second focal plane (SFP) reticles is one of the most critical decisions you’ll make when selecting an optic.
First focal plane (FFP): In FFP optics, the reticle scales with magnification. This means that the subtensions for holds and measurements remain accurate at all magnification levels. For instance, if you have a mil-dot reticle in an FFP scope set to 10x magnification, each mil remains a mil regardless of whether you’re at 10x or 20x. This is especially useful for ranging and holdover calculations during dynamic shooting situations.
Second focal plane (SFP): In SFP optics, the reticle appears to change size as you adjust magnification. This means that while your target may look larger at higher magnifications, the subtensions do not remain consistent across all settings. If you plan to use your reticle for ranging or holdovers at varying magnifications, SFP can complicate things unless used strictly at one set power.
Reticle illumination
Illuminated reticles can enhance visibility in low-light conditions or against complex backgrounds. When deployed properly, they help maintain target focus without losing sight of your crosshairs. However, illumination can introduce issues such as washout in bright conditions or battery dependency. Make sure to consider whether this feature aligns with your typical shooting environments.
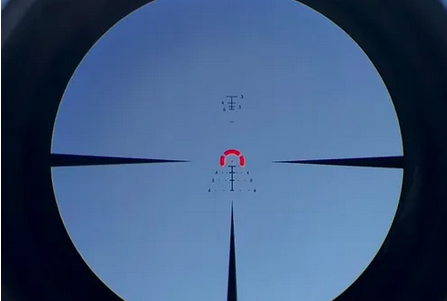
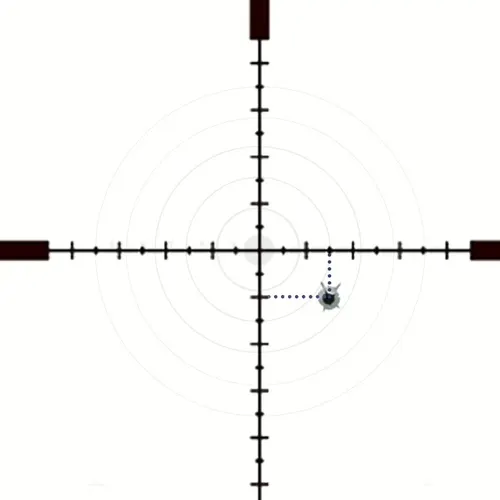
The role of subtensions in ballistic calculations
Subtensions are the measurements between various points on a reticle that allow shooters to make accurate windage and elevation adjustments. Understanding how to utilize subtensions effectively can significantly enhance your long-range shooting performance.
Using mils for adjustments
Mils are a common unit of measurement in long-range shooting due to their relationship with distance and angle. One mil corresponds to 3.6 inches at 100 yards, making it easy to calculate drop or windage adjustments based on target distance.
For example:
At 400 yards, 1 mil equals 14.4 inches.
At 800 yards, 1 mil equals 28.8 inches.
This scaling allows shooters to quickly estimate how much adjustment is needed when engaging targets at distance.
Calculating bullet drop
Using subtensions for bullet drop calculations involves determining your bullet's trajectory based on its ballistic coefficient (BC) and muzzle velocity. Many long-range shooters utilize ballistic calculators or apps that factor in environmental variables like temperature and altitude to produce accurate data.
Once you have a solid understanding of your load's drop characteristics, you can use your reticle's subtensions to compensate effectively. For instance, if your bullet drops 12 inches at 500 yards, knowing that 1 mil is approximately 5 inches at that distance will help you adjust accordingly.
Windage compensation
Wind can be one of the most challenging factors in long-range shooting. Understanding how to read wind conditions and apply windage corrections using your reticle is crucial.
Most reticles will provide windage marks either on the horizontal axis or as dots along the vertical line. By estimating wind speed and direction—often aided by mirage observation—you can use these markings to hold off instead of adjusting your turrets.
For example:
A 5 mph wind might require a hold adjustment of about 0.5 mils at 300 yards.
A 10 mph wind could necessitate around 1 mil.
The impact of magnification on reticle usability
Magnification plays a significant role in how effectively you can use a reticle for long-range shooting tasks. Here are some factors to consider:
Target acquisition speed
Higher magnification can improve target clarity but may slow down acquisition speed. For fast-paced shooting scenarios—like competitive matches—finding a balance between clarity and speed is essential. A lower magnification setting might allow quicker target transitions while still providing enough detail for precise shots.
Eye box considerations
The eye box is the area behind the scope where your eye can be positioned while still seeing a full image through the optic. A narrow eye box can lead to difficulties in finding the correct sight picture quickly, especially under pressure or when transitioning between targets.
Reticles designed for low-light environments may also have larger eye boxes to help combat issues during critical moments. Be sure to test your chosen optic in various conditions to determine how well it fits your shooting style.
Image distortion
Some scopes exhibit image distortion at high magnifications, which may affect how you perceive your reticle's subtensions or details in your target area. Look for optics known for their high-quality glass and minimal distortion—this will ensure that what you see through the scope aligns closely with reality.
Environmental considerations and their effects on ballistic performance
When shooting at long ranges, environmental factors like temperature, humidity, altitude, and wind play significant roles in bullet performance. Understanding these elements can help you make informed decisions regarding reticle use and adjustments.
Temperature and humidity
Temperature fluctuations affect air density and can influence bullet trajectory. Warmer air is less dense than cold air; thus, a bullet will experience less drag in warmer conditions. Conversely, high humidity can increase drag due to increased moisture content in the air.
Make sure to account for these changes when calculating drop or wind adjustments using your reticle's subtensions.
Altitude effects
Shooting at higher altitudes presents unique challenges due to thinner air density. Bullets fired from elevated platforms will experience less drag compared to sea level shots, often resulting in flatter trajectories. Knowing your shooting environment allows for better prediction of bullet behavior and necessary adjustments via your reticle.
Wind dynamics
Wind is notoriously difficult to gauge accurately over long distances. Factors such as terrain features, temperature variations, and other environmental changes can create erratic wind patterns that complicate aiming adjustments. Always stay vigilant about wind conditions while using your reticle for holdovers or turret adjustments.
Practical tips for mounting and zeroing optics with various reticles
The way you mount and zero an optic significantly impacts its performance over long distances. Here are some practical tips to ensure optimal results:
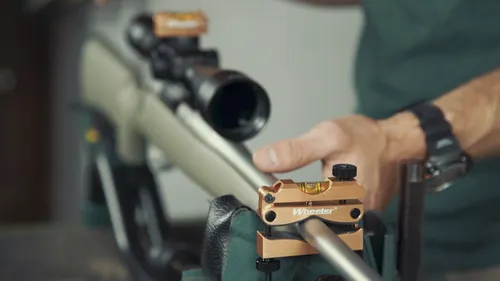
Proper mounting techniques
Leveling: Use a level during installation to avoid canting issues that can throw off your point of impact (POI). Even slight misalignments can lead to significant errors at long ranges.
Torque specifications: Follow manufacturer guidelines for torque settings when securing rings and bases. Over-torquing can damage components or lead to shifting zeros over time.
Ring lapping: Consider lapping rings if they are not machined perfectly parallel. This step helps ensure consistent contact between the scope tube and rings, maintaining better alignment.
Zeroing process
Initial bore sighting: Before heading to the range, perform a rough bore sighting by aligning the optic with the barrel's line of sight at a short distance (25 yards). This saves time during live fire zeroing.
Use a tall target test: Once you're on paper at close range, conduct a tall target test by aiming at a vertical line or aiming point from a distance (e.g., 100 yards). Adjust your turrets based on where impacts land relative to expected POI.
Verification: After zeroing at one range (say 100 yards), confirm your settings by checking POI at longer distances (300 yards or beyond). This helps identify any potential discrepancies caused by environmental factors or equipment issues.
Shop Tips
Always check eye relief before finalizing mounting positions; too much or too little can lead to discomfort or missed shots.
Keep a torque wrench handy when mounting optics; consistent values prevent over-tightening.
Regularly verify zero after changes in temperature or altitude; environmental shifts can introduce unexpected variables.
Be mindful of parallax errors when transitioning between distances; always check focus before firing.
Use quality tools like bubble levels or laser bore sighters; they save time and improve accuracy during setup.
Common mistakes
Neglecting proper eye relief checks can lead to injuries or missed shots.
Over-torquing rings may cause scope damage or misalignment.
Ignoring parallax adjustments leads to inaccurate shots when transitioning between distances.
Trusting unverified dope charts without confirming through testing can result in missed targets.
Skipping verification checks after changes in environmental conditions may throw off established zeros.
Conclusion
The impact of reticle design on long-range ballistics cannot be overstated—it influences everything from target acquisition speed to windage adjustments and bullet drop calculations. By understanding different types of reticles and their applications, you'll be better prepared to choose an optic that aligns with your shooting needs.
Remember that careful mounting procedures and regular verification checks are crucial for achieving consistent results downrange. As you refine your skills with various reticle designs, you'll gain confidence in making accurate shots under varied conditions.
Whether you're competing or hunting, taking these principles into account will enhance your shooting experience significantly.